Do you ever feel like people throw money away?
I don't mean how they spend what they don't have, which isn't good. I mean literally throw money away.
Think about it. Have you ever picked up a quarter off the ground? Where did it come from?
This post contains affiliate links to products I recommend. I do make a portion off any you may purchase. See full disclosure here.
This always happens to my kids. They want to bring money to school for popcorn day or to buy something from the school store. Inevitably one of them looses half of their coins just on the way to school.
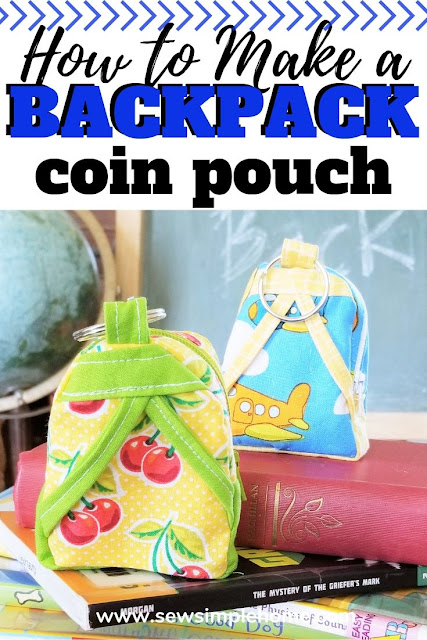
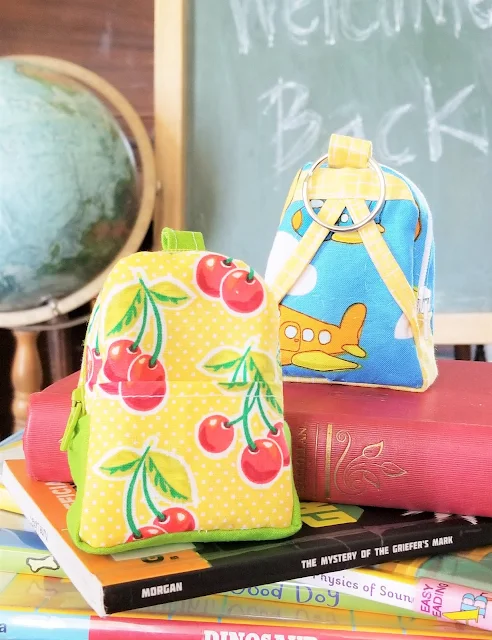
Not anymore! Now they'll have this DIY coin purse to keep their money safe. Plus, it is a mini backpack.
Who doesn't love that?!
I'll admit something. I've never sewn a real backpack before.
This post contains affiliate links to products I recommend. I do make a portion off any you may purchase. See full disclosure here.
Not because I can't, but mostly I have never felt the need to sew one. I mean I've sewn up a ton of our Drawstring Backpack pattern. But not a traditional backpack.
After designing this adorable mini backpack, I may have to make a full size backpack sewing pattern.
What do you think?
But for now, let's talk about this mini backpack coin purse pattern.
First, it has a zipper. DON'T STOP reading!! Zippers are not as scary as you think. You can sew a zipper!
If you need some practice, try our tutorial on making a pencil pouch. It is a great zipper beginner project.
Check out some other great Back to School Sewing projects in this post.
This pattern also has the option to have a cute little front pocket. It isn't super useful since I know anything in that pocket will get lost.
But it is SO cute!
Finally, it has a loop for a key ring.
That means my kids can add it to their backpack, keychain or book bag. Now their money won't get lost.
Parenting Win!
Want the entire Mini Backpack Pattern and full step by step photo tutorial and none of the hassel? Grab it in our Etsy Shop. No need to access the internet each time you want to make your own.
Make a Mini Backpack DIY Coin Purse
- Mini Backpack Coin Purse Pattern (download pattern pieces at the end of the post)
- 2 Contrasting Fat Quarters
- 7" Zipper
- Fusible Interfacing
- Key Ring
- Thread
We've got a great video tutorial in the post showing how to quickly sew up this pattern. It is for the front pocket version. Make sure to turn off your ad blockers so you can see it.
Place the right side of one of the zipper tops along the edge of the zipper. Stitch in place. Repeat with opposite zipper top and opposite side of the zipper.
Step 2
Press open the zipper tops and topstitch along the folded edge of the fabric. Make sure not to sew over the zipper teeth.
Step 3
Make sure you have added the for markings to the purse bottom before sewing.
With RST, center the purse bottom over the zipper. Make sure to unzip your zipper enough that your pull tab is in between the two red sewing lines.
Stitch the two pieces together along the short edge (red lines).
Step 4
Trim both ends of the excess zipper.


Take two strap pieces. Fold the raw edges so they meet in the center. Press.
Fold in half and press. Stitch along the open edge to close the straps.


Press the ends of the keychain loop 1/4" towards the wrong side and stitch. Fold loop in half and stitch the ends together.
Step 7
Add marking dots on both backs of the backpack pieces.
If you want to add the outside pocket, now is the time. Baste the pocket to the outside of the front backpack piece.
Step 8
On the backpack back, measure down 1" and place your two straps overlapping in an "A" shape. Tack down the straps where they meet.
Step 8
Stitch the keychain loop at the top of the backpack back.
Step 9
Press the ends of the ribbon piece 1/4" towards the wrong side. Stitch across the folded edge from one side to the other at the top fold and bottom fold.
Trim any over hanging fabric.


Match the marking dots on the backpack to the marking dots on the purse bottom. Carefully pin the back, bottom and zipper together. You'll have to maneuver your fabric a bit so use a lot of pins.
Stitch back and zipper sides together.
Repeat Step 10 with the front piece. Make sure to unzip your zipper slightly so you can turn it right side out later.
Step 11
Trim down your seams. Turn the backpack right side out.
Step 12
Add key ring to the key chain loop.
You are all finished!!
Isn't it adorable? My kids immediately claimed their little backpack. And tried to claim the money I put in it for the photos too.
Don't worry. My $2.70 is safely back in my purse.
Want the free diy backpack coin pouch pattern pieces? You can grab them by clicking the image below.
I did make an SVG file for cutting out using your Cricut cutting machine. You'll have to adjust the size. Your mini backpack should be about 3" x 4".
OR
Grab it in our Etsy Shop. No need to access the internet each time you want to make your own.
Check out some of these great keychain patterns too:


This is super cute and easier than first impressions, what great clear instructions :)
ReplyDeleteThanks Vicky! It was a fun project to do
DeleteGoing to try this so cute! Thankyou so much!
ReplyDeleteEnjoy Terri!
DeleteHave it in my to do Christmas file. I have three grands still in school.
ReplyDeleteThanks
Thanks so much for the patterns and directions... I can't wait to try it out. (sorry about the anonymous post... I didn't know how to get my name on this... Mariann)
ReplyDeleteThis is too cute!
ReplyDeleteThank you so much!!
DeleteThis is Fabulous! Thank you so much my daughter is over the moon :D
ReplyDeleteThis is Fabulous! Thank you so much, my daughter is over the moon :D
ReplyDeleteThis would be a cute way to give gift cards for almost any occasion - Christmas, birthdays, baby showers, graduations, etc.
ReplyDeleteVery wonderful post.
ReplyDelete