For 8 years, I taught high school students to sew. Some while a public school teacher, some in my home through sewing lessons.
One of the many projects I always taught was how to sew a drawstring backpack pattern. It teaches great skills plus they really love them.
One of the many projects I always taught was how to sew a drawstring backpack pattern. It teaches great skills plus they really love them.
That being said, over time I put together my own version of the drawstring backpack. I call it the Traveling Backsak. It can be a great beginner pattern while still challenging the student to do new techniques.
Related: Reversible Bookbag Pattern
This post contains affiliate links to products I recommend. I do make a portion off any you may purchase. See full disclosure here.
This pattern is great for simple travel like to Grandparents or a trip to the library. You can use it to transport those all important ballet slippers or the soccer cleats.
You can also adjust the straps on the pattern to fit the needs of your child and whatever age.
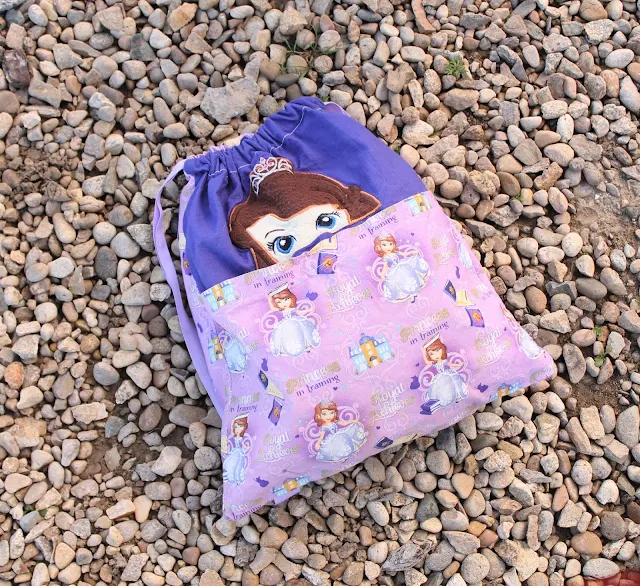
For instance, I've made several for my 3 children over the years. The Sofia and Mater Backsaks I made for our trip to Disney World several years ago. They were perfect.
We used them on the airplane and while in the parks. They could fit toys, snacks and a water bottle.
Like to sew for Disney? Check out our Sew Disney Bound Facebook Group for inspiration or to share your own creations
My sister likes to use the Traveling Backsak for her children while they travel on planes and trains.
They pack up all their precious cargo and can entertain themselves for hours. She has requested new ones because they are so useful.

Drawstring Backpack Pattern
Materials Needed
- 1/2 yard fabric (cotton, bottom weights, or denim)
- Drawstring Backpack Pattern Pieces
- 40" of 1" Webbing or ribbon
- Thread
Just want the pattern and full tutorial and none of the hassel? Get them both for download for just $3.97. No need to access the internet each time you want to make your own.
Step 1
Download Backsak Pattern Pieces
Take pocket piece and turn down
1/4". Turn down again 1/4". Sew across.


Step 2
Place pocket onto front bag piece and sew
down the middle through both layers. Now
sew the remaining 3 sides of the pocket down to the front bag piece .
Step 3
Take your 60 inches of webbing or ribbon, fold it exactly in half and
cut it. With wrong sides up, place your
straps 1 inch from the top edge of the front and the back piece. Stitch in place.
Step 4
With right sides together, place front and back pieces together (Figure
E).
Step 5
Measure down from the top edge and
mark at 2" & 3". Sew your bag from the top, down to the 2"
line.
Step 6
Then leaving a gap, start sewing
again at your 3" line and continue to the bottom edge of the bag . Make sure to backstitch near your
gap to secure your stitches.
Repeat this step for the opposite side of the bag. DO NOT SEW THE BOTTOM OF THE BAG YET.
Repeat this step for the opposite side of the bag. DO NOT SEW THE BOTTOM OF THE BAG YET.
Step 7
Now, cut on your pencil lines
to, but not through your stitching on both sides of the bag. WARNING: If you cut through your stitching
you'll have a real BIG hole at the very end.
Step 8
With the flaps you just cut, fold them open and place them under the
machine needle. Stitch flaps
down in a square through just the top
layer.
Step 9
Take straps and pull them through the two openings on the opposite side
of the bag.
Step 10
Iron the top edge down 1/4" then fold it down and iron again 1 1/2". Now stitch in place
Step 11
Turn your bag right side out. Place bottom edge of the straps to the bottom
of the back layer of the bag (Figure O).
Stitch in place through just the back layer.

Step 12
Turn the bag inside out and stitch 1/2" from the bottom. You're finished!!

See how simple and fun this pattern is.
Remember, if you'd rather just download the drawstring backpack pattern and tutorial with all the instructions, pattern pieces and even measurements, you can get the full tutorial and PDF pattern for download for just $3.97.
No need to access the internet each time you want to make your own.
I've also had several blogger friends make the drawstring backpack pattern through the years. They've enjoyed it and many of their children have made the pattern themselves as well. I know you and your children will enjoy it too!


