Each year we decide as a family what costumes to wear for Halloween. This year was a little different because my 8 year old was adamant that he wanted to be Pikachu and my husband had no desire to dress up.
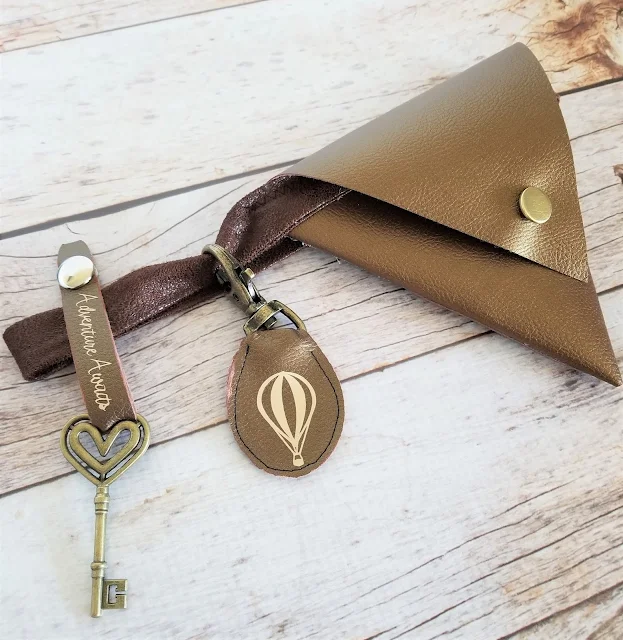
I pretty much could decide on whatever I wanted for my other two children and myself. I went with a fun Steampunk Family Costume idea. Because of that, I picked a lot of leather projects to do and one of them was this DIY leather keychain.
This post contains affiliate links to products I recommend. I do make a portion off any you may purchase. See full disclosure here.
Even though I made these particular keychains for a costume I thought these would make such a great gift for anyone. I really thought they'd be a great customized gift if you add a monogram or an image that a spouse or coworker would relate to.
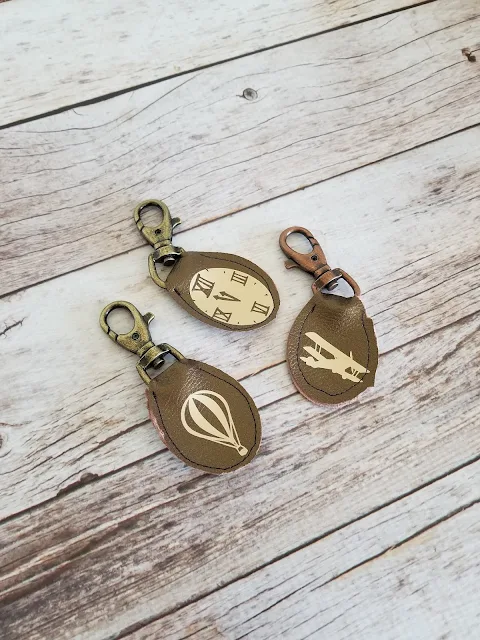
You could put them on a regular key ring or on a swivel hook like I did. I made these DIY leather keychains using faux leather, but you could use genuine leather and make a really nice keychain as well.
Since Cricut has a large variety of faux leather and genuine leathers you can have your pick of colors and textures. Or perhaps you have an old leather purse or vest you can use to cut out your keychain pieces.
You also can pick from tons of different iron-on vinyls from Cricut or check out some fun pattern heat transfer vinyls from Expressions Vinyl.
Use these to cut out fun patterns, images or words to add a fun touch to any leather keychain. You can use the new EasyPress 2 to add your iron-on to your leather.
Just make sure to pick the correct temperature so you don't ruin the leather. We've got a great EasyPress Temperature guide you can download, print, and laminate to add to your bulletin board or like me, just thrown on your pile of crafting supplies.
Either way, it is a great quick reference for your EasyPress.
One more way you can customize your keychains is to emboss them using the Cuttlebug. It is a really fun tool and you can see how I use it to emboss some leather earrings in this post of our family steampunk outfits.
I really love the look of embossed leather. This is a great way to add a little something to the keychain that is a bit more subtle and really classy.
My favorite embossing folder is the Heather's Lace folder.
I really love the look of embossed leather. This is a great way to add a little something to the keychain that is a bit more subtle and really classy.
My favorite embossing folder is the Heather's Lace folder.
DIY Leather Keychain Tutorial
Materials Needed
- Keychain Cut File SVG, PNG or Leather Keychain Cut file available on Design Space
- Cricut Faux Leather or Metallic Leather - or just some scrap leather you might have
- Everyday Iron-on
- Swivel Hook - you can get these in most fabric stores or even at walmart
- Thread
Open up leather keychain cut file in Cricut Design Space. You'll notice it has 2 different types of keychains.
One is for this tutorial, the other you'd want either a snap or button to fasten it at the end.
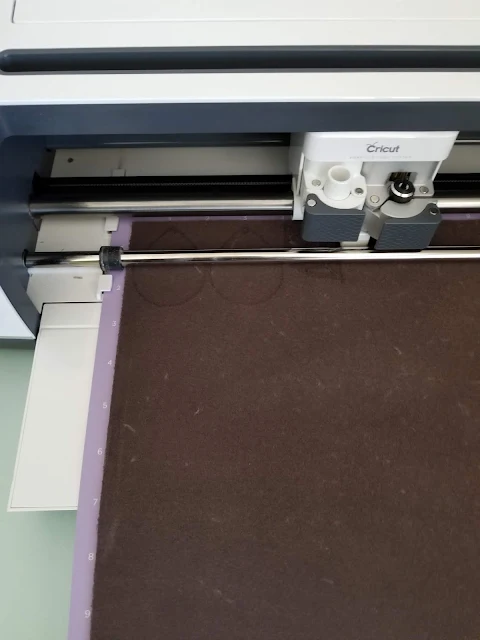
Load leather onto Cricut mat and load the Deep-cut Blade. Make sure your leather has the smooth side down.
Or your mat will have loads of fuzzies on it afterword. Plus, that is the right side of the "fabric" and it should always be down on the mat.
You might consider using washi tape or blue painters tape to keep your leather in place. I've had it move a few times on me because it is so heavy.
Especially if your mat isn't brand new and not quite as sticky. Cut out design on Cricut Maker.
Switch to your Fine-point Blade and load your iron-on vinyl. Cut your iron-on vinyl.
Make sure to click "mirror" so that it cuts out backwards. Unload design and weed out unneeded vinyl.
Iron on your designs to your vinyl pieces. Make sure to use the printable EasyPress temperature guide to get the right heat settings.
Also, make sure you don't press to hard on the vinyl because you don't want to make an imprint that you didn't intend to be there like of the bottom of your iron or the side of a heat press. Just be careful.
You can use a press cloth or a heat protective mat so you don't end up burning your leather. For this project, I just use a pressing cloth since it was thinner and easier to work with the leather. But either will work, you may have to experiment a bit.
Place your leather through your keychain ring, hook or fob. You might have to fold, twist and turn your leather until you can get it how you want it.
It is okay to lightly pull or tug to get it the way you want. Just be gentle and work with the leather for your desired result.
Carefully stitch around the outside of the faux leather to keep it in place.
If you are using genuine leather, it will be a bit trickier to feed through the machine. Make sure to use your walking foot to help it move through your machine. You'll also want a heavy duty needle.
You've made your very first DIY leather keychain!! Way to go. It is a lot easier than you thought wasn't it. Remember you don't have to use genuine leather, faux leather works well.
Or think about heading to your local thrift store and finding an old leather purse or vest that you can use to cut out keychains. Upcycling is a great way to make gifts for the holidays.
Think of all the Christmas gifts you can check off your list this year if you make everyone a leather keychain. Just cut out a bunch of the keychains with your Cricut Maker and add the vinyl image you like.
You could have all the family gifts and teacher gifts done for the year!! Or what a cool graduation gift!


