
Happy New Year!
At the start of every new year I feel like getting organized. Making sure I am ready to take on the next 12 months.
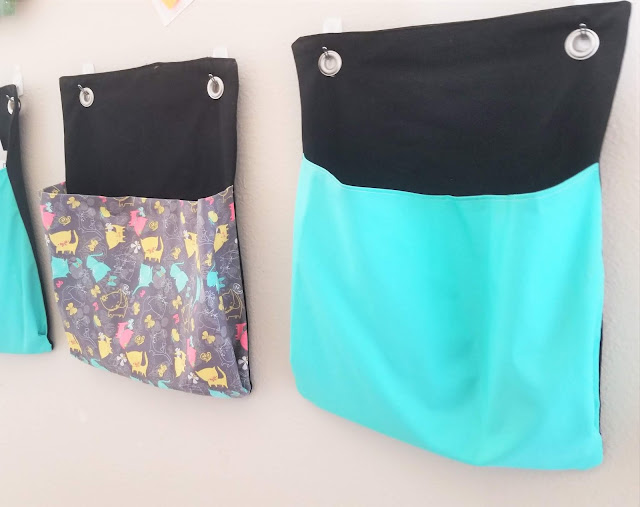
This year, I started early and made these DIY hanging wall files. And let me say, I LOVE THEM.

This post contains affiliate links to products I recommend. I do make a portion off any you may purchase. See full disclosure here.
Okay, silly. Maybe.
But I really do love to get organized and I especially LOVE the get organized in DIY ways. Like the fun fold-out bow box that can hold toys, books or craft supplies.
This DIY wall pocket organizer is perfect for our "command center" in the house.

I've sewn one for each of my children. When they come home from school they empty their backpack and place all their papers in their hanging wall file.
Once a month, I come and go through all the papers and decide which we keep and what can be recycled.

Since implementing this system, our clutter and countertops have been clutter free. And if I find a "treasure" I simply add it to their file. It works great and they look really nice on the wall.
Let me show you how to make your own hanging wall files.
DIY Wall Folder Holder Tutorial
Materials Needed
- 1/2 yard Cotton fabric
- 1/2 yard or 1 Fat Quarter of Contrasting cotton fabric
- Fusible interfacing
- 1" grommets
- Thread
Cutting Instructions - width x length
- Cut 1 pocket piece - 16" x 11.5"
- Cut 2 (back and front piece) - 13" x 17"
- Cut 1 interfacing - 13" x 17"

Fold one of the long edges of the pocket towards the wrong side 1/2" and than another 1/2". Press.
Stitch across the folded edge.


Place the pocket over one of the main pieces. Match the bottom edges.
Match one of the side seams. Create a 1.5-2" pleat on the side of the pocket like the photo above.
Repeat pleat on the opposite side.

With Right Sides Together (RST), place the back main piece over the pocket and front.
Stitch the 3 layers together. Leave a 3" opening at the top to turn your wall file.

Clip the corners of the file and turn it right side out through the opening you left in Step 3.
Press.

Place grommets on the top of the file. Space them evenly. Use a marking pencils to mark the inside of the grommet so you know where to make your opening.

Cut a hole big enough for the grommet to go through but not to big. The grommet should be a little snug.

Use your tools to set the grommets on the wall file.

Tada!! You did it! Now you have a nice hanging wall file that can match any room, office or space.
I love when creating makes my home and family a little more organized and a lot more matchy.
Want more organizing ideas? Check out our list of sewing projects to organize your home.


These are wonderful and easy ideas, thank yop for sharing.
ReplyDeleteYou are so welcome! I hope they come in handy.
DeleteI am not sure what I could have done wrong but the measurements given produced a weird outcome. The pocket is an inch shorter than the piece it is sewn to since they are both 17" and even with the pleat the 17x23 pocket is way too big. Am I missing something?
ReplyDeleteI'm not sure what the issue is. Perhaps you turned them the wrong direction? The pocket is folded in half so it ends up being 17 x 11.5. Maybe that is where things turned.
Delete