You've been there. Walking down the aisle. Suddenly this gorgeous fabric just screams to you, "Make me a dress!"
But when you get there, you realize it is a silky special occasion fabric. You've never sewn with slippery fabric. Disappointment and fear take over.
STOP! No more! Let me give you some tips on how to sew silky fabrics. You don't have to be scared to try something new. You just need a little help is all.
If you aren't sure what I mean by silky fabrics, lets list a few. Silk, satin, polyester lining, organza, chiffon and even velvet.
These fabrics have a silky feel to them and often slip and create challenges during the sewing process.
But you can be successful in sewing with these materials, let me share my tips and tricks with you. You'll be sewing with special occasion fabrics in no time.
How to Sew Silky Fabrics
Tip #1: Choosing Your Fabric
Choosing your fabric is probably the hardest part about sewing. You want it to be perfect for the occasion.
The Holly and Ivy Dress or the Poinsettia Party Dress are both perfect for using special occasion fabrics. But deciding on what silky fabric to use can be a little scary.
 |
| Poinsettia Party Dress |
Start by deciding on the look you want for you dress. Do you want layers or just a flowy dress? What about weight? Does it need to be lightweight or a little heavier for the winter?
How about the pattern? Can it work for any type of special occasion fabric or is it designed for one in particular?
These questions can change whether you should be using a cotton, satin or even velvet. Read you pattern carefully and take your time in deciding what fabric is best.
Tips #2: How to Sew Satin
If you decide satin is the right fabric for you, start by making sure to have nice sharp scissors. It really does help prevent fraying as satin tend to fray a lot.
I usually will cut my fabrics using pinking shears. This helps with the fraying, especially if you are not planning to overlock the seam finishes.
Satin does not like water. So when you use your iron, make sure not to steam or steam very little. You don't want to end up with water marks.
Always press on the wrong side of your fabric, the not shiny side. If you do need to steam, try using a pressing cloth over your fabric to keep a barrier between the moisture and your fabric.
When sewing, remember to purchase a smaller size needle for satin. A size 60/8 or slightly larger needle would be appropriate. This makes smaller punctures in the fabric which makes for a better look and sewing process overall.
You'll also want to reduce your stitch length to make it smaller. This helps prevent some of the pulling and skipping of stitches. It is always smart to test your stitching on a scrap piece of fabric before sewing.
Tip #3: How to Sew Velvet
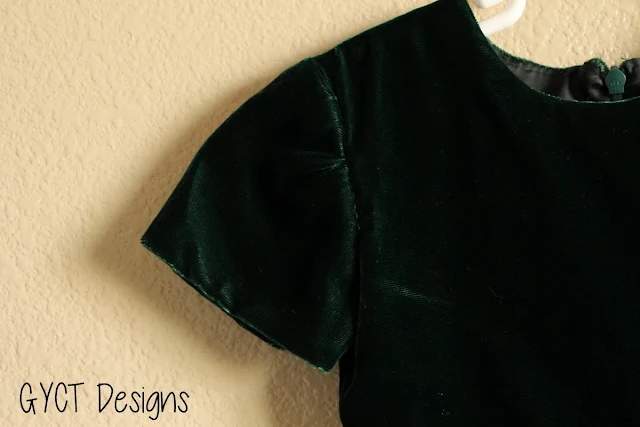
Velvet makes beautiful dresses, but it can be a pain to sew with. The first thing you need to do is find the nap or direction the velvet should go.
Velvet has piles, which is the fabrics that stick up. You'll want to make sure the piles are going the correct direction. To do this, "pet" your velvet fabric.
As you do this you will see that the fabric is smoother as softer one direction than it is in the other directions. The fabric should hang so that the nap is nice and smooth. Cut all your pattern pieces so the direction of the nap or piles is correct.
Picking your needle size for velvet is pretty easy. You can use a size 70/10 and be just fine because the fabric is fairly thick. If you are using a finer velvet, you'll want a smaller needle.
Next, velvet moves A LOT during sewing. This is because of that piles we talked about. You'll want to either use a basting stitch to hold your layers in place or you can also purchase a basting spray (kind of like a spray glue) to hold your layers in place while sewing.
I tend to do a simple basting stitch. I run it along my seam and then sew with my sewing machine.
Finally, pressing velvet is important. Because of the piles, velvet seams can be bulky.
However, you don't want to put your iron directly on the velvet or it will crush the piles and ruin the look and feel of the fabric. So you can use a needle board (which most of us don't have) or grab a nice thick towel.
Place the towel down on your ironing board, place your velvet, piles down on the towel and then your iron over the velvet BUT NOT TOUCHING IT.
Let the steam come through and finger press as needed. If you need to directly touch a seam, place the towel over the seam and touch the iron only to the towel.
There are so many beautiful sheer fabrics like organza, chiffon or georgette. But they can really be trouble to work with.
Start by getting the correct needle size. You'll want a 60/8 needle. This helps prevent some of the pulling. You can also use a layer of tissue paper while sewing to prevent the fabric from getting caught in the sewing machine.
To finish your seams on sheer fabrics, you'll want a seam finish that is not noticeable. So make sure you thread matches your fabric well.
For chiffons or similar fabrics, I would suggest a french seam to keep the fraying edges enclosed.
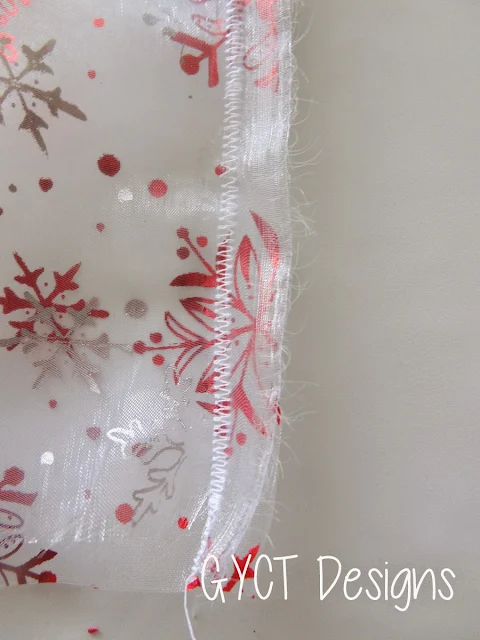
For organza or similar fabrics, a narrow zig-zag stitch is appropriate. Using bias tape can also be a great way to finish a hem for a sheer fabric. Learn how to make your own bias tape.
For chiffons or similar fabrics, I would suggest a french seam to keep the fraying edges enclosed.
For organza or similar fabrics, a narrow zig-zag stitch is appropriate. Using bias tape can also be a great way to finish a hem for a sheer fabric. Learn how to make your own bias tape.
Be careful when pressing sheer fabrics. Some do not do well under the hot iron. Finger pressing may be the better option.
Tip #5: How to Sew Tulle
If you decide to do an underskirt or add some fullness using tulle, there are several things you can do to be successful. First, make sure to use a smaller needle such as the 60/8 size.
Next, using some sort of stabilizer like bias tape along the edges will help your tulle keep its shape and make it easier to sew.
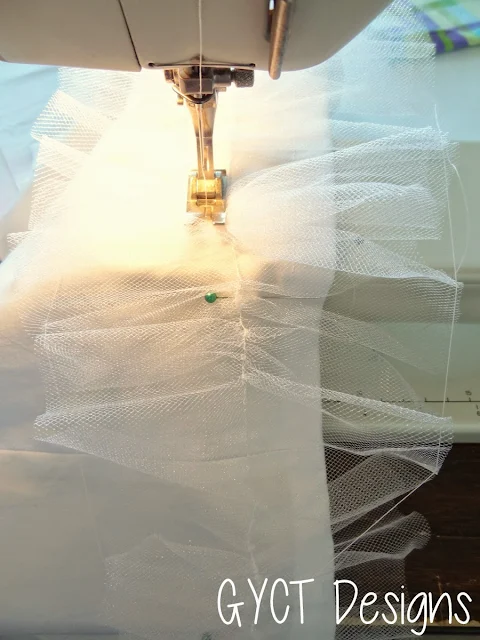
However, if you are gathering tulle, you can also use tissue paper to help. Place a strip of tissue paper over the tulle where you plan to sew your gathering stitches.
Sew the two layers together. At the end, just rip off the tissue paper. Makes the tulle sew much better.
DON'T iron tulle. It will melt. Just don't!
Tip #6: Cutting Out Your Pattern
When you are ready to cut, make sure to use sharp scissors and follow your pattern and cutting instructions.
Instead of pinning special occasion fabrics and pattern pieces together, try using either sewing clips or pattern weights to keep the pattern and fabric aligned.
Now that you know how to sew silky fabrics, are you ready to try?
Grab this free infant pattern and get sewing!!

Follow the Holly and Ivy Party Dress Sew-along. Well walk you through step by step what you need to do to sew the pattern.
- Sewing the Bodice (Steps 1-4)
- Inserting Sleeves (Steps 6-13)
- Tips for Sewing a Simple Tulle Underskirt (Steps 14-16)
- Making Skirt Gathers and Finishing (Steps 17-21)
OR get the baby size 0-3 months for FREE


