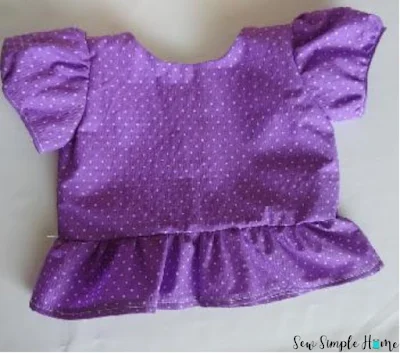
I personally LOVE hand-me-down clothes. I love to give them and I love to get them. But sometimes, I just need to create something simple that works with my daughter's wardrobe.
That's when I turn to my trusty girls peplum top pattern.
Not only have I been sewing this pattern for YEARS, but it works as a casual piece and even a more formal piece. She can wear it to school or wear it during the holiday season.
Plus, it works with silly character fabrics or silks.
Materials Needed
- Peplum Top Pattern - get for free at the end of the post look for the peach colored button
- 1-2 yards cotton fabric
- 1 yard lining fabric
- 3 snaps or buttons - I use KAM Snaps
- Lightweight fusible interfacing
- Bias Tape - learn to make handmade bias tape
- Thread
Step 1
Take a small scrap of fusible interfacing about 1" wide and the length of the center back. Iron it to the wrong side of the bodice at center back. Repeat with opposite center back piece.
With Right Sides Together (RST), match the shoulders of the front and back bodice. Pin the shoulders and stitch across. Repeat with lining. Press seams flat and open.
Step 2
With RST, place the lining over the main fabric. Pin together along the neckline and down center back. Stitch around the neck and down center back at 1/4" seam allowance. Leave a 1/2" opening at the center back bottom of each side.
Step 3
Take scissors and cut into each of the 4 corners and trim the sharp edges at the top of center back. Clip around the rounded edges so the neckline will lay flat. Press the seams.
Carefully turn the bodice top right side out. Push out each of the corners and press. To finish, you can either topstitch around the neckline or you can understitch.
Step 4
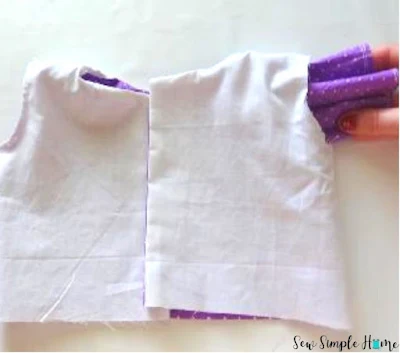
Place your bodice front pieces with RST and matching side seams. Take the front lining piece and lay it flat and separate from the main front.
Carefully turn up the back lining pieces away from the side seams. You should now be able to see both of your main fabrics side seams. Stitch down both of your side seams. Repeat entire step with the lining pieces.
Step 5
Turn the bodice so that the lining is on the inside. Match side seams and underarms. Pin the armhole of the lining to the bodice and baste the two layers together around the armhole. Repeat with opposite side. Set bodice aside.
Step 6
Place two lines of basting stitches along the rounded edge of the sleeve for gathering later. Start and end at the markings from your pattern pieces. Repeat with opposite sleeve.
Fold sleeve in half with RST and match the underarm seams. Repeat with opposite sleeve.
Step 7
Use the bias tape guide in your pattern to cut 2 pieces of bias tape. Fold the pieces in half long ways and press. Open the bias tape up again and fold the raw edges into the pressed line like in the first image. Press.
Fold the tape again in half, hiding the raw edges inside and press. Now you have bias tape. You may also use store bought bias tape. Fold the pieces RST and match the short ends. Stitch across the ends. Repeat with other bias piece.
Step 8
Take one of your sleeves and add a basting stitch around the bottom edge of the sleeve. Turn the sleeve right side out. Place the one of the bias tape circles around the bottom edge of your sleeve with RST. Stitch the open bias tape around the sleeve.
Fold the bias tape to the inside of the sleeve, encasing the raw edge of the sleeve. Stitch bias tape again around the sleeve. You should now have a little "cuff" on your sleeve. Repeat with opposite sleeve.
Step 9
With RST, place the sleeve inside one of your bodice armholes. Match the seam on the sleeve to the side seam on the bodice. Pin. Match the center top of the sleeve to the shoulder seam on the bodice. Pin.
Gently pull the basting stitch so that the sleeve gathers. Finish pinning the sleeve to the armhole. Stitch the sleeve to the armhole. Finish the seam with a zig-zag or overlock stitch to prevent fraying.
Step 10
With RST, place your 3 skirt pieces together at the side seams. Stitch down your side seams. Press seams flat and open. Finish edges with a zig-zag or pinking shears.
Step 11
Press your hem up 1/4" and then fold another 1/4" all the way around the skirt. Stitch the hem right along the top edge of the folded hem.
Next, fold the short edges of your 2 back skirt pieces 1/4" and then another 1/4". Stitch down the edge. Repeat with opposite side.
Step 12
On the top edge of the skirt, place 2 rows of gathering stitches from side seam to side seam. Place skirt up next to the bodice.
With RST, place skirt over the bodice matching raw edges of the main fabric top. Move lining out of the way so the skirt isn't sewn to lining. Pin the skirt side seams to the bodice side seams. Pull gathering stitches so that the skirt is the same width as the bodice top. Pin in place. Stitch the skirt to the top.
Step 13
Press the raw edge of the skirt towards the bodice. Carefully fold the lining of the bodice down so that the folded edge of the lining covers the raw edge of the skirt. Pin.
Topstitch around the entire bodice lining or you can hand stitch the lining to the skirt. Hand stitch is great for fabrics that slip easily.
Step 14
Using chalk, fabric marker or even pins, mark where each snap or button should be on the back of your bodice. Start the first one about 1/2" from the neck and about 3/4" from the edge of center back.
Continue adding snaps every few inches, equally spaced. If using buttons, you'll need to consult your sewing machine manual. This will help you know how your machine creates buttonholes. Buttonholes can be sewn vertically to give your dress a nice clean finish.


This is such a cute pattern - thanks for the instructions and pattern.
ReplyDeleteYou are so welcome. Glad you like it. Enjoy!
Deleteidk if I'm just not seeing it BUT the free download of the peplum top doesn't have the pattern for the skirt
ReplyDeleteThere should be a cutting chart for the skirt on the pattern pieces.
Delete