The wind is blowing and the snow is falling and I'm cuddled next to the fire with a cozy fleece blanket. But wait, why is it wet?
GROSS! My 5 year old was sucking on the tassels that are knotted...again.
This is my biggest pet peeve when it comes to fleece blankets. My kids sucking on all those hanging tassels. But not anymore!
This post contains affiliate links to products I recommend. I do make a portion off any you may purchase. See full disclosure here.
With the braided fleece blanket, those tassels are non-existent. They are braided into the blanket and make a nice finished edge (and keep the blanket from being all damp and slobbery).
This is actually a technique that my mother uses regularly. It works really nicely on fleece and materials that don't naturally fray at the ends.
(Now if only I could get my kids to not suck on their fleece mittens.)
Not only does it keep away the slobber infused tassels, but the edge is super classy and gives blankets an expensive finished look. And the best part is it is really super easy to do.
You can create the braided edge with a single layer of fleece or a double layer of fleece. The process is the same and so is the end product. The biggest difference is where you want a heavier blanket or a lighter one.
Braided Fleece Blanket
Materials Needed
- 2 - 1.5 yards fleece
- Thread
Layer the two pieces of fleece together matching all the corners. Cut out a 3x3" square in all four corners.
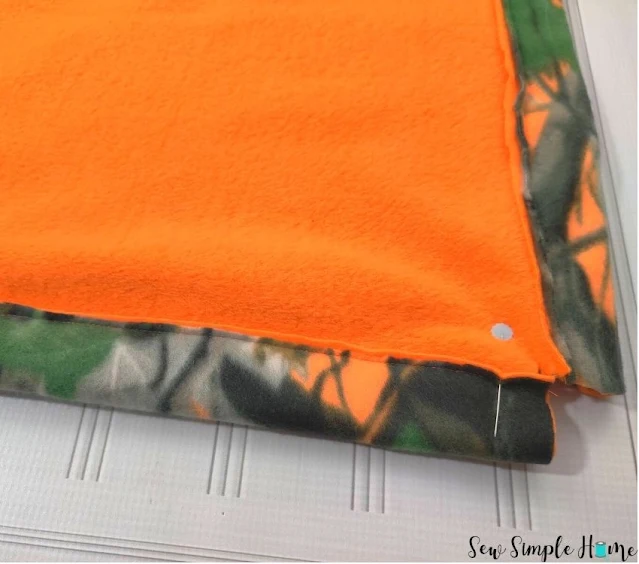
With the two fleece layers together, fold the raw edge of the blanket up 1.5". It should match the corner where you cut your square. Pin in place.
Repeat with all four sides of the blanket.
Stitch down the raw edge of the folded fleece at 1/4". Repeat on all four sides.
Step 4
Cut loops out by measuring down the sewn fleece every 1". Cut through the folded fleece as close to the sewn edge as possible.
Repeat on all four sides.
Step 5
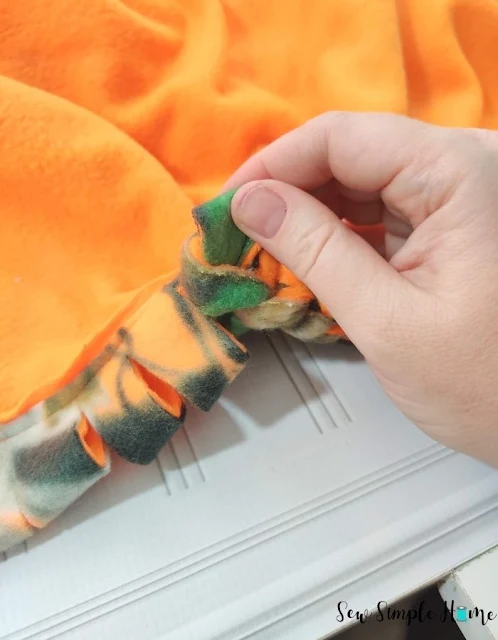
To create the braided fleece look, take a loop in your right hand and open it with your fingers. Pull the loop to the left through the loop in your right hand.
Take the loop you just pulled through and open it. Pull the loop to the left through the loop in your hand.
Continue this process all the way down your blanket sides. If you need a better visual, check out the video in the post for help.
This is what the braiding should start to look like.
Step 6
When you get to the last loop, turn the loop inside out and use a needle and thread to tack it to the beginning loop you made.
You did it! See how easy that was.
Now you can make beautiful blankets for family and friends or every season of the year without worrying about wet, hanging tassels.
Enjoy sewing for your home? Check out these Easy Sewing Projects for the Home.
Looking for some great handmade gift ideas? Get the free printable Handmade Holiday Gift Guide that includes links to over 50 handmade gift ideas.


No comments
I'd love to hear from you!