"Mom, she's crying," my daughter said to me while holding her brand new baby alive doll.
I wasn't sure why that should concern me. "I'm sorry sweetheart. What are you going to do?" I responded.
"Baby Lilly doesn't have a bed Mom! She needs a bed!" she cried.
This post contains affiliate links to products I recommend. I do make a portion off any you may purchase. See full disclosure here.
I will admit I was a bit surprised by her request. I mean baby dolls cry for all different reasons.
But what would it hurt to come up with a fun baby doll Moses basket pattern that we could share with the readers. Not only would her crying baby be satisfied, but we'd have a fun project to add to our other baby doll projects.
This pattern is actually really easy to sew. But let me give you a tip to help you be most successful.
Make sure to pick a good thick interfacing. You can use either a fusible interfacing or a fleece interfacing. Either will work for this project, but you want to make sure they are nice a stiff to help keep the shape of your bassinet.
Another tip to save on fabric, some of the measurements for the bassinet are extremely long. To use the yardage you have, you can cut several smaller lengths of the middle rectangle, ruffles or bias tape and sew them together.
Free Baby Doll Moses Basket Pattern
Materials Needed
- Free Baby Doll Bassinet Pattern - download the free pattern at the end of the post
- 1 yards cotton main fabric
- 2 yards cotton lining fabric
- Heavyweight Interfacing
- Fusible Fleece Interfacing
- Bias Tape - 4-5" wide
- Matching Thread
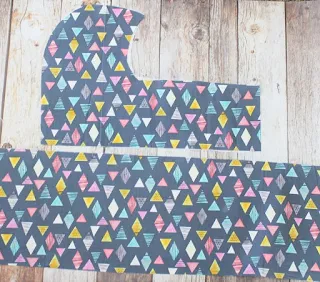

Cut out bassinet pieces mirror to each other. Add interfacing to the backs of all the bassinet pieces.
Pin one of the main bassinet sides to the middle rectangle piece. Stitch down the curve, across the straight bottoms and up the short end.
Repeat with opposite side of the bassinet.
Repeat with opposite side of the bassinet.
If the middle piece is a bit longer than the sides, simply trim the extra fabric down to match the bassinet sides.
Step 2
Repeat Step 1 with the lining pieces. Stitch in a layer of fleece interfacing for extra body and support.
 Step 2
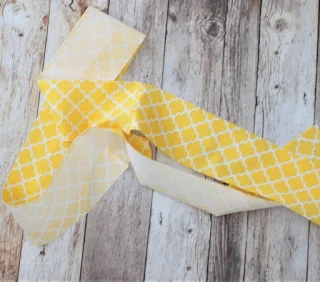
Fold the strap in half with right sides together along the long side. Stitch down the long side at 1/4".
Turn the strap right side out and press.
Step 3
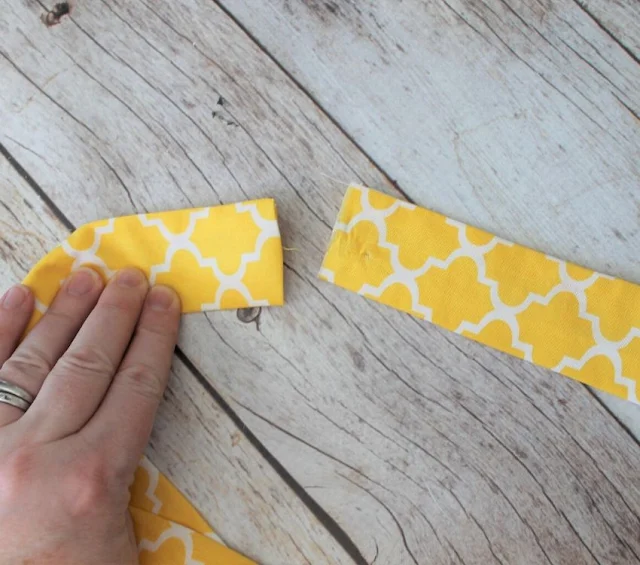
Turn the raw ends of the strap 1/2" inside the strap. Tuck one strap end inside the other. Stitch them together.
You should now have one round strap.
Step 4
Pin the strap around the main bassinet. Stitch the strap to the bassinet.
Make sure to watch the video in the post to see how easy it is to stitch on the strap.
 Step 5
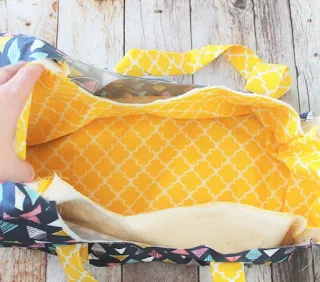
With wrong sides together, place the lining inside the main bassinet. Pin the layers together. Stitch all the layers together at 1/4".
Step 6
Take the rectangle and hem one end by turning one of the raw edges up 1/4" and press. Turn it again 1/2" and press. Stitch.
Step 2
Repeat Step 1 with the lining pieces. Stitch in a layer of fleece interfacing for extra body and support.


Fold the strap in half with right sides together along the long side. Stitch down the long side at 1/4".
Turn the strap right side out and press.
Step 3
Turn the raw ends of the strap 1/2" inside the strap. Tuck one strap end inside the other. Stitch them together.
You should now have one round strap.
Step 4
Pin the strap around the main bassinet. Stitch the strap to the bassinet.
Make sure to watch the video in the post to see how easy it is to stitch on the strap.


With wrong sides together, place the lining inside the main bassinet. Pin the layers together. Stitch all the layers together at 1/4".
Step 6
Take the rectangle and hem one end by turning one of the raw edges up 1/4" and press. Turn it again 1/2" and press. Stitch.
Sew a gathering stitch down the center to add the ruffling.
Step 7
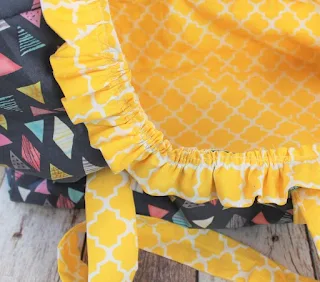
Stitch ruffle to the right side of the bassinet. You may need to trim down the raw edges of the bassinet and ruffle to make everything line up nicely.
Step 8
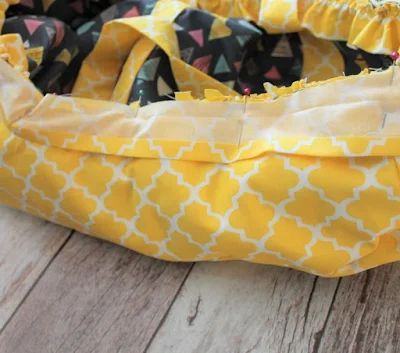
Pin the bias tape to the wrong side of the bassinet edge. Stitch a single layer of bias tape.
Step 7
Stitch ruffle to the right side of the bassinet. You may need to trim down the raw edges of the bassinet and ruffle to make everything line up nicely.
Step 8
Pin the bias tape to the wrong side of the bassinet edge. Stitch a single layer of bias tape.
Step 9
Turn the bias tape towards the front of the bassinet. Stitch over the raw edge of the gathers and bassinet.
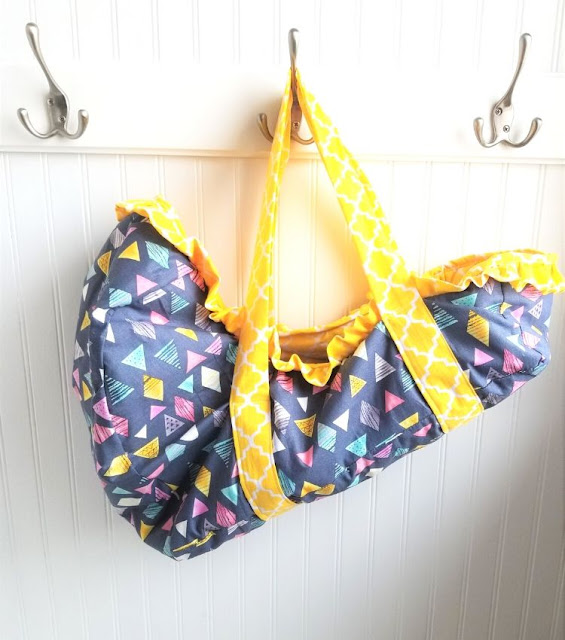
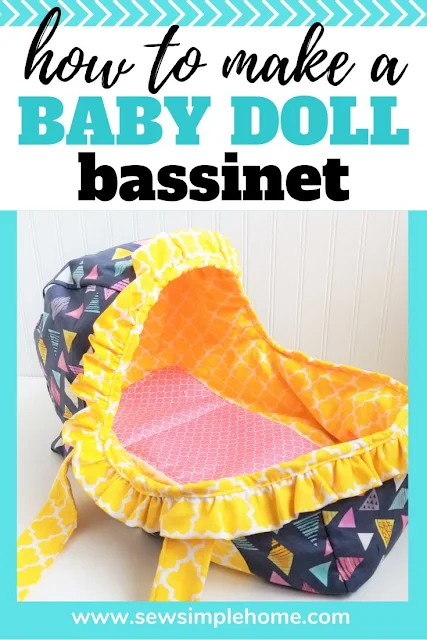
And you are done!!! You have a cute baby bassinet for that sweet baby doll.
Now that baby doll won't be crying because she doesn't have anywhere to sleep. Although she might cry because she needs a diaper change. Make sure to make her some cloth baby doll diapers too.
I have tried this bassinet on several dolls. Yes, it only comes in one size, but her Baby Alive, Cabbage Patch Doll and her 18" princess dolls all fit nicely in the bassinet. In case you need reference.
Now it is your turn!!
Want the free baby doll Moses basket pattern? Simply click the button below to download the pattern for free.









This is too lovely! Thank you very much.
ReplyDeleteThank you so much for posting this - what seam allowance did you use?
ReplyDeleteI used a 1/4" seam allowances.
DeleteThank you!
ReplyDeletelink for baby doll clothes pattern is to e non-existing site
ReplyDeleteJust checked the link and updated it. Try this one https://www.sewsimplehome.com/2020/03/doll-clothes-patterns.html
DeleteHow much fusible fleece should I buy?
ReplyDeleteI'd say 1/2 yard would be enough. You'll need it to cover the two basket sides and the center piece.
DeleteI purchased both fusible fleece and some pretty stiff heavyweight interfacing - which do you recommend I use? I didn't know if I use both types or if I just pick one (and which one would hold shape better for the bed/sew easier since I'm a beginner).
ReplyDeleteI would use both. You want bassinet to be pretty stiff. I use interfacing on the main fabric and fusible fleece on the lining.
DeleteHi am i kissing a pattern piece for rectangle and straps or if anyone can tell me the sizes that would be a great help
ReplyDeleteThe rectangle measurements are in the printed PDf Pattern.
DeleteI dont have the measurements for the rectangle or strap either!!! Disappointing. I wanted to do this today. Ive gone back through the pattern and the video but just dont see it!!!!
ReplyDeleteYou can find it in the actual printed pattern pieces. There is a cutting chart
DeleteDid you ever try or consider the sew in foam
ReplyDeleteI have not, but you could for sure try it out and see
DeleteI’m not understanding the pattern to make the rectangle and the strap… I don’t see on the pattern where to attach the strap either. Would
ReplyDeleteit be possible to clarify please?
Check out our video on YouTube. It should clarify that step a bit more: https://youtu.be/QIAVqV_TQPM?si=vitvlzcsqXB-orkX&t=284
Delete