Getting organized has always been one of my favorite hobbies.
I know that sounds a little strange, but when I am organized life seems to run smoothly and I am much happier as a person.
This post contains affiliate links to products I recommend. I do make a portion off any you may purchase. See full disclosure here.
One way I keep myself organized is by having a nice planner. Like my yearly printable planner or like last year when I tried out the Happy Planner.
A good planner can go a LONG way in keep you organized for life, work and even hobbies.
But one thing some planners don't have are color, creativity and can be just plain blah.
Not this year though! This year I'm going to teach you how to make stickers on Cricut!!
Yep, stickers are what make the world better.
Just ask my 4th grade self and my amazing sticker collection (which I still have parts of). Stickers can turn the most boring assignment, planner or sewing plans into ART!!
That's why today I want to teach you something new. Two ways to make stickers.
The first way is from start to finish. You'll get your own images, design them using free software called "Inkscape" and load them into Design Space.
The second way is to simply download the free sewing stickers I've made for you. You'll upload them to design space and be on your way.
Either way you choose. By the end of this post you should have your own adorable stickers to add to your crafting collection.
How to Make Stickers With Cricut
Materials Needed
- Sewing Sticker Cut Files - download for free at the end of the post
- Avery 81/2 x 11" Shipping Labels
- Printer
- Cricut Design Space
- Cricut Maker or Explore - Learn all about the Cricut Maker
- Notebook or notepad
One tip I want to share before we start. I use Avery shipping labels for my stickers. Why?
My printer cannot handle the Cricut sticker paper. It won't feed through any of my printers. But it will feed these labels through.
Feel free to try the sticker paper, it is thicker and really nice. But if it won't work with your printer, try out the shipping labels.
Step 1
Watch our full video on how to use Inkscape to create your own stickers. It is super simple. - OR -
Watch our full video on how to use Inkscape to create your own stickers. It is super simple. - OR -
Step 2
Download our free sewing stickers at the end of the post to upload to Cricut Design Space.
Open a new project in Cricut Design Space. Select "image" and find the sewing sticker PNG file wherever you downloaded it onto your device.
Step 3
Select "complex" on the image type. This will ensure that your image has the best quality.
When you select "continue" check your image to make sure the background is clear and your stickers look separated.
Step 4
Select the Print Then Cut image.
You can also change the title or label on your image before you save it.
Step 5
The stickers will now open in Design Space. You'll want to resize them.
The Print Then Cut area on your Cricut machine is 6.25 x 9.25". I designed these stickers to be 6" wide. Once you've resized them click the "make" button.
Step 6
You'll now send the design to your cutting machine. Select print and make sure to load the sticker paper or label sheet to your printer.
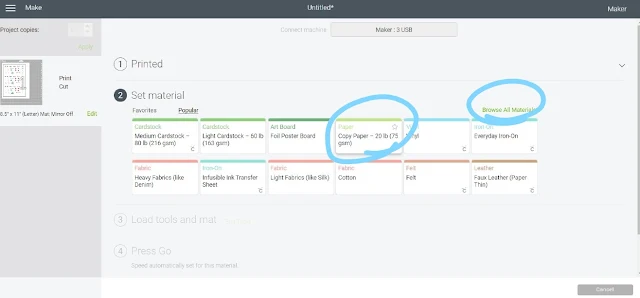
When you go to select your material type. If you are using the Cricut Sticker Paper, browse the materials and select sticker paper.
If you are using labels, you will select copy paper.
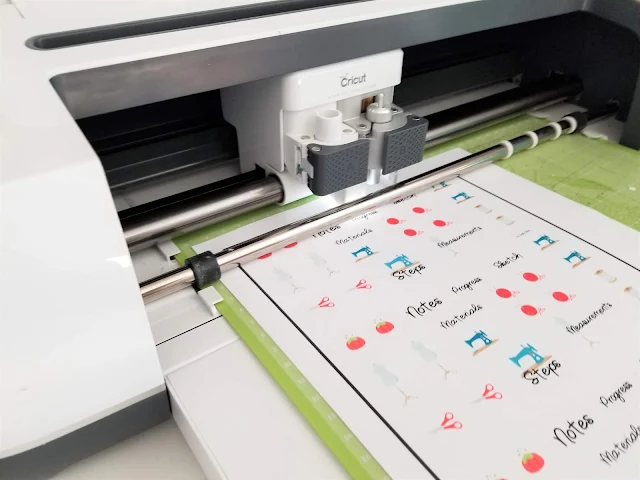
Load your paper onto the green cutting mat and send file to cut.
You did it!!
Wasn't that like the easiest project ever!!
You can create stickers within design space as well. But sometimes people find it easier to create the file outside of design space.
Many times the images we want to use are too large and can freeze up.
I hope you enjoyed learning how to make stickers with Cricut.
Now addd those stickers to your notebook. You can record what projects you plan to work on or update those you currently are working on.
Want the free sewing planner stickers? Simply click the button below to download the PNG file for cutting.


No comments
I'd love to hear from you!