
If you've been around for a while, you'll know that Halloween and fall is my favorite time of year. Just check out all our fall sewing projects.
I love the colors, the crisp air and the millions of projects that I get to work on to bring in the festive fall and holiday spirit. Fall makes my heart happy.
So when Shelly from Coral+Co asked if I might be interested in joining in on her Halloween Sewing and Craft Party, I said heck yes! I had a few pillow appliques that I wanted to get down for the season and knew they'd be perfect for this fun party.

This post contains affiliate links to products I recommend. I do make a portion off any you may purchase. See full disclosure here.
A couple years ago I got these super great pillows for my porch outside. I've got two nice wicker chairs and they needed something. These pillows were the perfect addition.
However, the pattern on them is perfect for summer, but not really very inspiring for fall. So I got to brainstorming and decided I wanted to make two fall pillow covers.
Since fall also includes Halloween, I wanted these fall pillow covers to convert from Halloween to fall so they could be used through Thanksgiving.
That is where the fun pillow appliques came in. I decided that one side of the pillow cover would include a fun Halloween applique and the other side would be just fall. That way I can turn them around and get an entire season out of them.

For this project, I decided to use a bit of fusible fabric. This is a great for using for applique projects since it is has a glue on one side that fuses to the fabric once it is heated up.
Cutting out your applique on your Cricut Maker makes it nice and crisp and then you can press it right onto your project and it will stay put. Usually I suggest stitching fusible fabric down after you press it.
So let's get started on how to make fall pillow covers!
How to Make Fall Pillow Covers
- Black and Orange Fabric
- Burlap Fabric
- Happy Halloween Applique
- Halloween Subway Art
- Fusible Fabric
- Black Iron-On Vinyl
- Buttons
- Thread

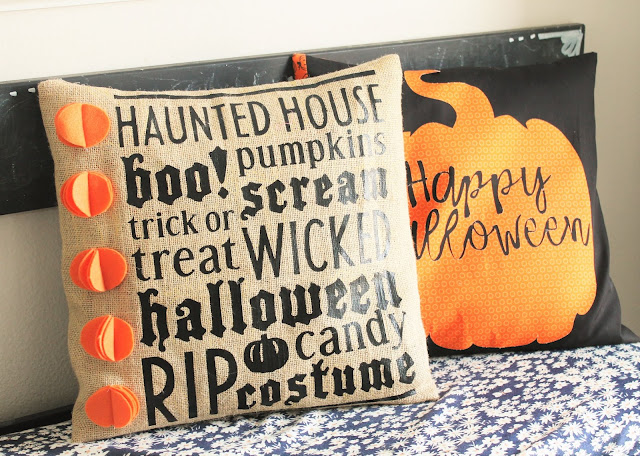
Happy Halloween Pillow Cover

I started with my Happy Halloween pillow. Since I was covering my pillows I used my tutorial on how to make an envelope pillow cover to start this pillow.

I decided to do part of the pillow black and the other part with orange jack-o-lanterns, so I took the full measurement of my pillow cover and divided it in 3rds. I cut 2/3rds the length in black and 1/3rd in pumpkins.

I hemmed the edge of my fall pillow cover and then added decorative buttons.
What's a decorative button? It is a button that doesn't function. Meaning there are no buttonholes. But they look nice.
I don't need buttonholes because my "envelope" overlaps so that my pillow doesn't come out without me telling it to.

Finally, I used this fusible fabric from Cricut to cut out my Halloween pumpkin on my Cricut Maker. I used the rotary blade to cut out my pillow appliques and they cut out really nicely.

Press the fusible fabric right onto your fall pillow covers. Just a few seconds on each section.
If you really want to ensure it doesn't move, make sure to stitch it down. But I decided to skip this part, because frankly, sometimes I'm just lazy like that.

Halloween Subway Art Pillow

Step 1
Load the Halloween Subway art from Cricut Design Space. My pillows are about 16 x 16", but since you can only do a 12" wide mat on design space I did cut my design up a bit. It should fit about a 12"x 15" pillow cover. It will cut out on 2 mats.

Step 2
Use black Iron on to cut out your design on your Cricut Maker. Make sure to MIRROR it in design space so it cuts out correctly. Weed.

Step 3
Take your Iron-on and press it to your burlap using your Cricut EasyPress. Using the instructions from the temperature guide, you'll want to press it at 305°F for 30 seconds.


Step 4
Since you are working with burlap fabric, you'll probably want to move your stitch to a zig-zag. But you don't have too. Then follow the tutorial for how to make an envelope pillow cover here to cut out the right size burlap for your pillow.

I hope you liked these simple fall pillow covers. I really love the burlap one and can't wait to add them to my porch.


Halloween Sewing and Craft Party
Check out all the fun Halloween Inspired Tutorials everyone is making!
9/5 Flamingo Toes | GYCT Designs
9/7 Paisley Roots | Swoodson Says


