When I think back on my childhood, one of my fondest memories are all the hours spent at our local library during our summer reading program.
We'd go for the craft or storytime and get our weekly reading prize or coupon. My siblings and I would spend time browsing through books and enjoyed picking out new library books each week. The love of learning has stuck with us all in various ways.
This post contains affiliate links to products I recommend. I do make a portion off any you may purchase. See full disclosure here.
Naturally, when I had my own kids I wanted to pass on those same positive reading summer vibes. And let me tell you we have an amazing library!
They do some really fun activities and so cool in fact we have our own book inspired mural. The kids love going each week to pick out books and spend a lot of time reading each day. It's great.
The challenge, how to get all those books home in one piece and without Mom having to carry them all.
Please tell me you have the same problem. A big stack of books that no one seems to want to carry. It's a great problem to have but also a bit of a health issue.
That's where the Summer Reading Reversible Book Bag comes to the rescue.
This simple book bag is the perfect size for all those library books, whether big children's books or heavy chapter books. It will hold them. Plus, we can keep our summer reading charts in their bags as well.
It's also a great size for Mom to carry but also for kids to be able to carry around. The book bag pattern can be changed by subtracting a few inches here or there to better accommodate I larger or smaller person as well.
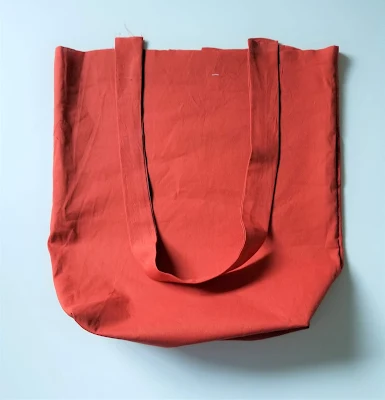
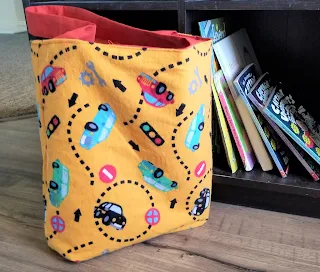
Plus, the handles have stabilizer so they are nice and strong. I also boxed the corners which helps the bag stand up on its own.
Which is really nice when you've got a bag full of books and you want to set them down without spilling them all over the ground.
Let me teach you how to make a book bag.
Reversible DIY Book Bag Pattern
Materials Needed
- 1/2 yard of main fabric
- 1/2 yard of lining fabric
- 1/2 yard medium weight interfacing
- thread
- Be awesome! Dr. Seuss Cut File
- Blue Everyday Iron-on from Cricut
- Cricut Maker
Step 1
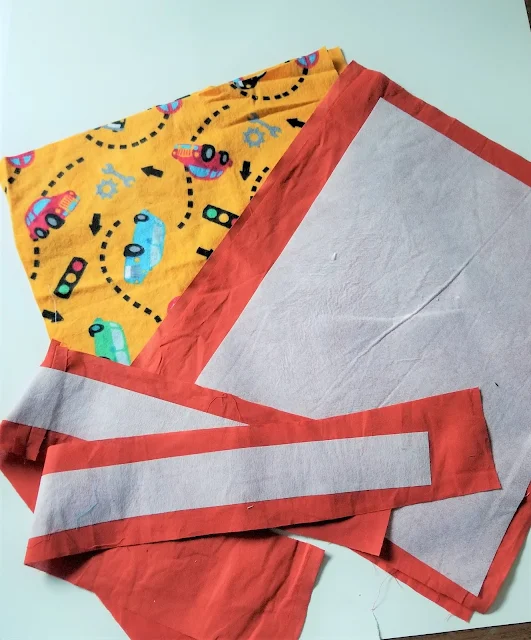
Cut 2 front bag pieces from main fabric 16" x 14" and 2 in the lining fabric.
Cut 2 interfacing pieces 14.5" x 12.5".
Cut 2 handles 25" x 4" and 2 handle interfacing pieces 23" x 2.5"
Step 2
Apply interfacing to pattern pieces.
Step 3
With Right Sides Together (RST), stitch the main book bag pieces together on 3 sides. The 2 long sides and one shorter side. Repeat with lining pieces.

Step 4
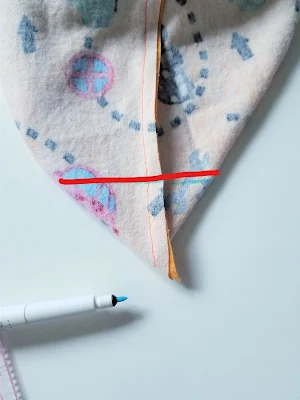
To get the box corners, open up your main bag piece and open your corners so they make a triangle shape.
Use a washable marker or fabric chalk to mark a line 2" from the tip of the triangle.
Do this to both corners of the main bag and of the lining bag. Sew across the line your drew on the bag. Press.
Use a washable marker or fabric chalk to mark a line 2" from the tip of the triangle.
Do this to both corners of the main bag and of the lining bag. Sew across the line your drew on the bag. Press.
Step 5
Take your handle pieces and fold them with RST along the long side. Stitch down the long side.
Step 6
Turn your handles right side out and press.
Step 7
Match the raw edges of your handles to the raw edges of your main bag pieces. You'll want to pin them about 3-4 inches from each side. Stitch handles to the bag.

Step 8
With RST, put them main bag inside the lining bag. Make sure your handles are inside the bag and out of the way.
Pin 2 bags together but mark a 3-4" opening that you won't sew. Stitch 2 bag pieces together.
Pin 2 bags together but mark a 3-4" opening that you won't sew. Stitch 2 bag pieces together.

Step 9
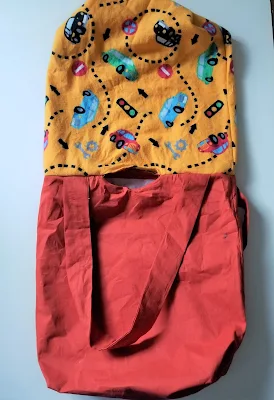
Turn your bag right side out through the 3-4" opening you made. Press well.
Step 10
Topstitch around the top of you bag to close the opening and give it a nice finished look. Press.

Step 11
Finally, add the HTV vinyl you cut out using your Cricut Maker and press it on the bag.
There you go! You're all done.
Now you have a great book bag that you can use all summer and take to the library, park or use when school is back in session.
It's great because you can turn it inside out and have an entirely different bag and new look.
Looking for more summer fun ideas? Check out our post with more ideas for fun things to do with kids this summer.
Looking for more summer fun ideas? Check out our post with more ideas for fun things to do with kids this summer.


