Today I wanted to bring home a little project I shared for Whimsical Fabric a few months back. I love usable projects and organizing. I thought why not make a fun project for all those school and art supplies. So I am sharing an Art Kit tutorial.
Materials Needed:
3 Contrasting Fabrics - 1/2 yard each (I used the Sidewalks fabrics from Riley Blake)
40" Ribbon (I used Jumbo Ric-Rac)
Thread
Step 1
Cut your 3 contrasting fabrics into 22" x 11" pieces.
Step 2
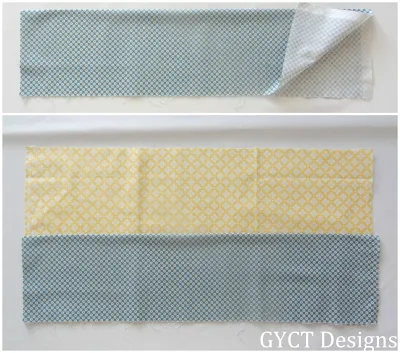
Take one of the fabric pieces and fold it in half matching the two long sides. Place another fabric piece on a flat surface with right side up. Place the folded piece on top of the flat piece and match the bottom raw edges.
Step 3
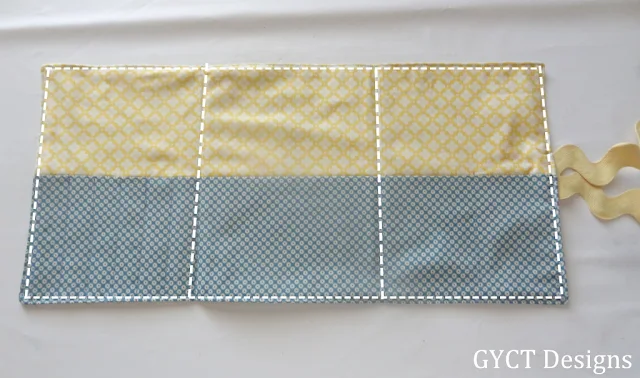
Fold the two fabrics into 3 equal sections and press with the iron. This will help you with placement of the pockets.
Step 4
Using a ruler and marking pen, draw lines at 7" and 14" for the pockets. On the far left pocket, draw lines ever 1-1.5" to hold pencils or markers. On the far right pocket, draw a line down the center for 2 smaller pockets. Now stitch down each of drawn lines, making sure to backstitch at the beginning and end of each line.
Step 5
Take your ribbon or Ric-Rac and cut 2 pieces that are each 20".
Step 6
Place your two pieces of ribbon and pin them to the side where the pocket and back piece meet. Next, place the 3rd piece of fabric, with right sides together, over the pocket piece. Stitch the pieces together, making sure to leave a 3" opening on the short side.
Step 7
Clip your corners.
Step 8
Turn the kit right side out through the opening on the side. Press.
Step 9
Topstitch around the outside of the art kit. Also stitch down where the art kit will fold in thirds.
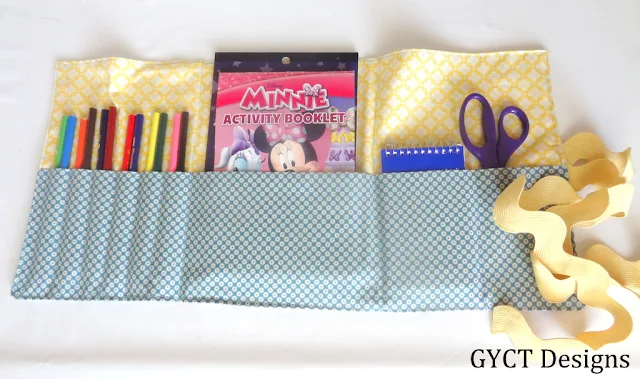
Tada!! You are done. Now fill it with your little ones favorite art supplies like colored pencils, stickers, small coloring books, scissors, glue or a notepad.
Once you have it all filled, fold it in thirds and tie your ties. Now your little one is ready to go to school or church.


Wow...I love this! You make it seem so simple...
ReplyDeleteCheck out my blog at www.adventuresofmightymom.com!
WOW! I LOVE THIS, IT LOOKS SIMPLE AND BEAUTIFUL
ReplyDeletehttp://www.makingjoyandprettythings.com/