If you have little girls in your life, you for sure know that they all love the movie Frozen and Princess Anna.
My 2 year old is no different. So for Christmas, Santa decided she needed a DIY Anna Coronation Dress.
I decided to share the Princess Anna Coronation Dress tutorial for all my sewing friends.
This post contains affiliate links to products I recommend. I do make a portion off any you may purchase. See full disclosure here.
I know there are probably a million of these Princess Anna dress tutorials out there. But honestly, I just couldn't help myself.
This one should be fairly simple as all you need is your favorite Peasant Dress Pattern.
Princess Anna Coronation Dress Pattern Tutorial
Materials Needed:
- Free Peasant Dress Pattern
- Green, Black and olive green fabric
- Anna Applique Pattern - download at the end of the post
- Wonder Under
- Elastic
Step 1
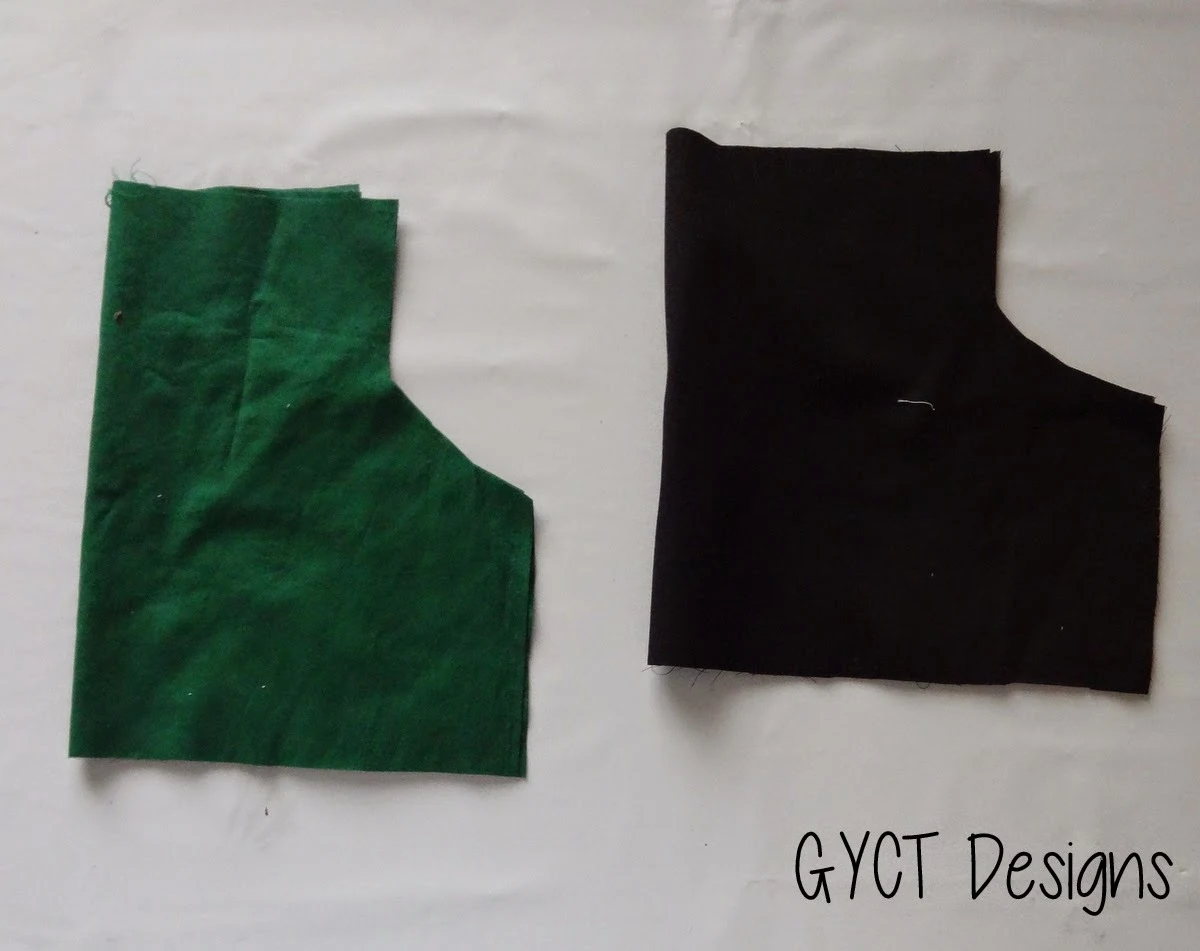
Cut out your bodice front back and sleeves. The front and back should be in black. The sleeves in green.
Step 2
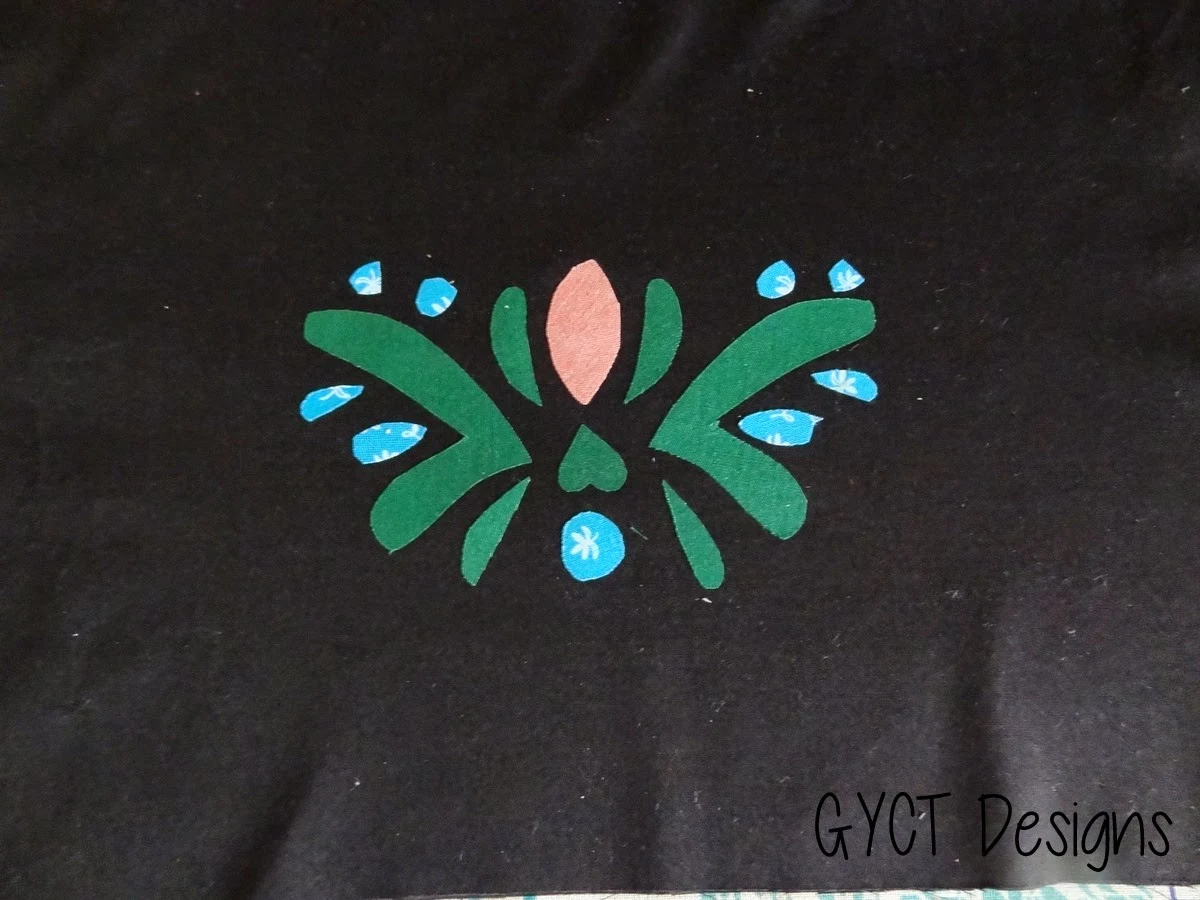
Using your Wonder Under, print and cut out the applique pattern for Anna's Coronation dress.
Follow the chart on the applique to know what colors to cut in each shape. For the best method of applying applique, see this post.
If you feel like you need to make the applique smaller or larger you can always print the applique at 110% or 90% to change sizes.
Follow the chart on the applique to know what colors to cut in each shape. For the best method of applying applique, see this post.
If you feel like you need to make the applique smaller or larger you can always print the applique at 110% or 90% to change sizes.
Step 3
Apply the applique onto the front of your cut out main bodice piece. Stitch around the edges of the applique to ensure they stay in place.
Sew the sleeves to the bodice front and back.
Next apply your elastic according to the directions on your pattern. I added elastic to the neck edge and the hem of the sleeves.
Step 5
Now for the skirt.
First, measure your bodice around the waist. You'll want your finished, pleated skirt to be the same width. The length of the skirt should be the same as what is on your pattern.
So how do you decide on the size of your strips?
Finished Waist Measurement / 6 strips = Width of Strips
22.5 / 6 = 3.75"
Now add .75" for seam allowances
= 4.5" Strips
Remember you are adding pleats that will touch at the center. So all your strips, green and olive green, will be the same size.
You'll want to cut out strips of fabric, green and olive green, that are the correct length mentioned on your pattern and the width you calculated above.
You'll want 6-7 of each color. Stitch together one green and one olive.
Continue until they are all stitched together in a row. Stitch the last two together to make the skirt of the dress.
Press the bottom edge of the skirt up 1/4 inch and then again 1" and stitch a hem.
Pleat the olive colored strip to the center of the green strip. Pleat the opposite olive strip to meet the other strip. They will meet in the middle.
Pin each of the pleats in place and press. Repeat with each strip.
Pin the skirt to the bodice top. If you have to adjust your pleats so that the skirt fits to the bodice, do that now. Stitch the skirt to the bodice top and press.
Congratulations!! You just made yourself a little Anna Dress.
Super simple and you can really use whatever peasant dress pattern you have available.
Want the free Anna Coronation Dress Applique? Simply click the button below to download.
Don't forget to share your creations in our Sew Simple Home Facebook Group.


Love it!!! I really need to GMCT and make a Frozen Dress!!!
ReplyDeleteOnce you start Terri you'll be making a million of them!
DeleteWhy can't I find patterns for little girls size 10/12? 9year olds like to dress up. I do not know how to resize patterns.
ReplyDeletePlease help. I'm sure she would love this dress.
Sandy the peasant dress pattern I suggested above goes up to size 12. It is a great one!
DeleteThank you I will try. I have never made a dress before. I will let you know how it goes.
Delete