How much do you love
your sewing machine? It's an important question.
Do you take care of your machine?
Do you regularly clean it? Learn how to clean your sewing machine.
Do you have small people that come around and turn all the knobs and push all the buttons?

This post contains affiliate links to products I recommend. I do make a portion off any you may purchase. See full disclosure here.
I love my sewing machines. In some ways, you might say I'm a bit mean to them. They work late into the night. Sometimes I yell at them.
In an effort to show my machine a little love {and to keep small fingers away from all the knobs}. I decided to make this easy sewing machine cover pattern.
Perhaps, you need to shower that beautiful machine with a little more love. Like maybe, give it some "clothes". Show it you really care.
Maybe make it a nice easy sewing machine cover pattern.
Maybe make it a nice easy sewing machine cover pattern.
Now to be truthful, I do have a hard shell sewing machine cover. It is nice for when I travel and take my machine.
But for daily use, it is a bit of a hassel. I don't want to unplug and pack my machine up every single day. I use it too much.
Also, perhaps you
struggle like me to know where to put your favorite
sewing scissors and that GIANT
ruler and french curve of yours.
This
is real struggle. But this new sewing machine cover pattern has a TON of
pockets.
I even stick my magnetic pin cushion in one of
the pockets to keep my toddler from grabbing the pins.
Why than have I not
made a nice soft sewing machine dust cover until now?
Time. Money.
Effort.
I guess I just thought
other things were more important. Not anymore. I am excited to
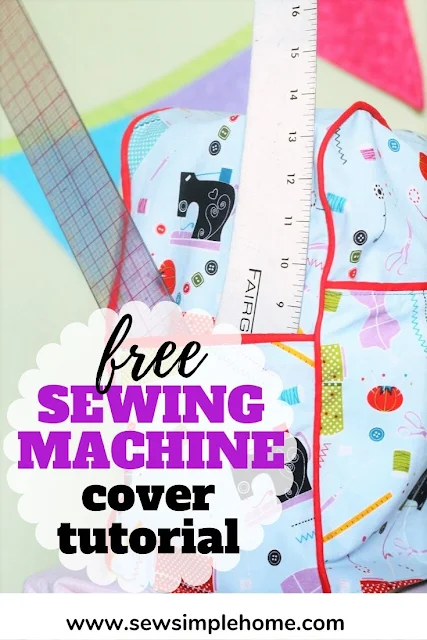
share with you my Sewing Machine Cover Pattern and Tutorial!!
Sewing Machine Cover Pattern
Materials
Needed
- 1 1/2 yds Main Fabric
- 1 yd Lining Fabric
- 2 yds matching bias piping
- Optional: Fusible Interfacing
- Matching Thread
Tip: You can make your own bias tape and they can save you a money and ensure that it matches your chosen fabric perfectly.
Measuring and Cutting Out Your Sewing Machine Cover Pattern
To begin, you need to
grab your measuring tape and measure your
machine.
Use the above picture to help you get the following measurements
from your sewing machine: Width, Length, Depth, Around Machine Outside
Now cut your pieces as
follows:
Piece Name
|
# in Main Fabric
|
# in Lining
|
Measurements
|
Sewing Machine Cover Front/Back
|
2
|
2
|
Length x
|
Sewing Machine Cover Sides/Top
|
1
|
1
|
Around Machine x Depth
|
Front Pocket
|
2
|
||
Side Pocket
|
2
|
Step 1
Start by making sure your piping is prepared. You'll use your bias tape to cover your piping. Take one of your front pocket pieces and place it on a flat surface.
Pin your piping to one of the long edges. Stitch it in place right next to the piping.
Pin your piping to one of the long edges. Stitch it in place right next to the piping.
With Right Sides Together (RST), take the other front pocket pieces and place it over the first piece. Stitch is next to the piping as well.
Turn your pocket right side out and topstitch along the bottom of the piping.
Turn your pocket right side out and topstitch along the bottom of the piping.
Repeat this step with your side pocket pieces.
Step 2
Place your front pocket piece over your front cover piece, matching the side and bottom edges. Stitch the pocket to the front cover along the bottom edge at about 1/4".
Use your ruler and marking pen or chalk to draw lines for separate pockets. Stitch along the lines making sure to backstitch at the beginning and end.
Do this same step with the side pocket stitching to the cover/sides piece.
Next, pin piping around the outer edge of the front cover piece. Curve around the corners of the cover. Stitch piping in place. Repeat with back cover piece.
Step 3
With RST, place the side/top piece over the front cover piece. Pin edges and stitch pieces together.
Turn right side out to make sure the piping looks correct and press. Take back cover piece and pin to the edges of the side/top piece. Stitch back cover to side/top piece. Turn right side out and press.
Repeat this step with the lining pieces. The lining will not have piping.
Step 4
You should now have a main sewing machine cover piece and a lining piece.
With RST, place the lining over the main cover. Match the bottom edges together and all the side seams.
Pin in place.
Stitch around the bottom edge, however, leave a 2-3 inch opening at the bottom. Turn the cover right side out through the opening. Push the lining into the main cover. Press.
Step 5
Topstitch around the bottom edge of the machine cover.
Make sure that the opening you used to turn your machine cover is closed with your topstitching. Press cover.
Now put that adorable sewing machine cover onto your machine and fill it with all your favorite sewing items!!
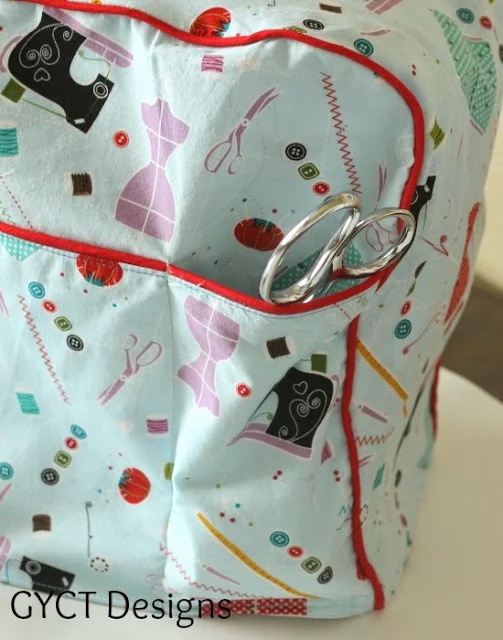
I think my favorite feature of this sewing machine cover pattern are the
pockets. Now I have a place to store items.
Mostly I like that I
can put my scissors in these pockets. Away from little fingers who tend
to grab them and run around the house with super sharp scissors. No more!


So awesome! I need a cover for my machine, thanks for sharing! :)
ReplyDeleteThanks for the inspiring tutorial. Now I'm ready to make one for myself!
ReplyDeleteAwesome tutorial . I will make for myself a new one
ReplyDeleteI have the exact same sewing machine as shown in your picture and have finally found the pattern to make its cover, thanks to you. Great instructions, easy to follow and thank you. Do you have a pattern for an overlocker machine.
ReplyDeleteCan't you do the same thing? Measure it, and the dimensions will just force it to be more square.
DeleteIf you are curious where to put the cover while you are sewing, place it over the back of your chair. Now it isn't on your sewing counter creating clutter, or at your feet to trip on. And the pockets are still holding your tools within easy reach & not cluttered too close to your machine and sewing project either!
ReplyDeleteAwesome!! Thanks a lot for sharing ☀️ Loved it 💕
ReplyDeleteI really needed one for my machine..
Awesome!! Thanks a lot for sharing ☀️ Loved it 💕
ReplyDeleteI really needed one for my machine..
Now I have an idea to do so for my new sewing machine. Thanks for sharing this tutorial.
ReplyDeleteI love the cover and want to make two for my machines. Can you tell me what you mean by covering the piping with bias tape? The link is to pre-made bias tape on Amazon. Are you suggesting to cover that or to buy plain piping cord and cover that, in other words make our own piping.
ReplyDeletePiping and bias tape are two different notions. Piping usually comes in white or possibly black. The idea is to use premade bias tape to cover the piping so it is an appropriate color for your machine cover.
Delete