When my husband and I first got engaged and went to put together our wedding registry, we started seeing a trend. Everything we were choosing was green. I mean everything.
The towels, curtains, furniture, appliances. We both were really drawn to the color green. (Yes, it does happen to be both our favorite color.)
This post contains affiliate links to products I recommend. I do make a portion off any you may purchase. See full disclosure here.
We started to realize if we didn't want our home to be so monochromatic, we'd have to pick some different colors. That is when we decided to go for red in the kitchen.
Red is a warm color and promotes hunger. That's why so many food companies and restaurants use red in their advertising.
Fast forward 15+ years later and my kitchen still has quite a bit of red going on. However, I really do love greens and blues and wanted to start switching things up a little.
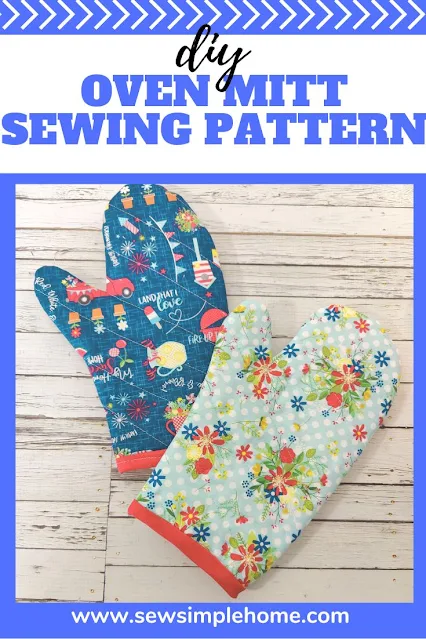
To start, I wanted to change up the hot pad and oven mitt I've had since we got married. That is how this free oven mitt pattern came along.
My need for a little change in my kitchen results in you getting a freebie for your own kitchen sewing. Plus, this project is quick and makes really great gifts.
Or if you have your own boutique or craft fair booth, people really love pretty oven mitts for each season or holiday themed items.
Video: How to Sew an Oven Mitt
Oven Mitt Sewing Tutorial
Materials Needed
- Oven Mitt Sewing Pattern - grab at the end of the post, look for the peach button
- 1/4 yard Cotton fabric for main
- 1/4 yard Cotton fabric for lining
- Insul-bright
- Thread
Cut out oven mitt using the printable oven mitt pattern pieces at the end of the post. Cut 2 in main fabric, 2 in lining and 2 in Insul-bright.
Stack the 3 layers of material together. The main fabric is wrong side up, Insul-bright in the middle and the lining is right side up. Line the layers up and pin together.
Stitch some diagonal lines through the three layers. Each line should be about 1-1.5" apart. Start the lines in the middle of the oven mitt and stitch out. This will help keep everything lined up a bit better.
Repeat step 2-3 with the opposite side of the oven mitt.
Place the two quilted sides of the oven mitt together and stitch around the outside at 1/4". Leave the bottom straight edge open.
Clip around the curved edges of the oven mitt and clip into the fabric where the thumb and hand meet. Trim extra bulk out of the seam allowances as well.
Open bias tape and stitch tape around the bottom edge of the oven mitt. Making sure right sides are together.
Carefully fold bias tape to the inside of the oven mitt and pin in place. Use a hand needle to slipstitch the bias tape closed.
Alternatively, you can stitch the bias tape using your sewing machine.
That's it! You've just made a brand new oven mitt for you kitchen. It is going to be nice to have a matching set or two.
Or make them for gifts for friends and family. However you decide to use this pattern, I hope it will brighten up your space and put a smile on someone's face.

.jpg)
.jpg)

.jpg)
.jpg)
.jpg)
.jpg)
.jpg)
.jpg)
.jpg)
.jpg)
.jpg)


No comments
I'd love to hear from you!