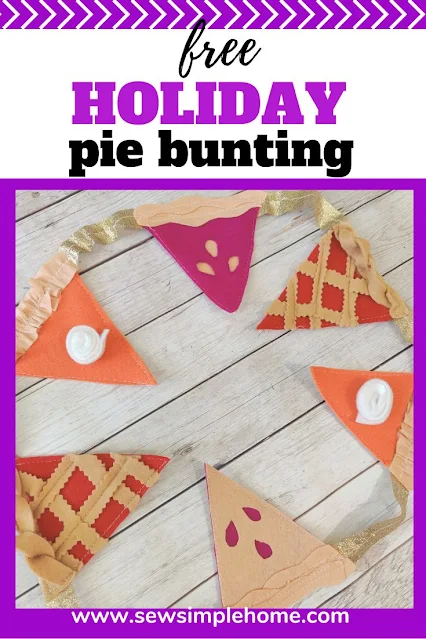
Nothing says the holidays quite like pie. Pumpkin pie, cherry pie, apple pie. Fruits freshly harvested and baked in a crispy crust.
This post contains affiliate links to products I recommend. I do make a portion off any you may purchase. See full disclosure here.
Now you can show your festive pie spirit by making this whimsical pie bunting sewing project. It is quick, easy and perfect for adding a little fall cheer to your home décor.
Plus, you can hang it from October to December. It can span the entire holiday season. And did I mention it is made entirely of felt? Well it is. That means if you really don't want to sew it, you can pull out that trusty hot glue gun and glue it all together. (See, I'm not above "cheating" on sewing projects occasionally.)
DIY Pie Bunting
Materials Needed
- Holiday Pie Pattern Pieces - download at the end of the post from the peach colored button
- 1 sheet of each felt color - Tan, Red, Orange, Fuchsia
- Square of White Fleece
- Matching Thread
- Pinking Shears
VIDEO: How to Sew Pie Bunting
Cherry Pie Tutorial
Step 1Cut out 2 tan felt pieces for the crust and 1 for the berry filling. You can decide if you want to cut the "teardrops" from the tan piece or from the berry filling. I did it wrong the first time and cut from the berry filling, but I actually liked the way it turned out. So this is up to you.
Sew the berry filling to the bottom crust.
Optional: Sew the top crust over the berry filling.
Cut about 4 random strips of tan crust that you pile on top of each other. Stitch them to the top of the crust.
Pumpkin Pie Tutorial
Cut 1 tan pie in felt and 1 orange pie in felt. Also, cut the pumpkin pie crust pattern in tan.
Stitch a gathering stitch down the center of the pie crust piece. Pull the gathering thread to gather the crust. Learn how to gather in this post.
Cut the whipping cream pattern piece in white fleece (or felt). Cut a swirl into the middle of the circle. Slowly roll from the center of the circle to the end, making a little "flower" or your whipped topping. Glue or handstitch the end.
Stitch the orange pie to the tan crust along the triangle edges. Glue the whipped cream to the center of the pumpkin pie.
Pin the gathered pie crust to the top of the pumpkin pie. Stitch down the center of the crust to the pie.
Step 1
Apple Pie Tutorial
Step 1
Cut a tan pie piece, a red pie piece, 7 apple pie lattice pieces using pinking shears and a 1" x 7" tan piece of material.
Place the tan pie on a flat surface. Place the red pie over the tan. Place the lattice pieces over the red pie in a lattice pattern. Pin all the layers together.
Stitch the lattice pieces to the pie. Stitch around the to triangle sides of the pie to hold all the layers together.
Take the 1" x 7" piece of tan fabric. Cut down the center almost to the end. Braid the two sections together and stitch the end together.
Place the braid over the top of the apple pie and stitch the sides down and the center.
Assembling the Pie Bunting
You can make as many pies as you'd like for your bunting, depending on where you plan to hang it. I would suggest at least making 7-8 different pie pieces.Take a 4-5 foot piece of ribbon (or more). Leave a foot to a foot and a half tail on each end. Pin pie pieces to the ribbon at about 2" apart. Stitch pie pieces to the bunting.
There it is. A cute little pie bunting that you can hang up this fall and leave all season long.
It would be super cute on a mantel or entertainment center. But what about at work, for a fun fall harvest party or down the center of a Thanksgiving table.
However you choose to use the pie bunting, I hope it will bring a few smiles and some lasting memories.

.jpg)
.jpg)
.jpg)

.jpg)
.jpg)
.jpg)
.jpg)
.jpg)
.jpg)
.jpg)
.jpg)
.jpg)
.jpg)
.jpg)
.jpg)
.jpg)
.jpg)
.jpg)
.jpg)
.jpg)


Really cute. Plan to make it with grandchild using glue. Please consider offering a printable tutorial ( I don’t see a print option). I did screenshots that I’ll print out for tutorial. Thanks!
ReplyDelete