
"Ouch!" I screamed for the second time in 30 minutes. I'd, once again, stepped on a sewing needle in my sewing space.
This was not a typical problem, but my 4 year old had found my pin cushion and kindly removed the pins onto the floor. It was time to pull out my shoes and start the process of collection all those sewing pins.

This post contains affiliate links to products I recommend. I do make a portion off any you may purchase. See full disclosure here.
It was a hassle but I did it. However, I had to come up with a different plan. That's when I started researching diy pattern weights.

I'll admit, I didn't get right on the bandwagon of using pattern weights. I've always loved using sewing pins. It's what I learned to do when I first started sewing. It was tradition.
And if I didn't want to pin something, most of the time I would just find some toys, Legos or maybe my 20 pairs of sewing scissors to use as weights. (Don't make fun of me, I'm sure you've done it too!)

But the time to change that was now. Making pattern weights was not complicated but it would make my pattern cutting a bit faster and less stressful.
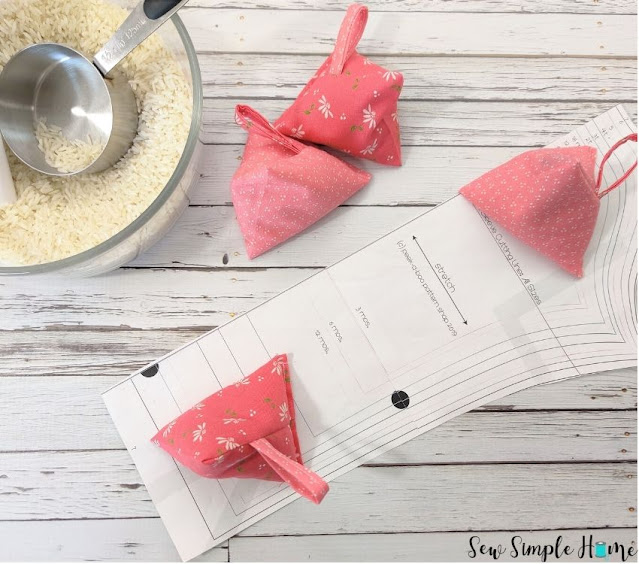
The best part about this project is that I already had all the supplies on hand. Just some fabric scraps and some dried rice and I was ready to go.

Which means it won't take much for you to make your own diy pattern weights either. Simply follow the tutorial below and get sewing those pattern weights today!!
VIDEO: How to Sew Pattern Weights
DIY Pattern Weights
- Pattern Weight Pattern - get free at the end of post by clicking the peach colored button
- OR Cut
- 8" x 4" Cotton Fabric
- 3.5" x 1" Contrasting Cotton Fabric
- Matching Thread
- Dry Rice
- Paper Funnel

Step 1
Take the 3.5" x 1" tab and press both sides in towards the middle of the tab lengthwise.

Step 2
Fold the tab in half making sure the raw edges are enclosed inside the tab. Stitch down the side of the tab. Press.

Step 3
Fold the fabric for the pattern weight and fold it in half.
Fold the tab in half, matching the raw edges. Place the tab about 1.5" from the top of the pattern weight. Pin.

Step 4
Fold the pattern weight fabric up to match all the edges. Pin in place.

Step 5
Stitch down the two side seams, but leave the top open. Trim the corners of the pattern weight fabric.

Step 6
Turn pattern weight right side out. Press.

Step 7
Fold the top edge a 1/4" to the inside of the pattern weight. Press.

Step 8
Fill pattern weight about 2/3 - 3/4 full of dry rice. Create a paper funnel to add rice to the weight.

Step 9
To make the triangle shape, find the two side seams and match them in the middle of you seam. Pin across the fold.

Step 10
Stitch along the folded edge using a sewing machine or you can hand sew closed if you prefer.

Tada!! You did it.
Look how cute that little pattern weight is?!

Now repeat the process so you have a small collection of matching pattern weights. Once you have the amount you want, you can start using them instead of pinning.
And be grateful that these cute little weights will save you from stepping on anymore pins kindly scattered by small children.

Want the free diy pattern weights printable pattern? Simply click the button below to download.


No comments
I'd love to hear from you!