My 5 year old's nose is constantly running. He drooled a lot as a baby which meant his clothes were always wet. But now, he just loves to wipe his snot on his sleeves.
Naturally, as his mother, I tend to remind him 100 times a day to grab a tissue and wipe his nose. It is a daily battle and we are getting better at it. But since consistency in parenting is so important, I try to carry a package of tissues in my purse or car to keep up.
This post contains affiliate links to products I recommend. I do make a portion off any you may purchase. See full disclosure here.
As is typical with children, the plastic container for the tissues is always being destroyed, so I figured it was time to learn how to sew a pocket tissue holder.
I looked at many design and decided to make this interesting crisscross pattern. It makes the package a bit more intriguing and makes tucking the tissue package inside super simple.
And since it is made with simple cotton fabrics, if it gets dirty or falls prey to the preschool booger wiping, it can be thrown right into the washing machine and come out nice and fresh.
Plus, this is a great beginner sewing pattern. With just a few straight stitches you'll have your own quick and useful tissue pocket. Make a bunch for friends and family for gifts or just one for your own backpack or purse.
How to Sew a Pocket Tissue Pouch
Materials Needed
Seam Allowance: 1/4"
Step 1
With Right Sides Together (RST), match one main fabric piece to the opposite contrasting fabric piece along the straight edge. Sew pieces together. Repeat with two remaining pieces.
Step 2
Press pieces open. Match RST and stitch along the top curve and along the bottom curve.
Do not stitch the straight sides.
Step 3
Clip every 1/2" along both curves with scissors.
Step 4
Turn the case right side out and press well. Topstitch along the curves of the case.
Step 5
Fold the top curve down to match where the center fold of the bottom is. Fold the bottom curve up to match the fold of the top. Pin in place.
Step 6
Sew a straight line down both sides of the case. Trim the corners and sides with scissors.
Step 7
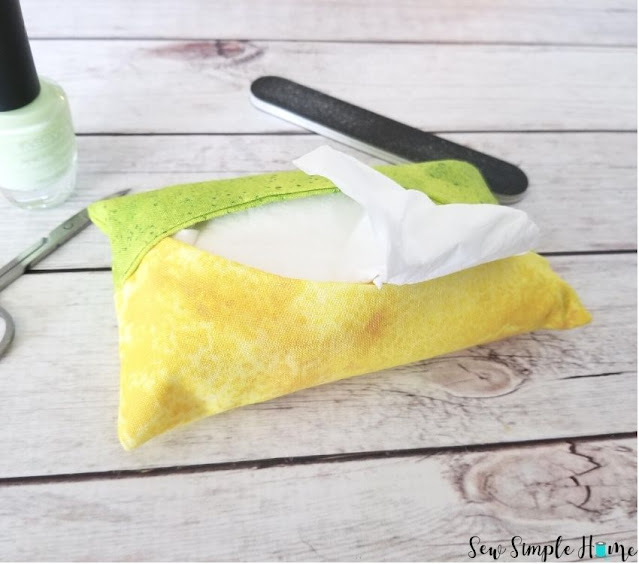
Turn the case right side out and press the seams well. Tuck a package of tissues into the case and add it to your purse.
That's it. How quick and easy this project is. Don't you love how useful it is.
Looking for some great handmade gift ideas? Get the free printable Handmade Holiday Gift Guide that includes links to over 50 handmade gift ideas.


No comments
I'd love to hear from you!