"What did we get the neighbors? How about the kids teachers? Did you get something for my aunt?"
Questions often asked the night before a gift should be presented. Luckily, someone brilliant invented gift cards. Because let's be honest, no on knows what to get the uncle who has everything and hates everything else.
This post contains affiliate links to products I recommend. I do make a portion off any you may purchase. See full disclosure here.
But a gift card doesn't have to seem impersonal. In fact, it can seem much more intentional with the help of this diy gift card holder pattern.
Pick custom fabrics that fit the recipients personality or some silly fabric to make them laugh. The best part, you only need scraps. You'll use less than a square foot of fabric for this project.
Go rummage in that fabric scrap bin and find the perfect fabric to add your little gift card.
And don't feel guilty if you are regifting a gift card someone gave to you. At least you aren't wasting hard earned money, you are just passing on the joy.
DIY Gift Card Holder
Materials Needed
- DIY Gift Card Holder Pattern - (Download at the end of the post for free)
- Fabric Scraps in 3 colors - Link to Christmas Traditions fabric
- Fusible Interfacing
- Matching Thread
- Gift Cards
If you'd rather not print the pattern, here is the measurement chart.
Cut out pattern pieces (download at end of post) and press interfacing to the wrong sides of the fabric.
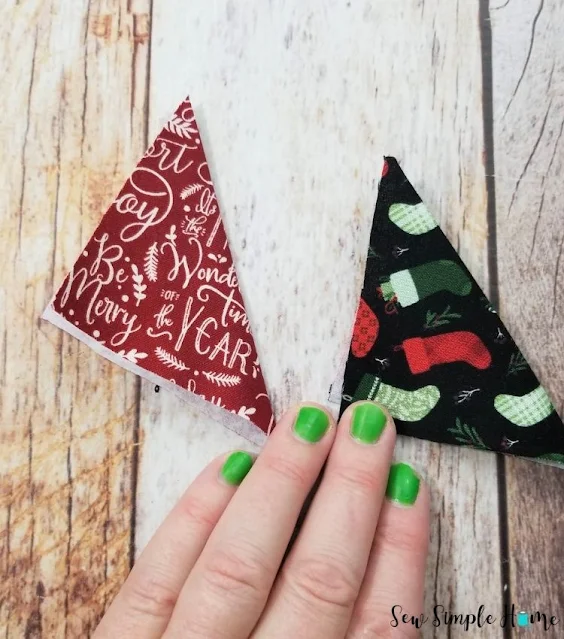
Fold the two squares in a diagonal with wrong sides together. Press.
Line up the bottoms of the diagonals with the bottom of the main gift card holder. You want the two diagonals to overlap.
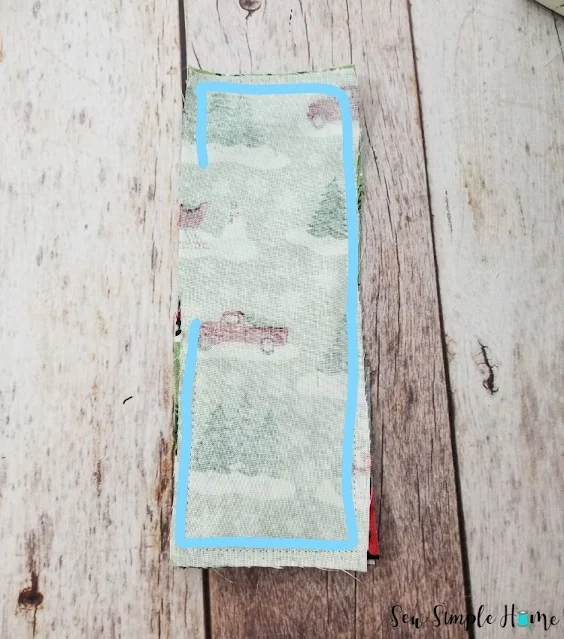
Place the back piece over the top of the other pieces with right sides together. Pin in place. Mark a 2-3" opening on one of the straight sides above the pocket. This will be the opening to turn the gift card holder.
Step 5
Stitch around the outside of the gift card holder at 1/4". Make sure to leave the opening open.
Trim the 4 corners. Turn the gift card holder right side out through the opening.
Step 7
Carefully topstitch from the top of one diagonal around to the other. Don't stitch over the diagonal pockets.
You did it!! See how easy that was. A quick project that makes a great gift and can be used over and over again.
Want the free diy gift card holder pattern? Simply click the button below to download the free PDF sewing pattern.


That's such a simple project, great for last minute gifts!
ReplyDeleteThis is sewfun!
ReplyDeleteGreat pattern.
Carla from Utah
Would like to know what fusible interfacing did you use?
ReplyDeleteGreat question. For this project, I used a lightweight interfacing. You can get it here: https://shrsl.com/2onfx
DeleteThis comment has been removed by a blog administrator.
ReplyDeleteAny tips on how to turn the corners at the bottom by the pockets? Even after trimming them closely, they still seem really bulky.
ReplyDeleteThe best thing is to trim the corner at an angle. Use your iron and really press those corners with steam. They should get nice and flat.
DeleteWhat a lovely idea! Thank you for the pattern and how-to. I made these with an eyelet and threaded a piece of leather through it so you can tie them up. These also make wonderful bookmarks so it's a gift that keeps on giving! Thank you again!
ReplyDelete