
It was such a mess. I'd go in and constantly be stepping on clothes, shoes or even bits of Ninja Turtles. My boys closet was out of control.
Something had to give. But the problem had more to do with where to put stuff rather than having to much stuff.
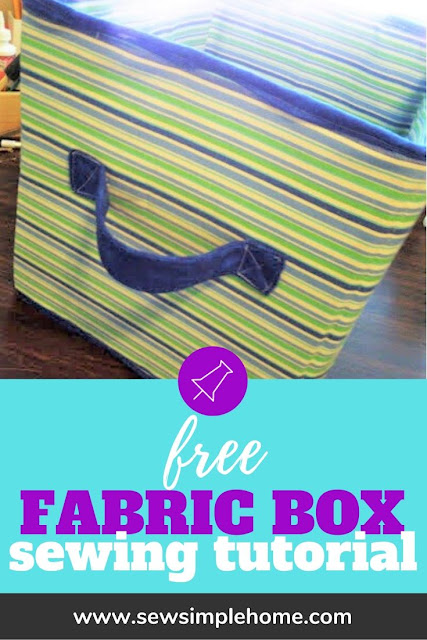
I decided I need to learn how to make a fabric box. One that could serve as a base for toys, books and clothes.

It didn't have to be anything amazing or super special, but it did have to function and withstand my boys closet.

I can run through my fabric stash and find enough fabric and use all my Amazon boxes to make some for free!

How to Make a Fabric Box
Materials Needed:
- 1/2 yard cotton fabric
- Cardboard Boxes
- 1 pkg Bias Tape - learn how to make your own bias tape.
- Matching Thread

Step 1
You'll need fabric and some cardboard. I had some nice twill weave fabric that is sturdy and a nice box.
Decide how big you want your box. Mine is 11x14. Cut two pieces of cardboard for each size.
Cut 2 long strips of fabric. Add all four of your sizes together. (11+11+14+14= 50 inches)


Step 2
Measure and mark at each corner on your fabric and then sew your two pieces together at each of the corners from top to bottom.
Your open ends should be sewn together and then zig zag or serge your edges.


Step 3
Now cut a bottom piece for your tote. Again, 11x14.
Pin your bottom to your four sides. Pay special attention to your corners. Then sew, make sure to pivot at your corners.


Step 4
Pin you bias tape to your bottom raw edges. Like above. And sew on.

Step 5
Place cardboard into your sides.
You'll need one more piece of cardboard that is 11 x 14 for inside bottom of your tote.

Step 6
Once you've done that, pin the rest of your bias tape around the top of your tote and sew.

Step 8
You'll also need two pieces of fabric to cover this cardboard. Sew them together leaving one end open.
Put your cardboard inside and sew your opening closed.
Finally, make a handle with your extra fabric or ribbon.
Voila, you are done!! It was cheap and pretty easy. Plus it is the exact size that I want.


No comments
I'd love to hear from you!