There is something about the lights of Christmas that bring magic and fun. My kids always want more twinkle lights and more color.
Finding ways to add more lights can be a bit of a challenge. Of course, I was willing to conquer this little challenge.
I've always wanted to decorate a glass block with vinyl and I thought Christmas was the perfect time to try it.
This post contains affiliate links to products I recommend. I do make a portion off any you may purchase. See full disclosure here.
I've seen these fun glass block projects all over and I thought this would be a great way to bring the holidays into my children's bedrooms.
These glass blocks are sturdy and the lights don't have to be plugged in but can be battery operated. Which makes them perfect for a little ones room.
Also, glass blocks have two sides. Which means you could potentially create two designs, for two seasons, out of one block.
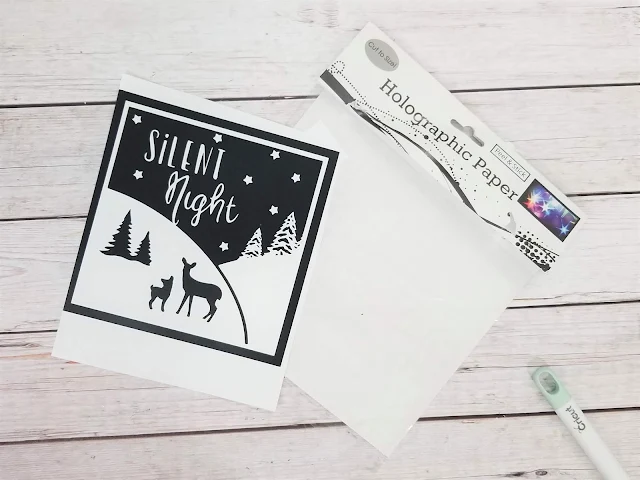
One important part of decorating a glass block is to make sure you have a holographic paper. That is what gives the star shapes when you turn on the lights.
Let me walk you through the easy steps on how to decorate a glass block and share this great cut file.
How to Decorate a Glass Block
Materials Needed
- Silent Night SVG cut file - available for free at the end of the post
- Black Permanent Vinyl (can be removable as well)
- Holographic Paper - optional: although this is what gives the lights a "starry" look
- 8 x 8" Glass Block
- Fairy Lights - in white or colors
- Clear Transfer Tape
Download the free Silent Night block cut file. Cut it out with your cutting machine.
Step 2
Weed your design. Make sure to weed all the small pieces carefully.
Step 3
Remove the vinyl using transfer tape. Place the vinyl design over the Holographic Paper sticker.
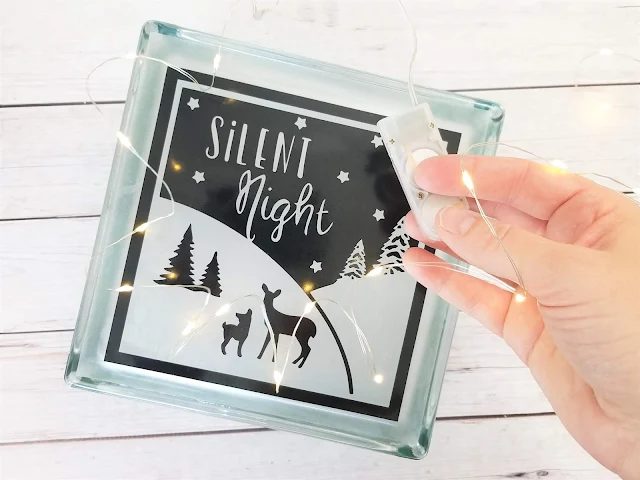
Peel the holographic sticker off and place onto the glass block.
Step 4
Open the fairy lights and place them inside the block.
Turn your lights on and you've got yourself a merry and bright Christmas decoration.
See how easy it is to decorate a glass block. Want the Silent Night cut files? Grab it for free by clicking on the SVG or PNG cut files below.
Need vinyl? Here are my favorite places to purchase heat transfer vinyl and adhesive vinyl.


Looks so pretty and
ReplyDeletethank you for the file.
Merry Christmas.
Carla from Utah
Thanks for the great instructions and links. One question, which one of the holographic vinyls did you choose, there are so many different ones and I have never bought any before. Thank you!
ReplyDeleteGreat question. I used holographic paper for the background not as the vinyl. The vinyl I used was a permanent vinyl. That way it doesn't peel off. However, if you want to remove the vinyl for a future project, you'll want to use a temporary vinyl.
DeleteHello, I just saw your video on the Christmas block. The holographic sticker you used, is it clear or white? Thank you for the svg!
ReplyDeleteIt is holographic paper, not vinyl, and it is a frosty color. Not white. Here is a link https://shop.craftsdirect.com/holographic-paper-6-885827258083-557094/
DeleteTry this one as well from Hobby Lobby https://www.hobbylobby.com/Scrapbook-Paper-Crafts/Paper-Cardstock/Specialty-Paper-Single-Sheets/Holographic-Adhesive-Scrapbook-Paper---12-x-12/p/81041455?gclid=Cj0KCQiA-qGNBhD3ARIsAO_o7ymGwv9DQ6WfchdCAmlUvPUl-xek_twyHib6ZVtTJqlyCb-WtmP5r-saAl2REALw_wcB
Delete