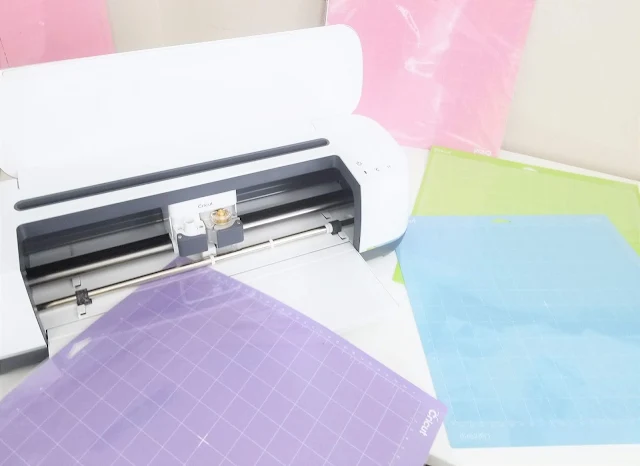
One important part of using a Cricut machine is understanding what cutting mat is right for the project you are working on.
Once you start using a Cricut, you'll get use to each of the cutting mats. But let me share a little bit more about Cricut cutting mats with you.
Once you start using a Cricut, you'll get use to each of the cutting mats. But let me share a little bit more about Cricut cutting mats with you.

This post contains affiliate links to products I recommend. I do make a portion off any you may purchase. See full disclosure here.
However, the Explore Air does not cut all the same materials that the Cricut Maker can.
Check out more about the Cricut Maker here.
Each Cricut mat was created for different materials and purposes. That means each of the mats has a different level of grip.
Some were made with a strong adhesive for heavy projects and others were made with a light adhesive to ensure that your project doesn't rip or tear.
Today I'll give you some tips for working with the Cricut cutting mats and break down each mat for you. We've got a free printable cheat sheet at the end of the post you can download as well.
Tips for Using Your Cricut Cutting Mats
1. When your mat is TOO sticky
When you first use your cutting mat, it might be to sticky and cause you to rip paper or snag materials.
Simply grab your mat place the sticky side up against your tshirt or pants and your surface should now have less stick!
2. When the mat is not sticky enough
If your mat is getting so that nothing is sticking and materials are moving during the cutting process, you probably need to clean your mat.
Grab some natural baby wipes and gentle wipe around in a circular motion. The gunk should start to come off. Allow the mat to dry before using again.
One word of advice. Many people suggest using a sticky adhesive spray to "restick" your mat.
If your machine is still under warranty, this could void your warranty. Beware and use at your own risk.
3. Keep Your Mats Covered
Each cutting mat comes with a clear plastic sheet. KEEP IT!!
After each use simply place the sheet back on the mat. This will keep your mat clean and keep anything you store it with from sticking to it.
4. Tape Heavy Materials Down
I mentioned earlier that heavy materials should be tape down like woods and leathers.
This just keeps the project from moving in the cutting process. Especially if your mat isn't as sticky anymore. You can use painters tape or washi tape to do this.
5. Properly Remove Mat from Projects
Another way to ensure your project looks great and your mat stays clean is to always peel your mat away from your project.
What does that mean?
Lay your mat face down on a flat surface and carefully peel your mat away from your project.
This will help your project to lay flat and your mat to not hang on to extra materials making it dirty.
6. Always Calibrate Blade for Best Cut
Before each project, make sure you have the correct blade for cutting and you have your machine calibrated for that blade.
It really helps to ensure the quickest, neatest cut.
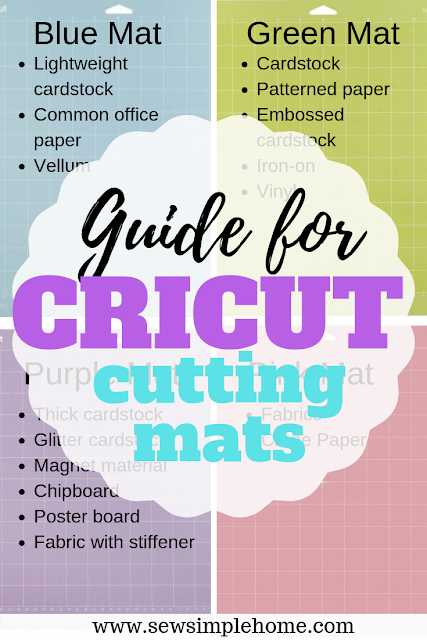
Guide for Cricut Cutting Mats
Blue LightGrip Mat
The LightGrip mat has a light adhesive grip and is perfect for lightweight materials that you don't want to tear or rip during the cutting or removal process.
- Construction Paper
- Copy Paper
- Lightweight cardstock
- Vellum
- Vinyl
- Washi Tape Sheets
- Wrapping Paper
Green StandardGrip Mat
- Cardstock
- Embossed cardstock or textured paper
- Iron-on Vinyl
- Patterned paper
- Vinyl
Purple HeavyGrip Mat
The HeavyGrip mat has a strong adhesive that will hold your material firmly in place during the cutting process.
It is often recommended that you tape down your materials like woods and leathers just to ensure that they don't move in the cutting process. You can use painters tape or washi tape to do this.
- Balsa Wood or Basswood
- Chipboard
- Corrugated Cardboard
- Fabric with stiffener
- Glitter cardstock
- Leather or Faux Leather
- Magnet material
- Poster board
- Thick cardstock
The FabricGrip mat is designed specifically for fabrics. The adhesive is different from the other cutting mats.
One thing to know about this adhesive is that it doesn't not stick well if it gets oily. Try to avoid touching the sticky part of the mat with your hands.
- Bonded Fabrics
- Crepe Paper
- Fabrics
- Felt
What size Cricut Mat do I need?
The Cricut cutting mats come in 2 sizes: 12x12 or 12x24 .Most often you will probably use the 12x 12 mat. It is easier to handle and works for most small projects.
If you plan to sew at all, I highly suggest getting the 12 x 24 mat.
You'll want to be able to cut out larger pattern and fabric pieces or several quilt blocks at the same time. The 12 x 24 will allow this.
Where to buy Cricut Mats?
The great thing about Cricut mats is that you can get them in a lot of places.First, you can buy them directly from the Cricut website. This is great because Cricut often has sales and you can get your mats for a bit cheap than at a fabric store.
You can also get your cutting mats on Amazon. You usually will get a package of 2 or 3 for a good price.
You can also go to your local JoAnn Fabrics or Michaels store and they carry mats. Some local Walmart's are also starting to carry Cricut supplies so you could try there.
I hope this helped you understand Cricut cutting mats a bit better. Cricut projects are much more successful when your have the right mat for the job.


Thanks so much for this article! I intend to buy the Cricut Maker this spring to help with my various crafting interests. I’ll be looking back here for more great information. Spinnin Jenny.
ReplyDelete