When I was first planning our family Halloween costumes this year I knew I wanted to create a cool steampunk theme. I was struggling where to start with my idea.
I was looking on Pinterest at some amazing steampunk hats and knew that was where I needed to start. I found a simple felt hat at Walmart and started experimenting on what this hat would look like. After all that experimenting I came up with a great hat. I wanted to share with you how to make a steampunk hat.
This post contains affiliate links to products I recommend. I do make a portion off any you may purchase. See full disclosure here.
If you aren't familiar with steampunk, it is science fiction placed around a real time period, usually the Victorian period.
Much of steampunk revolves around using steam to power trains and planes. Yes, it is science fiction, but sticking with some of the time period fashion is part of the fun of trying your hand at steampunk. Since it is a period of invention the use of gears, clocks and keys in steampunk costumes is very common.
As I was figuring out how to make a steampunk hat, I wanted to incorporate a lot of these as accessories as part of the design.
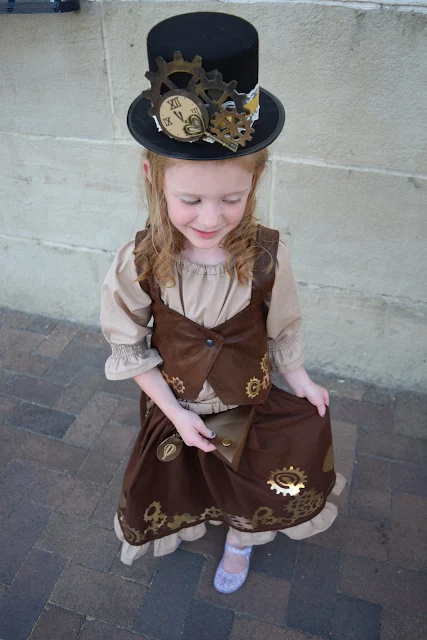
When I started thinking about our costumes, I started with my daughters costume. She is a little inventor. Always creating something new and building projects. You can see our full DIY Steampunk Family Costumes here. Since she is an inventor, I wanted to use a lot of gears as part of her costume. The gears were the base of what I wanted for her hat as well. I found that I could cut out all these gears with my Cricut Maker and really love how they turned out. I like that I could create them and paint them the exact colors I needed without having to head to the hardware store to find something that might work.
I also cut out keys with my maker. After they were cut, I didn't love them as much and decided I wanted some bronze keys and purchased those on Amazon. And since it was the Victorian time period, I wanted all the gears and keys to look vintage and have those metallic and old colors.
Overall, I really love how this project all came together. It was fun to try cutting out chipboard on my Cricut Maker. Once the hat was all done, I decided to make my own cute little hairpiece as well. That is what is pictured above. Now let me walk you through the steps I took to make her steampunk hat.
When I started thinking about our costumes, I started with my daughters costume. She is a little inventor. Always creating something new and building projects. You can see our full DIY Steampunk Family Costumes here. Since she is an inventor, I wanted to use a lot of gears as part of her costume. The gears were the base of what I wanted for her hat as well. I found that I could cut out all these gears with my Cricut Maker and really love how they turned out. I like that I could create them and paint them the exact colors I needed without having to head to the hardware store to find something that might work.
Overall, I really love how this project all came together. It was fun to try cutting out chipboard on my Cricut Maker. Once the hat was all done, I decided to make my own cute little hairpiece as well. That is what is pictured above. Now let me walk you through the steps I took to make her steampunk hat.
How to Make a Steampunk Hat
Materials Needed- Chipboard
- Metallic Acrylic Paints
- Iron-on Vinyl
- TrueControl Knife
- Bronze Antique Keys
- Lace ribbon
- Felt Hat
- Hot Glue Gun
- Cricut Maker
- Knife Blade
Start by opening up our Gears and Keys cut file in Cricut Design Space. You can adjust the size of the gears and keys to what fits your needs.
Move the white gears on your Cricut Make all the way to the right. That way it won't damage or imprint on your chipboard.


Step 3
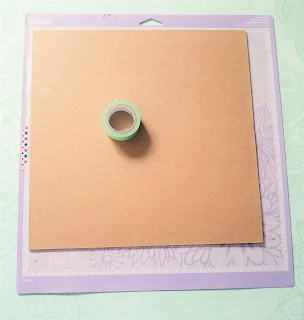
Load the chipboard onto your purple mat. The purple mat is the strongest Cricut mat and will hold the chipboard the best. Make sure to use some type of painters tape or washi tape to hold your chipboard in place. Don't worry if you cut through it, you can remove it later or just paint over it.


Cut out your gears using the knife blade. This process will take some times. Like several hours. So you can set it to cut and check on it regularly to make sure it is doing okay.
Step 5
Remove gears and keys and paint them. I used a combination of black, brown and metallic paints to give them the old, vintage look. I layered the colors with the solid color on the bottom and brushed the metallics over the top until I got the look I wanted. Allow them to dry fully.
I also cut out some circles in chipboard and a clock in iron-on vinyl. I pressed the vinyl to the chipboard with my Cricut EasyPress 2. It worked out really nicely. Just be careful to use the proper temperature.
Step 7
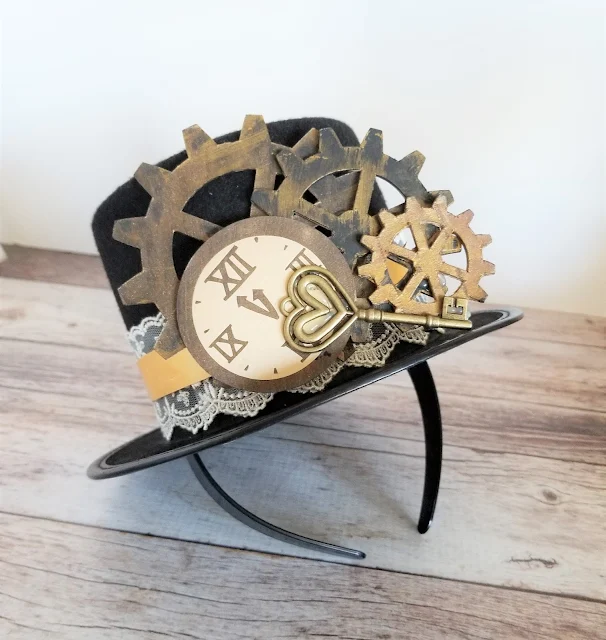
I cut out keys with my Maker machine, but I decided I wanted some actual keys for a difference in texture. I bought this bag of Bronze Antique Keys off Amazon. They worked really well and had lots of great shapes and sizes. They were the perfect addition for how to make a steampunk hat look authentic to the time period.
Step 8
Take your ribbon or lace and wrap it around the base of your felt hat. I did a simple vintage lace with a gold ribbon for a bit of color and to pull out the metallics in the paints I used. Glue it in place with a glue gun.
Step 9
Arrange your gears, keys and clocks in a way you like. I started by laying them out on the table and moving them around. Then place them on the brim of the hat and decide if they will work for you. Once you like what you see, glue it in place.
Cut 2- 1" piece of elastic and glue it inside the hat on opposite sides. Make it a loop and glue. This will hold the headband so the hat will stay in place.
There you have it. A fun and inexpensive way on how to make a steampunk hat. You could easily add a fun pair of goggles or some cute feathers. That's the great thing about steampunk, you can use your own imagination to create the look you want.
I loved how her hat turned out that I used the same idea to create this cute little hair accessory for my costume. I used a few of the gears as a base and added the flowers and clock. When I was done, I hot glued a hair clip on the back and it worked out really nicely.
Well, that's how you make a steampunk hat. Make sure to check out my daughter's entire steampunk outfit in our DIY Steampunk Family Costumes blog post along with our DIY Leather Keychain Tutorial and my 2 year old's Aviator hat and costume.


