How fabulous would it feel to give all your friends and family handmade quilts for the holidays or birthdays? Knowing you put all your sweat, tears and love into a gift just for those you love. That is a pretty big undertaking to make all handmade gifts, but it is 100% possible with Cricut. Yep. I speak the truth.

This post contains affiliate links to products I recommend. I do make a portion off any you may purchase. See full disclosure here.
How do I know it is possible? The Cricut Maker can do some amazing things.

This post contains affiliate links to products I recommend. I do make a portion off any you may purchase. See full disclosure here.
How do I know it is possible? The Cricut Maker can do some amazing things.
Yes, it needs you to guide it and show it what to do, but ultimately, with the help of your Maker, you can make so many wonderful projects in half the time or less. Like an amazing Christmas quilt or beautiful baby blanket.
You can make beautiful creations in so little time and you'll may never go back to hand cutting all those quilt pieces. Today I want to share with your some of my simple tips and tricks for piecing a quilt after cutting it out with the Cricut Maker.

Where do you start? Well, first you have to decide on what Cricut quilt pattern you want to cut out with the Cricut Maker and then you have to decide which quilt kit you want. These two decisions go hand in hand.

Where do you start? Well, first you have to decide on what Cricut quilt pattern you want to cut out with the Cricut Maker and then you have to decide which quilt kit you want. These two decisions go hand in hand.
Yes, you can use most any quilt kit for the quilt pattern, just make sure you have the right amount of fabric before you make your final decision.
Tip #1 - Pick the right quilt for the job
Make sure you take time to decide who and what you are making your quilt for. Is it for a new baby in your life or to set out for the holidays?
Make sure you look at the size measurements and that you are picking a quilt that will work in the space you plan to use it. For instance, I wanted to make a Christmas quilt.
In our current home we have a nice fireplace and I have dreams of our family sitting, drinking cocoa and talking while cuddled under a Christmas quilt.
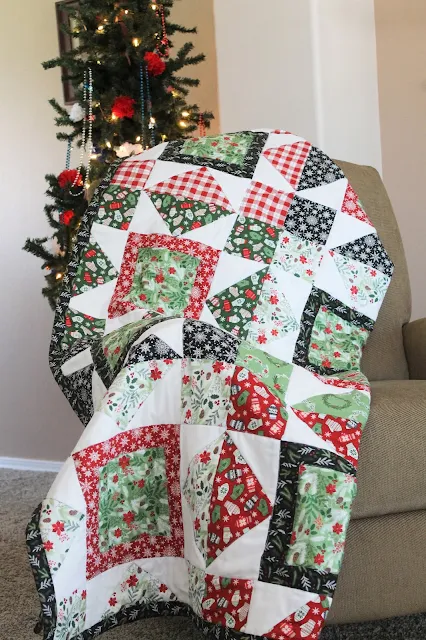
Once I picked my fabrics, I went through the Riley Blake quilt patterns and settled on the Big Star Quiltbecause I loved the look of the stars.
Make sure to head over and check out the beautiful quilt that Angel from Fleece Fun did using the same Riley Blake Comfort and Joy Fabric. It is really pretty!
Tip #2 - Make a design board
Even if you are using a pre-made quilt pattern like the Riley Blake patterns, you'll want to make a design board. This is a sketch, coloring sheet or even an image of your quilt that shows you which pieces of the pattern are which fabric choice.
Like this quilt from Heather Handmade, she made the To a T Baby Quilt and used the coloring chart included with the pattern to create her beautiful baby quilt. This way if you mess up, you can reference back to this design board and ensure you are on the right track.
Tip #3 - Use 1/4" Seams--ALWAYS
When quilting, you ALWAYS use a 1/4" seam allowance. ALWAYS. This can be a bit of a challenge if, like me, you have sewn garments and clothing for so long.
But quilts are designed specifically with 1/4" seam allowances so that all the pieces line up and your quilt blocks are the correct size. When you cut out your quilt pieces with the Cricut Maker, it has them cut perfectly and includes all the seam allowances. Which is so great because you don't have to worry about any of the math!!
That being said, make sure you sew those 1/4" seams carefully or you'll have big quilt squares that aren't the same size at all.
Tip #4 - Layout and stack your pieces
While that Cricut Maker is cutting out all your pieces, you can take time to lay out all your pieces correctly. Make sure the right pieces are together, that all the pieces are correct and accounted for. Then stack your pieces. This will help when you sew to keep you organized and sewing the right pieces together.
Tip #5- Chain Piecing
Chain piecing is when you sew your stacks of quilt pieces together in one continuous stitch. This saves on thread, time and helps keep you a bit more organized during the piecing process. There are lots of ways you might chain piece.
You might start with one row or one square. It really is up to you. Experiment a little with each different design. You won't regret it. Just make sure you have your finished design board somewhere so you can reference it for any mistakes.
Tip #6 - Press. To the Dark Side
Pressing is the key to a beautiful, flat quilt. You'd be surprised how bulky a quilt can get if it isn't pressed well. Start by pressing your seams on the wrong side of the fabric flat and then press them towards the fabric that is darkest.
This may seem difficult if you have 2 pastel colors, but just pick one and stick to that color. Press with and iron or try pressing using the Cricut EasyPress. It heats evenly and gives a really nice flat press. Won't it be nice when your quilt is all finished and pressed and it looks clean and professional because you pressed to the dark side.
Tip #7 - Get a good cutting tools
Despite cutting out everything on your Cricut Maker, you will still need to cut your threads, trim some pattern blocks and even square up your finished quilt.
Make sure you invest in good cutting tools. Like the Cricut Rotary Cutting Kit that includes a self healing mat, clear acrylic ruler and rotary cutter. You'll use all 3 of these tools to square up your blocks when you are ready to piece large sections of your quilt.
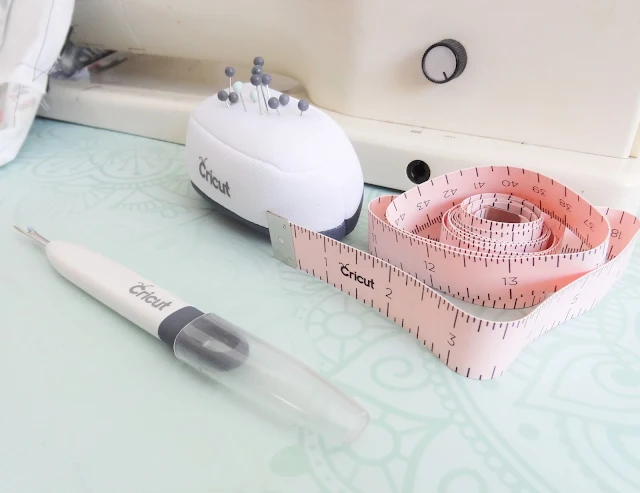
You'll also want a good pair of sewing scissors like those found in the Cricut Sewing Kit. You'll be using them for things like cutting threads and trimming corners or seams.
Tip #8 - Try your walking foot
I never realized before how nice it is to have a walking foot for sewing. But if you quilt, you'll love having a walking foot. It will help move all the layers of your quilt through your machine evenly. If you don't have one, consider investing in one.
Tip #9 - Square up your blocks
It's not as hard as you think to square up your quilt blocks. Especially is you have the Cricut 12 x 24" Acrylic ruler. I'm not exaggerating when I say it is one of my favorite tools for this quilting project.
With such a large ruler, I could easily square up my finished "Big Stars" before I pieced them all together. It made the process quick and efficient. Just pile them up, put your ruler in the corner and square them. Easy peasy!!
Just make sure when you square those big blocks that you don't cut off too much fabric and make your quilt way shorter than planned.
Tip #10 - Handmade is not about perfection, it's about love
Don't get too caught up in making the "perfect" quilt. While the Cricut Maker will cut our your quilt pieces perfectly, we are not machines.
If one or two of your blocks don't exactly line up or you have a big square that seems a little off center. Remember it is not the end of the world. It is the little details that make your quilt unique, handmade and special.
Be proud of the work that you've done. Even if it isn't absolute perfection. It is unique and handmade!! That is special enough.
Comments submitted may be displayed on other websites owned by the sponsoring brand.


