
When it comes to sewing, I love to try new techniques and projects. It is great to challenge myself to a project that I know I will learn a lot with.
That is why I was really excited to try out one of the Riley Blake Quilt Patterns that Cricut has in Design Space. I'm not an avid quilter by nature. There is something about having to measure all those squares and triangles that drives me a little bonkers.
But cutting out fabric on the Cricut Maker, means I don't have to do any of the measuring. I simply load my pattern in Design Space, set up my fabric, load the mat and DONE! It really is that easy.

This post contains affiliate links to products I recommend. I do make a portion off any you may purchase. See full disclosure here.
Before I take you to far into the cutting out process, I want to make sure you check out last weeks post on How to Make a Riley Blake Quilt with the Cricut Maker. This post will show you where to go to find all the Riley Blake Quilt patterns and kits.
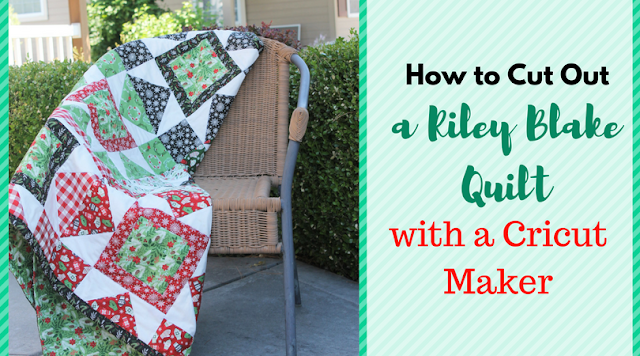
It will also walk you through some of the steps to getting your pattern ready in Design Space. (I am making the Big Star Quilt Pattern.)
Quilt Fabric Preparation
Let's talk about cutting out a Riley Blake quilt pattern on the Cricut Maker. Start by checking out your "Materials To Cut" in Design Space. All the fabric amounts will be listed. These should correspond with all the fabrics in your Riley Blake Quilt Kit.

Your biggest task now is assigning each pattern color to the quilt kit fabric. The best way to do this is to create some sort of "label" for each fabric. You can see exactly how I did this by checking out my Instagram Stories.

Quilt Cutting Preparation
Once you've made sure your fabric matches with the instructions, you can start prepping to cut out your fabric. The first thing I always check is my cutting mats.
Whenever you cut out fabric using the Cricut Maker, you'll want to use the pink Cricut FabricGrip Mats. These are designed specifically for adhering to fabric. For this particular pattern, you'll need the 12" x 24" FabricGrip mats to ensure all the pieces get cut out the correct size.

The FabricGrip Mats tend to loose their stickiness quicker then the blue or green Cricut mats. I think a lot of this is due to all the fibers on the fabrics. They'll also loose more stick with fabrics that have more pile like flannel and fleece fabrics.
That means periodically during your cutting process, you'll need to clean your pink FabricGrip Mat. Luckily, it is a pretty easy process.

I usually start by picking off any of the large pieces of fabric, lint or threads. The best way to do this is using the Applicator and Remover set which includes the Brayer and Tweezers. The tweezers are the perfect way to pull off any extra pieces without getting oils on the mat.
You can also use a heavy transfer tape to help remove excess fibers. If this doesn't work, try using a baby wipe to carefully remove the extra fibers.
Just be cautious and don't scrub, just rub gently. If you'd like more tips and tricks for keeping your pink Cricut FabricGrip Mat clean, check out our How to Clean Your Pink Mat post.

When your pink mat is ready, now let's focus on your Cricut Maker. You'll be using the Rotary Blade for cutting out fabric on the Cricut Maker.
This blade is amazing to watch and cuts everything so smoothly. It cuts through so many different fabrics such as silk, denim, cotton, burlap and canvas. There really is nothing like watching the rotary blade cut across your fabric.
If you don't have the Cricut Marker, you totally need to get even if you only want it for the rotary blade.

Cutting Out Fabric on the Cricut Maker
Once your pink mat is clean and your fabrics are all labeled, you'll want to trim your fabric sections down so they will fit on your 12" x 24" pink FabricGrip Mat. I'll walk you through the steps to make it super easy.
Step 1
Lay the fabric out flat with the selvages at the top and bottom of your self healing cutting mat.

Step 2
Fold the fabric so that the two selvages come together.

Step 3
Using the 12 x 24 Acrylic Ruler, cut each section into 12" wide pieces using a Rotary Cutter.

These will fit perfectly on your mat width-wise. They will hang over on the bottom, but that is okay. You'll than be able to remove the extra fabric, move it up on the mat and start cutting again. It is a great way to save on fabric and takes less time.
If those steps didn't really help you understand, check out this quick video. It will show you quickly how to do these exact steps.
Simple Tips and Tricks for Cutting Out Fabric on the Cricut Maker
Now just a couple more tips for helping make cutting out your Riley Blake quilt pattern a little easier.
Use a Applicator and Remover Set
If you haven't tried out the Brayer or the tweezers, head over to the Cricut shop and grab them. They really will make your life easier when cutting out fabric on the Cricut Maker.
The Brayer is designed to help the fabric adhere to the mat without getting the oils from skin on the mat. With just a little pressure the Brayer can get the fabric to stick and helps get out all the bubbles.
The Tweezers are perfect for lifting the fabric pieces off the mat after they've been cut. They are also great for cleaning the pink FabricGrip mat.

Work While It Cuts
While the Cricut Maker is cutting your quilt pieces, you can use the time to iron your fabric, match your pattern pieces or even start some of the sewing.
I actually did my morning chores while my Maker was cutting. I'd load the mat and go help kids get dressed, fixed breakfast, and did some dishes.
When I had a moment, I'd switch the fabrics and stack them. Cutting out fabric on the Cricut Maker really saved me time and effort that I could use somewhere else.

Now that I have my quilt pieces cut out, I'll will say the process is painless. It still takes time, because you have a lot of pieces to cut out.
However, it is so nice to not have to measure the pieces and be super accurate with each cut. The Cricut Maker takes all that away.
Yes, you still have to sew it, but how much easier that process is now that all the pieces are cut exactly the right size.

Don't forget to check out some of our other Cricut Maker projects. And see our finished quilt along with tips on piecing a quilt.


This is a sponsored conversation written by me on behalf of Cricut. The opinions and text are all mine.
Comments submitted may be displayed on other websites owned by the sponsoring brand.


This is a sponsored conversation written by me on behalf of Cricut. The opinions and text are all mine.
Comments submitted may be displayed on other websites owned by the sponsoring brand.


