I enjoy creating custom gifts for friends and family. Don't you feel special when someone creates something just for you?
You get a fun gift with your family name or child's name and you know the maker created it just for you. They took time to decided what you'd like and then personalized it just for you.
This post contains affiliate links to products I have used and highly recommend. I do make a portion off any you may purchase. But I wouldn't link to them if they weren't awesome! See full disclosure here.
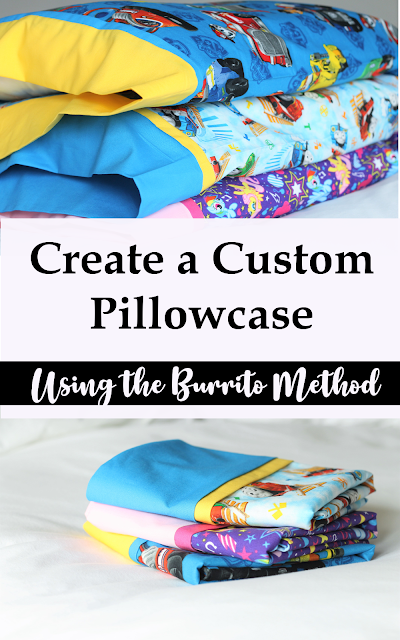
Pillowcases are one of my favorite custom gifts to give. You can find fabric that has the persons favorite character or fits into the colors of their room to make this easy burrito pillowcase pattern.
Today I want to teach you how to sew a pillowcase using the burrito method.
A burrito pillowcase is actually very easy to make. This method encases some of the seams for a really nice finish on the inside.
Once you've tried the burrito method you won't want to sew a pillowcase any other way. This is a little different than how to sew a standard pillowcase, but the dimensions are the same.
First, let's answer a few questions people tend to have about sewing a pillowcase.
What is the size of a standard pillowcase?
The standard pillowcase is about 22" x 32". This is a pillowcase that will fit a twin or full size pillow.
You can make this pillowcase pattern a bit larger for queen or king size pillows by adding a few inches to the length and width. But the measurements in this pillowcase tutorial are for a standard pillow size.
How much longer should a pillowcase be than the pillow?
Anytime you are sewing to cover up an item, you want to make sure there is enough room for some movement.
Typically, with a pillowcase, you'll want to be at least 2 inches wider than the pillow. And at least 2-3 inches longer. You can go less, but if you don't want that pillow peeking out, stick to the above measurements.
If you are wanting to make your own pillow, check out our popular pocket pillow pattern.
How to Sew a Pillowcase
Materials Needed
- 1 yard of Cotton Main Fabric
- 1/4 yard of Cotton Top Fabric
- 1/4 yard of Trim Fabric
- Thread (I personally love Gutermann)
- Heat Transfer Vinyl (for adding names)
- Cricut Maker
Check out the video at the top of the page if you want to see how I sew the pillowcase together.
Step 1
Cut out your fabric as follows:
Main Fabric - 27" x 41"
Top Fabric - 9" x 41"
Trim Fabric - 2" x 41"
Step 2
Take your Trim Fabric and fold it in half lengthwise and press.
Make sure you have a nice crease pressed. This will make the pillowcase look really nice at the end.


Step 3
Line up the raw edges of the Trim Fabric to the Top Fabric.
With right sides together, place the Main Fabric over the trim and top fabric. Pin across the 3 layers of the burrito pillowcase.
Make sure those raw edges are matched well. You don't want them peeking out on accident later.
Step 4
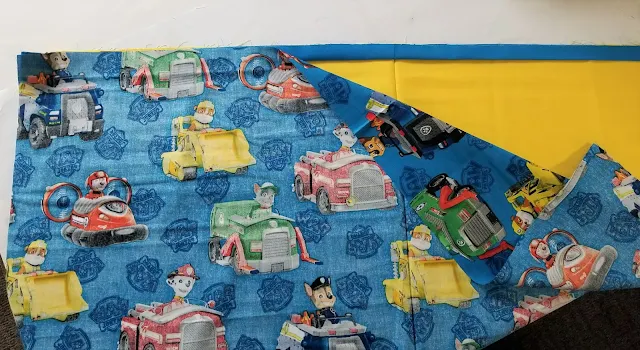
Roll the Main Fabric up until it is in the middle of the Top Fabric. This is where the burrito method comes in.
You can see in the photo that the main fabric is sitting right in the middle of the top fabric. This will help with the next step.
Step 5
Fold the bottom edge of the Top Fabric and match it with the 3 pinned layers and re-pin to add the fourth layer.
All those raw edges should be matched up and the main fabric is rolled in between all the layers.
Step 6
Stitch across the 4 layers so it makes a "burrito". Carefully pull the inside of the burrito pillowcase out and turn the pillowcase right side out.
If you are a little confused right now, take a moment to check out this quick video tutorial. You can watch as I sew up one of the pillowcases using the burrito method in the video on the page.
Step 7
Once the burrito pillowcase is turned right side out press. Fold the pillowcase in half matching the long sides.
Stitch down the long side and across the bottom.
You can also use a french seam to finish off your pillowcase if you want all the seams enclosed. Check this Dog Pillowcase to see how to sew a french seam.
Step 8
Clip the corners of your pillowcase. Clip them right to the edge of the stitching but not through it.
Step 9
Finish your raw edges with either Pinking Shears or another seam finish. {Check out our Seam Finishes 101 post for more options.}
Tada!! You have a quick pillowcase you can use as a gift. But wait! Let's make it even more special.
Everyone loves a fun pillowcase with their name on it. Just so no one else in the house can claim it as their own.
With just a bit of HTV Vinyl you can add a name and personalize this fun pillowcase.
Check out this post on how to use HTV vinyl and apply it to fabric with either an iron or and the Cricut Easy Press.
Liked this quick burrito pillowcase pattern? Check out some of our other great and simple sewing tutorials on our Sewing Tutorials Page.


