
Are you like me and enjoy new decorations for each season and holiday? The biggest challenge for me is how to store everything. Pillows are particularly difficult.
That's why I love using envelope pillow covers. They are a great way to keep a pillow covered and an easy way to keep them clean. Today I thought I'd show you how to make an envelope pillow cover.

This post contains affiliate links to products I recommend. I do make a portion off any you may purchase. See full disclosure here.
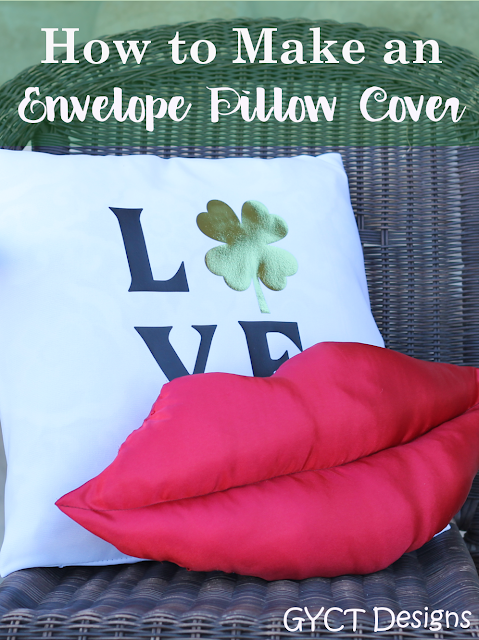
{If you like that Kissy Lips pillow, you can get the pattern and tutorial here.}
Related: How to Fix a Ripped Pillow
Related: How to Use Iron On Vinyl

Luckily, Cricut Design Space had some fun cut files to choose from that were St. Patrick's Day themed. I decided on this "Luck" cut file which is actually a t-shirt file, but works perfect for this pillow cover as well.
With my cut file chosen, I was ready to sew up a pillow cover quickly. Let's get sewing!!
How to Make an Envelope Pillow
Materials Needed
- Pillow
- Fabric to cover pillow
- Thread
- Sewing Machine
- Iron On Vinyl (HTV)
- Cutting Mat - Cricut has several weights of mats, you'll want the blue or green for vinyl
- Weeding Tool Kit
- Cricut Maker
- Cricut Easy Press
Step 1
Open up Design Space. Search for the SVG file you'd like to use. Click on the file and then select customize. This will allow you to change the size of the cut file. {I used the Love St. Patrick's Day file from Design Space.} Make sure when you cut it out that you MIRROR your image or you'll be wasting your Iron-On Vinyl.
Step 2
Use your Cricut Maker to cut out your "L,V, E" and the "shamrock". You will cut both of these designs separately.
Make sure you let your machine know that you are using Iron-on. And if, like me, you used the foil Iron-on, you'll want to make sure that your machine knows this as well. Or it will cut through your design to the mat. (Trust me, I've done that.)

Step 3
Follow the video below to measure and stitch up your envelope pillow cover. Pretty much you'll just need to make sure you measure the length and width of your pillow, but you can use your fabric to do this quickly.

Step 3
Follow the video below to measure and stitch up your envelope pillow cover. Pretty much you'll just need to make sure you measure the length and width of your pillow, but you can use your fabric to do this quickly.
Step 4
Once the pillow cover is all sewn, press the vinyl onto the front of your pillow using your Cricut Easy Press or iron. Make sure to check your cheat sheet that comes with your Easy Press to know what temperature to press at . Or you can head over to our Printable Cricut EasyPress Temperature Guide and print one for your craft room.


Do you like that cute Kissy Lips Pillow? Get the free SVG cut file in this post.


