Drawstring Tote Bags are perfect for all sorts of projects. They work great for keep toys out of your way. We use them to pack shoes and clothes around. Or you can use them to organize your holiday decorations. It is great to know how to make a drawstring bag for all sorts of projects.
Whatever you use a drawstring tote or bag for, you'll love knowing how easy it is to make them. Monday we talked about How to Make a Casing for our Sewing 101 Series. Today we are going to put that skill into practice and how to make a drawstring bag.
How to Make a Drawstring Bag
Materials Needed
Drawstring tote bag measurements
2 Fat Quarters of fabric
35" of ribbon
Thread
Step 1
Cut 2 fabric pieces 14" x 15". Cut the ribbon 35" long. Place the two pieces right sides together. Pin in place.
Step 2
Measure from
the top edge down 1” and mark with a pencil.
Mark again at the 2” mark.
Step 3
Begin sewing at the top of the bag. Sew down to the 1” mark. Backstitch and cut your threads. Begin sewing at the 2” mark.
Backstitch and continue sewing all the way around the bag. Making sure to turn your corners. Stop on the opposite side of the bag.
Step 4
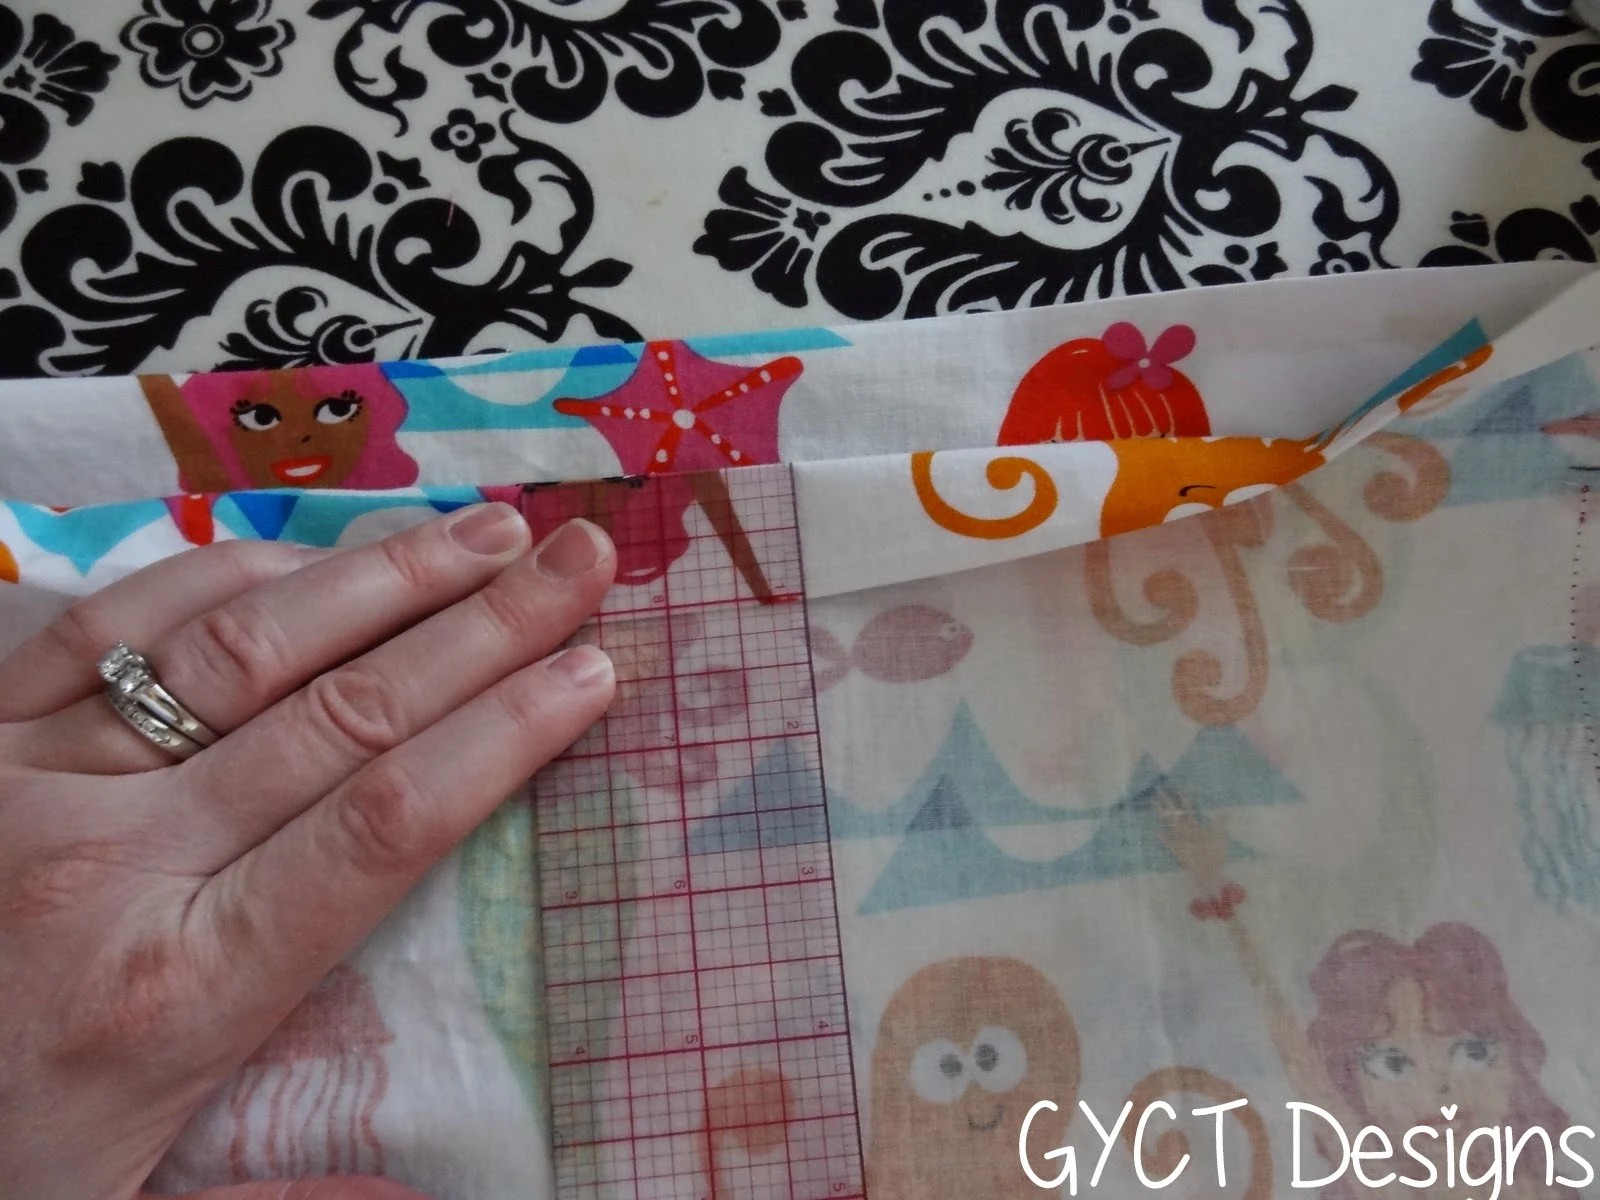
Press the top edge of the bag down ¼” all the way around the
“circle”. Roll down another 1” and iron
again. Pin in place. This is your Casing for you ribbon.

Step 5
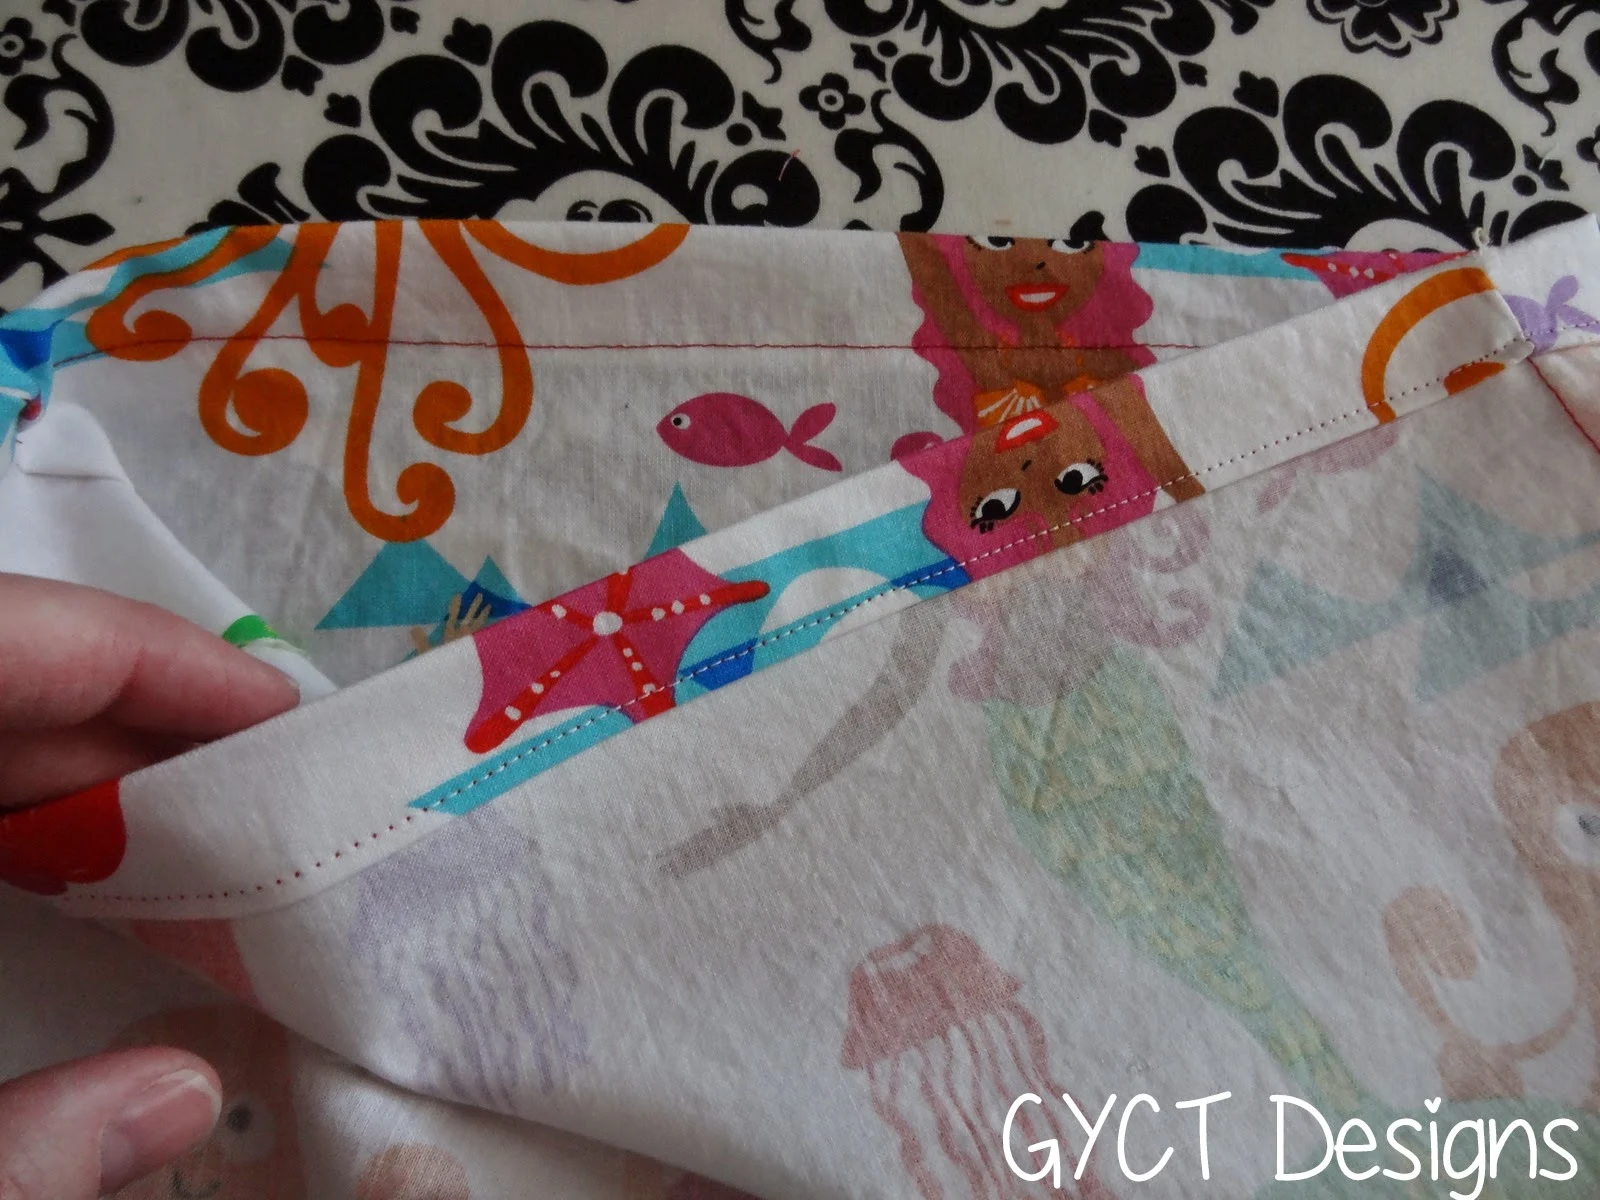
Place the bag over the arm of the machine. Stitch a casing around the bottom edge of the ironed casing.

Step 6
Cut your corners and finish your seams with pinking shears or zig-zag stitch. (Check our our Seam Finishes post here)
Step 7
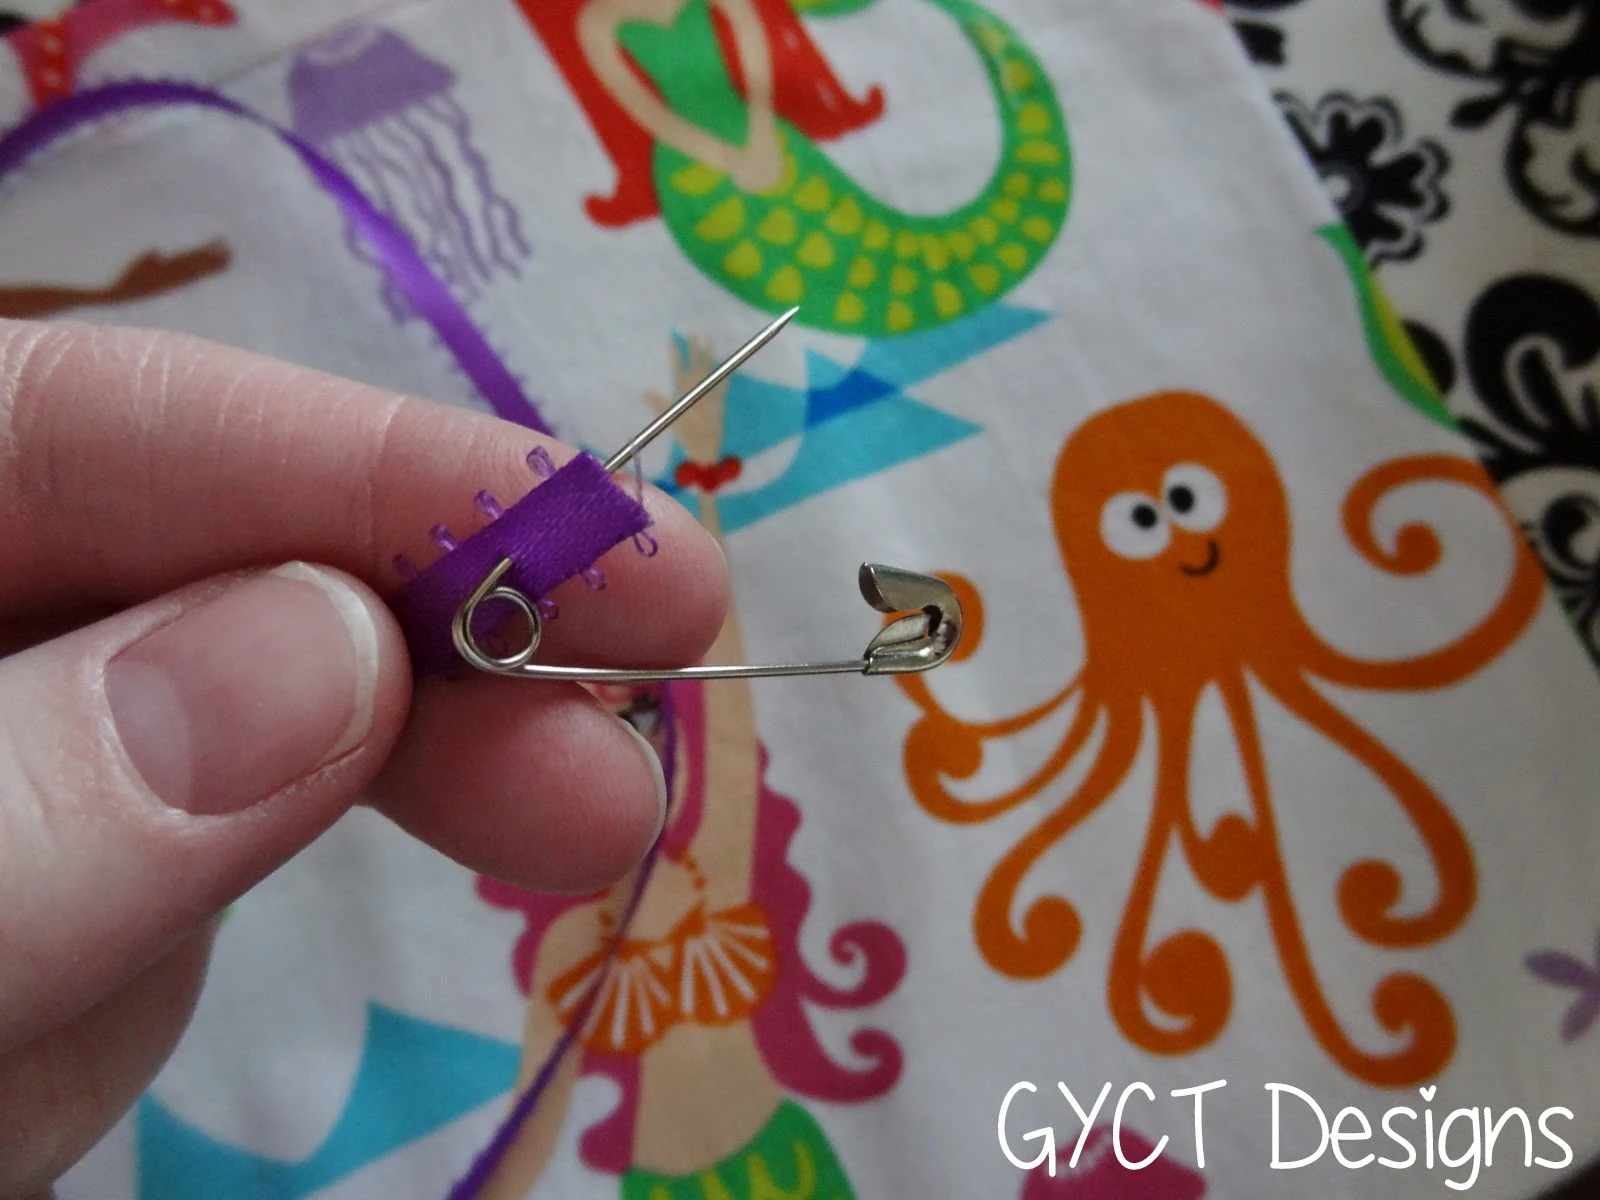
Place a safety pin on the edge of the
ribbon. Thread the ribbon through the
hole in the bags casing. Slowly thread
the ribbon all the way around the casing.
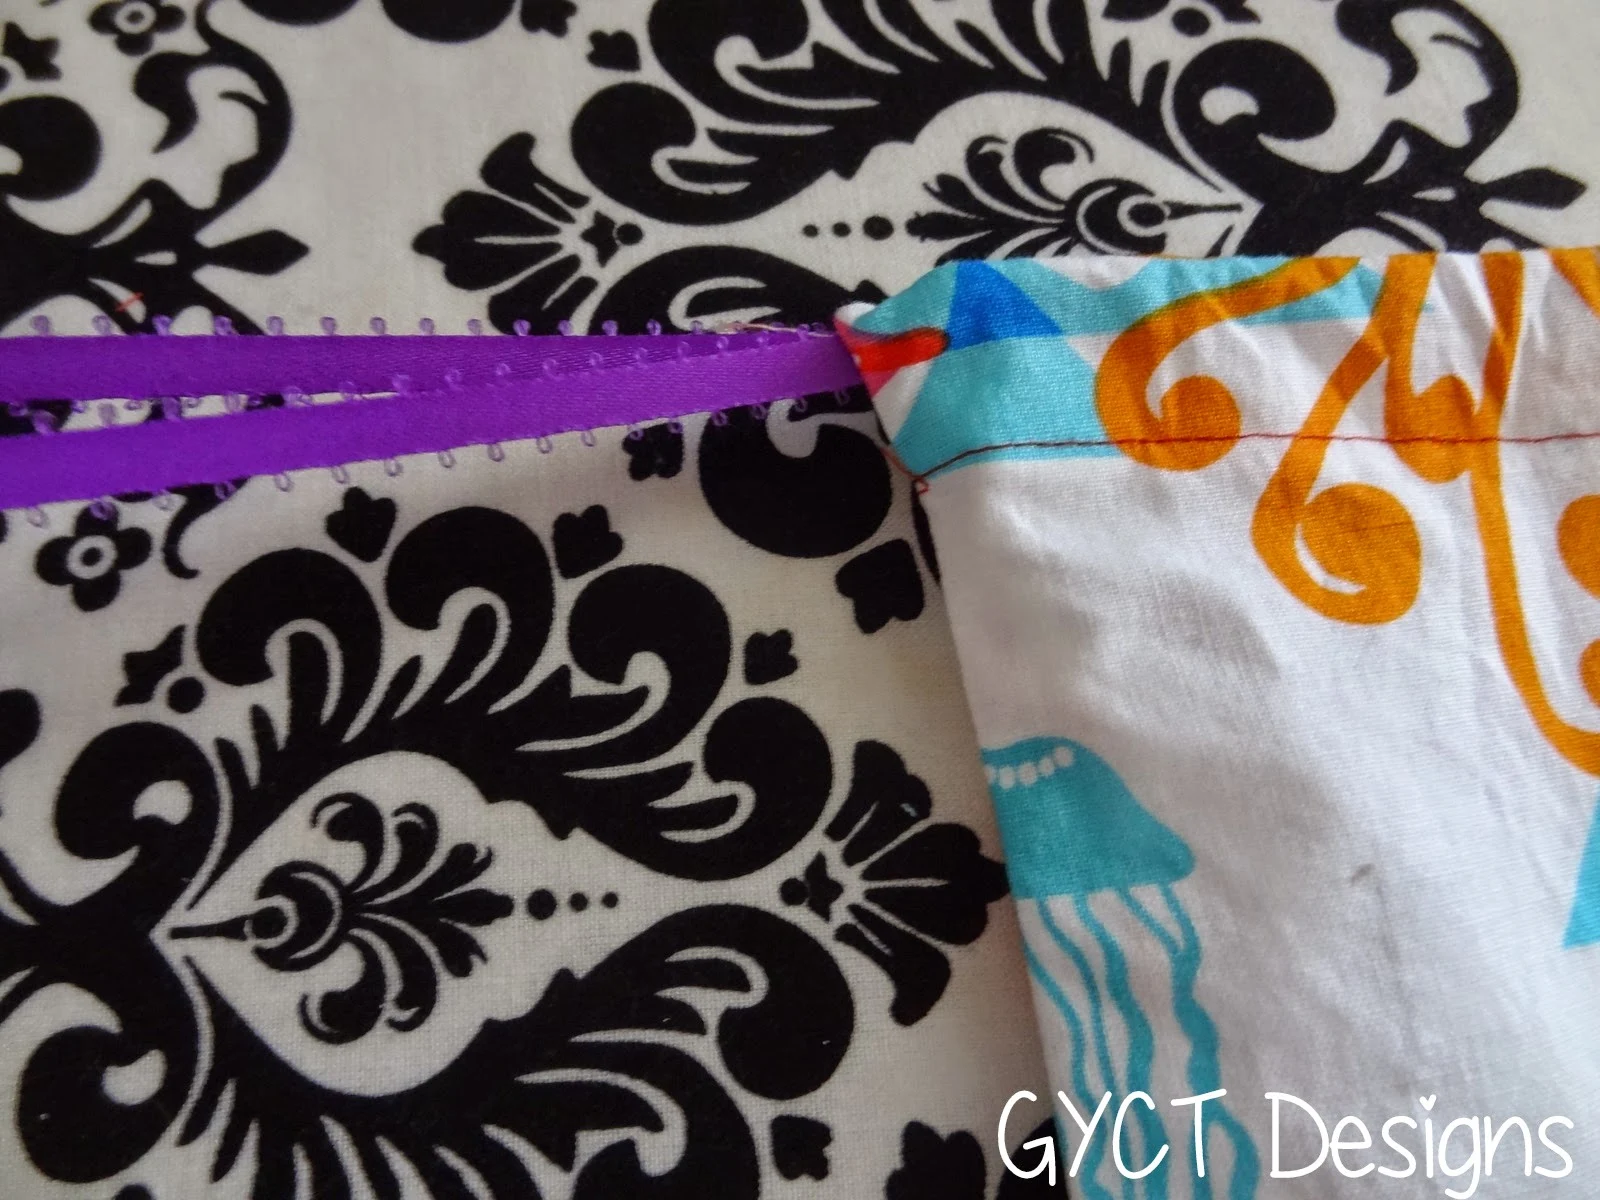
Pull the ribbon back out of the hole.


Step 8
Finally, tie the ribbon at the bottom so it doesn't get pulled back into the bag.
Now you’re done!!
All done and ready to fill!! Now you can see how to make a drawstring bag. You've also made a casing which you'll use for loads of other projects. Next you'll be ready to sew up some elastic casings like in our Jean and Jamey Jammies Pattern.


