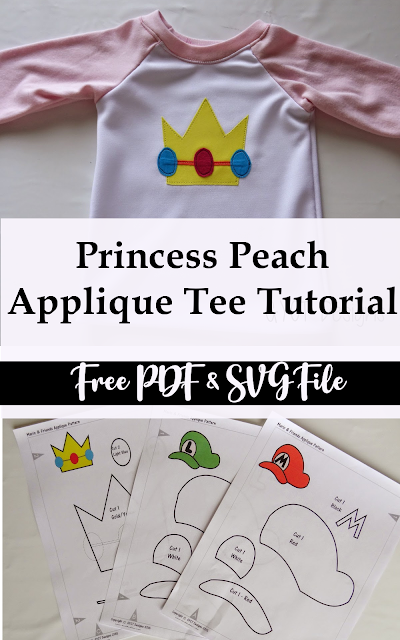
Are you a fan of the classic Nintendo hit Super Mario Bros.? It's been one of kids favorites for years. But, who says dressing up has to be reserved exclusively for Halloween?
Today, I'm going to show you how easy it is to create your own sleek Princess Peach Shirt – with only basic sewing supplies and techniques!
Perhaps you've already checked out our Mario and Luigi t-shirt applique. Totally loved how it turned out. However, as I was making the little man's shirt, I decided sister needed a shirt, so was born the Princess Peach Applique.
This post contains affiliate links to products I recommend. I do make a portion off any you may purchase. See full disclosure here.
If you are new to sewing or just have never made a t-shirt before, let me tell you this is one of the EASIEST projects you could ever do. It sews together quickly and you really don't need a ton of material.
You can always make your own t-shirt using our Rival Raglan Pattern. Or, just head to your favorite craft store and pick up a blank tee. Either will work out just great.
Okay, let's get sewing.
DIY Princess Peach Shirt
Materials Needed
- Princess Peach Applique pattern or SVG - get at the end of the post, look for the peach buttons
- Blank tshirt or grab the Rival Raglan Pattern
- Yellow, blue, red and brown scrap fabric
- Heat'n Bond
- Permanent Marker
- Thread
This pattern includes both a printable PDF applique pattern AND an SVG pattern to cut out using the Cricut Maker or Silhouette Cameo. Check out this post about customizing tees to see other ways you can use appliques.
Step 1
Print off your applique patterns. The size t-shirt I made was a 2. So if you are making a larger or smaller shirt, you might consider enlarging or shrinking the design before cutting it out.
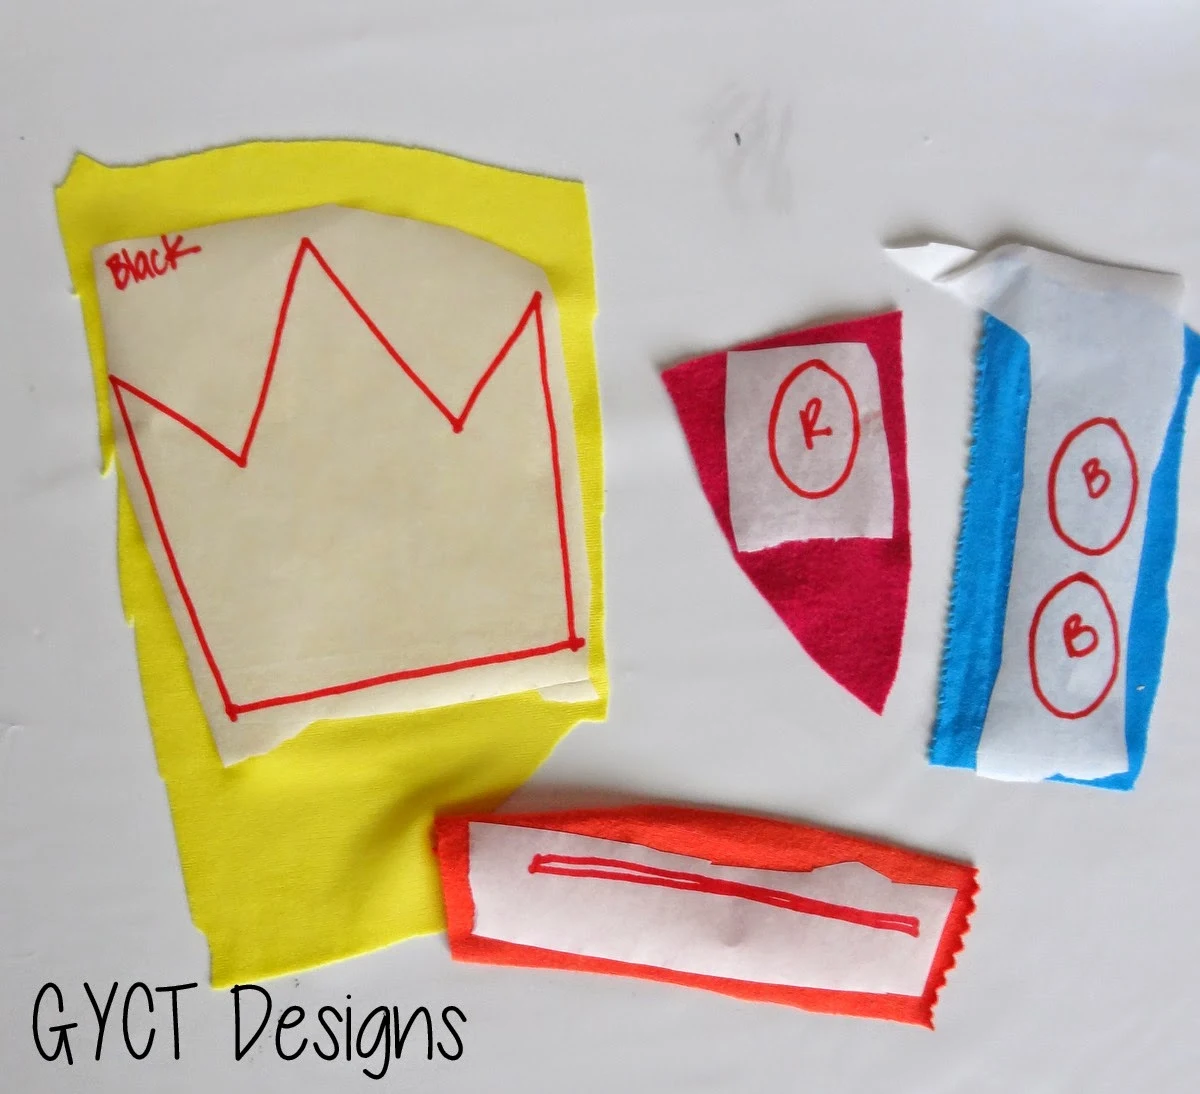
Trace each pattern piece onto your Heat'n Bond. If you are not familiar with Heat'n Bond, it has a smooth side and a shiny, bumpy side. Make sure to trace on the smooth side.
Step 2
Iron each of your transferred designs onto the correct color of scrap fabric.
The crown should be yellow, the long, skinny rectangle brown, one jewel should be red and the other two blue. Once the pieces are ironed on cut them out with some nice sharp scissors.
Peel off the backing the paper part of the Heat'n Bond. You should now have a shiny film on your fabric.
Step 3
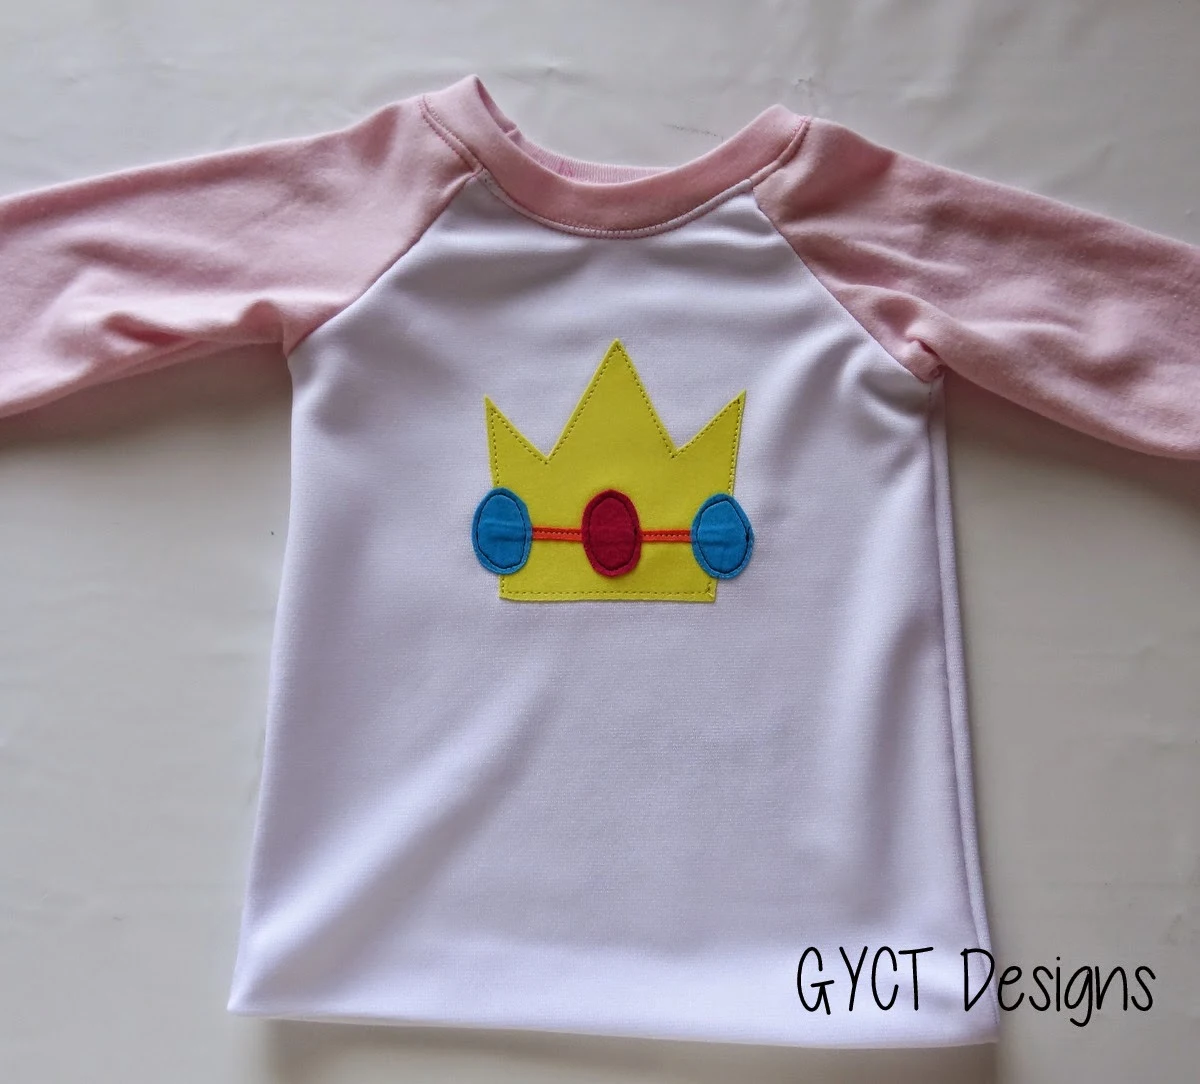
Lay the front of your t-shirt on a flat surface. Grab the yellow crown and iron it where you would like on the t-shirt.
Stitch around the outer edge of the crown so it stays in place. It is much easier to stitch onto a t-shirt if the shirt is not yet sewn together. But it can be done either way.
Step 4
Take your brown strip and iron it onto your crown. Use the placement markings on the pattern to help you know where to place it. Stitch across the rectangle to keep in place.
Step 5
Iron your 3 jewel pieces on, with the red in the middle. Stitch around each jewel to keep in place.
Step 6
Follow your sewing instructions on how to add the sleeves, back and neckband.
You did it! You have your own Princess Peach t-shirt!
This same process works for cutting out iron on vinyl and using this pattern as an SVG cut file instead of sewing applique. You can get either of the files down below.
Want the free diy princess peach shirt templates? Simply click the peach colored button below to download the pattern.


.jpg)


