I love the holiday season. I love the smells, the chill in the air and the chance to share fun projects with each of you. Earlier this year I got to share with you my fun Mitten Keepsake Ornament. It was such a fun little project and perfect for making into a simple DIY winter mitten garland project.
We LOVE mittens. Each year my children get to pick out new fabric and we sew up a new pair of mittens with the Frosty Mitten Pattern. However, each year it makes me a little sad because their little hands have grown. I mean how do you stop children from growing up?! (I'm serious, send me your tried and true ways. They need to stay little longer!!)
Anyway, this year I decided to conquer the growing and make a little keepsake that we can use to look back on those little people. I created a cute little mitten garland so we can remember how tiny those hands once were.
This is a fun project you'll enjoy as well. Make your own mittens and display them for the season on your mantel or tree. Make them even more special by using your little ones hand prints to create the template, or you can print ours. That way you can keep those little hands close to you for years to come.
Winter Mitten Garland Tutorial
Materials Needed:
Several Sheets of Colored Felt
1 Pkg Embroidery Floss
2" pieces of Ribbon
3-4 feet of Ribbon
Thread
Begin with your mitten template. Cut out 2 pieces of felt for each mitten. I cut out 10 mittens for my garland.
You can either download our pattern above or just trace around those little hands of your child or grandchild. Make sure they keep their fingers together and their thumb out.
Step 2
Grab your embroidery floss. Take one strand, unwind it and take from that 2 pieces of floss (you can do more if you want a real thick stitch). Then thread your needle. You will be using a blanket stitch to stitch together your mittens. You can see below the basics of a blanket stitch.
Go around your entire mitten with the blanket stitch, leaving only the straight edge at the bottom open.
Step 3
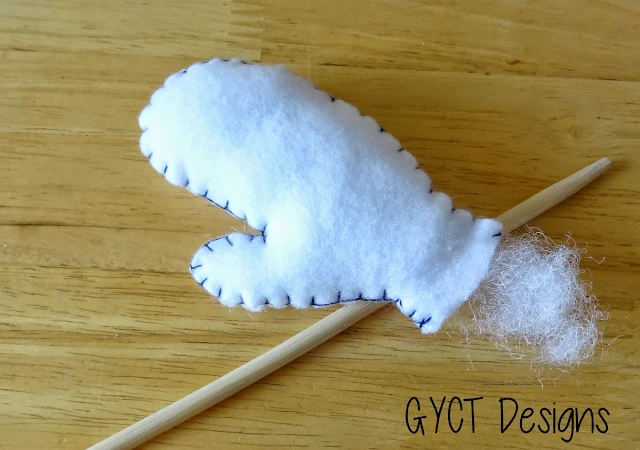
Take your fiberfill and stuff your mittens. You don't want them to puffy, but you do want some shape to them. Use a small dowel or pencil to help you get the stuffing into the thumb and around the round edges.
Step 4
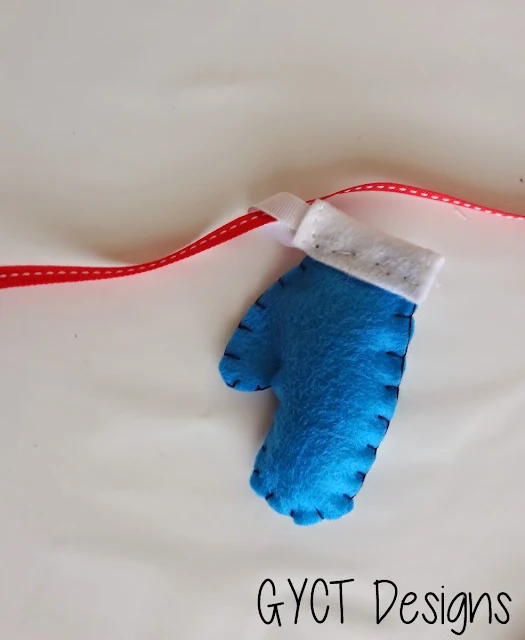
Now you will need ribbon and rectangle pieces of felt. This rectangle only needs to be big enough to cover the straight edge opening on the bottom of the mittens. Fold the rectangle in half at the bottom of the mitten and pin. Loop your ribbon and place it in between the mitten and rectangle and pin. Stitch around the rectangle to keep all the pieces in place using a whipstitch.
Step 5
Repeat all the steps with each of your mittens. You should have at least 10 or more depending on how big a space you plan to hang your mitten garland from.
Step 6
Take your 3 feet of ribbon and thread your mittens onto the ribbon. Space them about 5" apart. Make sure they are facing the direction you want because you'll be tacking them down.
Step 7
Thread your needle with thread and tack your mittens to the ribbon. Repeat with all the ribbons.
Now you can hang your mitten garland. You can put it on a Christmas tree or outside on a fence or hang it from the mantel. You can look at it and cry realizing those little hands are growing up way to fast. I mean, you can smile with the fun memories from holding those small hands.
We've hung our mitten garland in some many fun places and the children love to measure their hands today to their hands from years ago.
One more tip to add, you can always stitch the child's name and year on the mittens and add a new set each year. This makes a fun tradition and a great way to "measure" your child from year to year. However, you choose to make your winter mitten garland, you'll enjoy them each year.
********************
Interested in some in our free printable Christmas sewing patterns? Sign up below and you'll get all 5 free right to your inbox.


