

Today we are excited to have Kelly from Ruby and Jack Patterns. She is sharing her adorable DIY Unicorn Hoodie Horn and Mane Tutorial using the Denali Jacket hood. This is a great and fast Halloween costume. Your little ones will love.
Don't forget to check out our other great unicorn posts like our Unicorn Birthday Party and our Unicorn Printable Valentine.
-----
This post contains affiliate links to products I have used and highly recommend. I do make a portion off any you may purchase. But I wouldn't link to them if they weren't awesome! See full disclosure here.
If you want to go crazy, you can even make her an "alicorn," which, as my daughter taught me, is a magical horse with wings AND a horn! Your my-little-pony fan is sure to be impressed with both your sewing and your knowledge if you use the word "alicorn." ;)
You'll find links to the FREE printable pattern pieces for horn, ears, and wings, below the tutorial at the bottom of this post.
Let's get started!
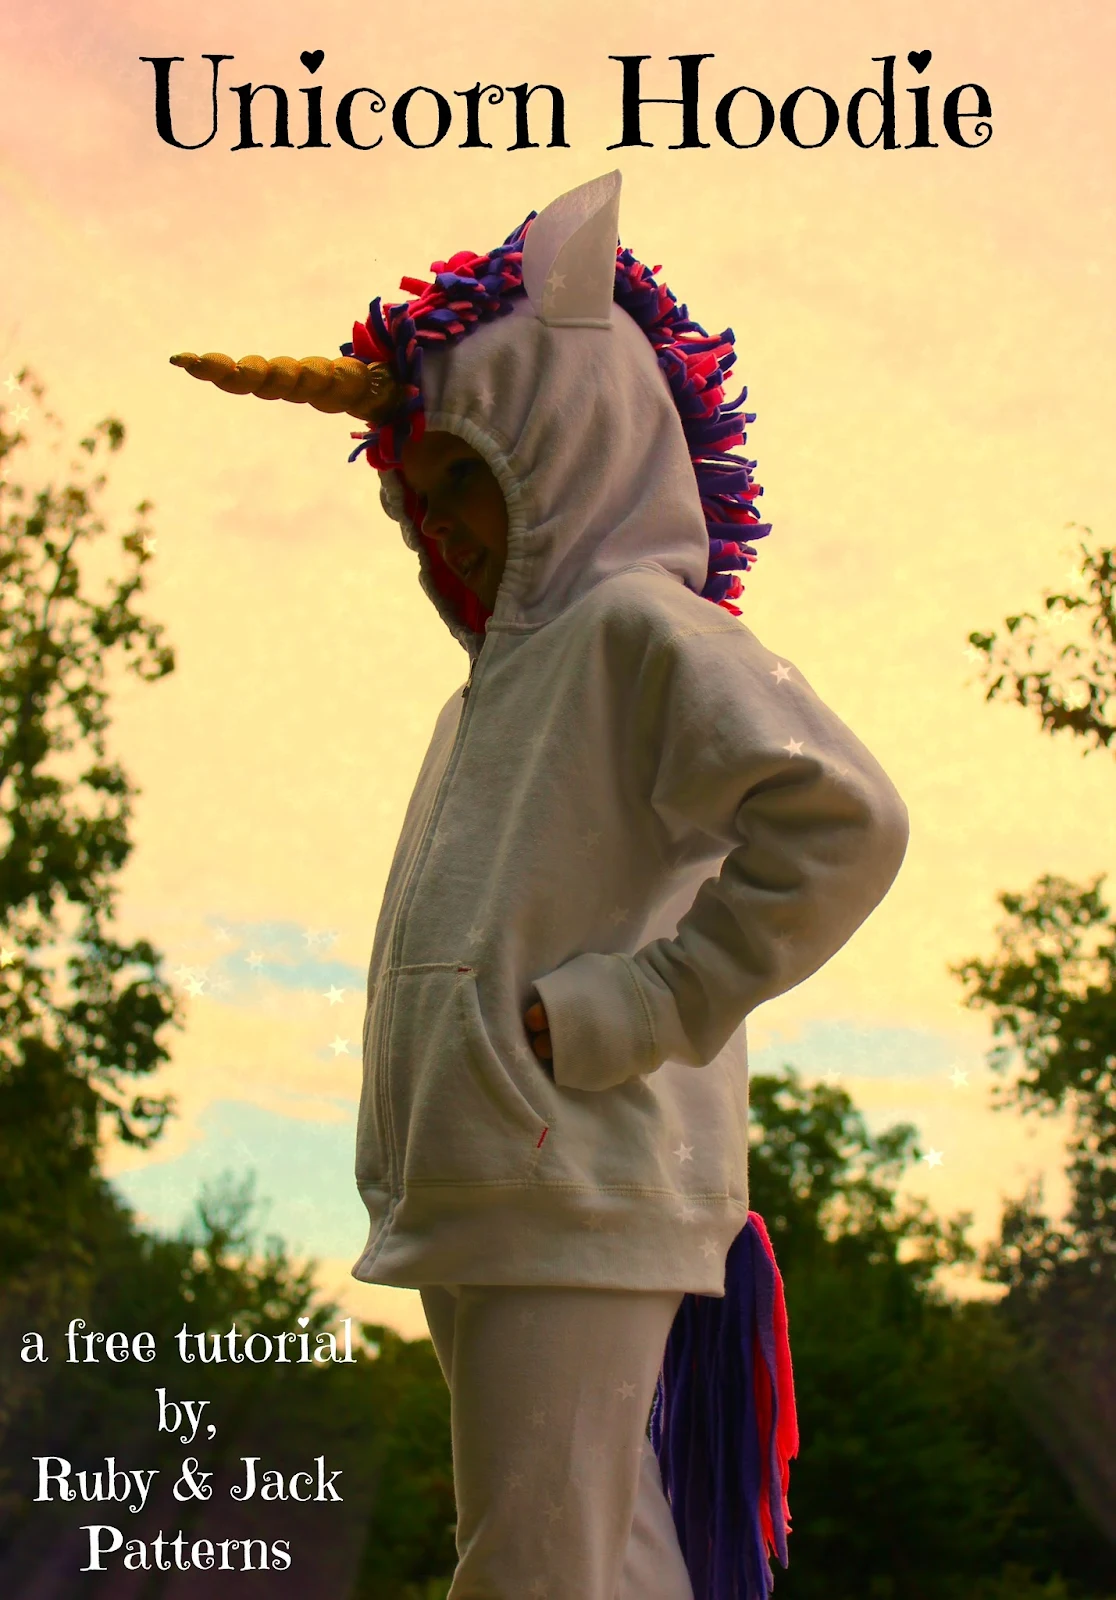
The first item you'll need is store-bought hooded sweatshirt. (Or you could sew your own hooded jacket, using a pattern such as Ruby and Jack's April Showers Raincoat or GYCT's Denali Jacket.) NOTE: I inserted a strip of elastic through the casing on the front edge of my hood, so that it fits more securely around the face. This is something to consider based on the shirt/jacket you choose to work with. You'll also need a bit more than 1/8 yard each of the following: 3-4 colors of fleece (for mane and tail), felt (for ears and wings), and sparkly stretch dance wear type fabric and stuffing (for horn). To make a unicorn horn, you'll also need a long "doll-maker's" needle and strong thread such as jeans, embroidery, or button sewing thread.


MANE: Measure around the top of your hood* from the front down to the neckline. For the bottom layer of your mane, cut a rectangle of fleece that measures about 5 inches wide, and is the length* of your hood. Your second hood layer will be 4 inches wide by hood length*. The third layer will be 3 inches wide by hood length*. (You may use more than three layers if you like. I'm just using three for the example.) Center your layers one on top of the other so that all colors show, pin, and sew them to your hood down its back center seam(see vertical dotted line in the picture). Now, use scissors to cut evenly spaced lines on both sides of each layer. Cut toward the middle and perpendicular to your center seam (see horizontal lines). On each cut line, make sure to stop about 1/4 inch from the seam, creating the look of hair. Shake the shirt gently to fluff up your mane. You may decide to clip the "hairs" a little shorter at the front so they don't fall into the face when worn.


TAIL: For the bottom layer, cut a fleece rectangle apx. 4" x 12". The second layer will be about 4" x 11"; and the third will be 4" x 10". Angle the bottom corners of each. Align all 3 layers so the top edges meet and the bottoms taper as shown. Flip your stack of layers over and upside down. Lay them on the back of your sweatshirt. Center your stack toward the bottom, middle point and stitch it down (see horizontal line in picture). After you stitch, start at the free end of your tail strips. Use scissors to cut even lines almost all the way up, making sure to stop before you reach the seam (see vertical lines). When you pick up the sweatshirt, the tail will flip down and look like hair.


EARS and WINGS: Print the pattern pieces below and use them to cut ears and wings (if desired) from your felt. Fold each ear in half, position it on the side of your hood, and stitch it down. Make sure ears are placed in the same spot on both sides. Position wings on the back of your shirt, and secure them by stitching down the middle. I just made simple white wings for this example. You can use the small inner wing outline to make a top layer and add extra dimension to your wings if you'd like.
That's how you make a unicorn horn! I hope you and your little one have fun with this. Thanks for checking out my post. I hope we meet again. You can visit me at my Facebook page, Etsy shop, and blog!


