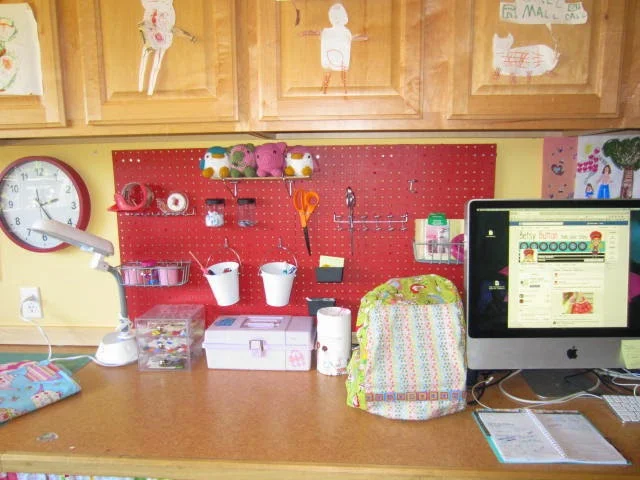
Hi I am Kathy from Handmade Dress Haven and I am happy to be sharing with you today about how I got my crap together in my sewing area.
I blog about sewing for my two girls, myself, my home, and for my sewing business Delphinium Designs. I sew mainly girls clothing and I have been busy this year! For me, sewing at least a few hours a day, every day, leads to clutter. And clutter leads to loosing things, like seam rippers and spools of thread and parts of patterns. So, I took advantage of this blog series to make my work space not only more neat and tidy but more useful.
My sewing space is actually a portion of our daylit basement/family room. I sew/create in a corner of it. You can read more about my first attempt at organizing it, from this April 2012 post. As you can see, that was a good start with storage and using the space but the cutting desktop was still becoming a disaster and leading to me loosing items. So, I got my crap together!
The third part of this peg board tale has to do with installation. In order to support the weight of my stuff and provide space for the pegs, the peg board had to be screwed into 2X1 boards that were screwed into the studs in the wall. But, several of our studs registered hot on the stud-ometer. Okay, it is not called a stud-ometer, but the thingy you use to find studs. It beeps if they are hot. Apparently, this means there is electricity too close to them and you cannot screw metal screws or nail nails into them or you will wreck havoc and possibly cause bodily harm to your installer.
Soooo, my husband could not create a frame for this peg board nor could he install peg board the entire length of my wall. Instead, he installed the 2X1 boards just across the top and bottom and screwed them into two studs. But, I am happy with my shorty peg board because it holds enough stuff and I made due in other ways on the rest of the wall.
And I added this baby to the wall. It is a bulletin board I covered with lovely Heather Baily fabric and ribbon. It's sweet and I love it. And the hooks are nowhere near hot spots. They are also not near studs so I cannot go crazy on this board or it might fall off the wall, but I can hang papers and cards. Good enough!
I have had this setup installed all week and it is glorious! Everything has a place. The plastic bin at the far end is only for items I am currently working on. No other fabric is allowed on the counter. And my kids are so thrilled with the peg board that they want one for their own rooms. I am not sure how we will mount Barbie dolls and American Girl dolls, but I will keep you posted!
Lest you think I am now perfect, I still have one pile o'crap to work on. Here is my actual sewing table, to the left of the gloriously organized and clean counter. Perfection is a work in progress.
Isn't it a huge improvement! Now that I got a great deal of the little items off the counter, I have so much more space. So, let me walk you through how I did it.
First of all, I banished all kid items from my desk. This is now my desk. They have their own desk and a small table on another side of the room. They do not need to use my desk.
Second, I installed a peg board. Did you know that you can go to a hardware store (I went to Lowes) and bought a peg board for $8 and had them cut in half for me, for free? And that took less than 5 minutes! It took me almost 20 minutes to find the pefect shade of red paint BUT at least part of the process was quick. I went with low VOC paint from a can instead of spray paint because spray paint is bad for the environment. 'Nuff said!


aw, thanks Amy!!
ReplyDelete