

My husband and I have a tradition of giving our children pajamas and an ornament each year when we decorate our Christmas Tree. This little Simple Clay Ornament tutorial is a great choice for this year. It is so simple, you can do them with your little ones and create your own memories.

You'll Need:
Baking Clay
Plastic Ring or Cookie Cutter
Pencil
Ribbon
Foil
Baking Sheet

I used a piece of plastic and wrapped it to make a ring. If you don't have one of these, you'll need a large circular cookie cutter.

Take your baking clay and knead it. Place clay into the plastic ring or cookie cutter. Press clay until it forms a circle.

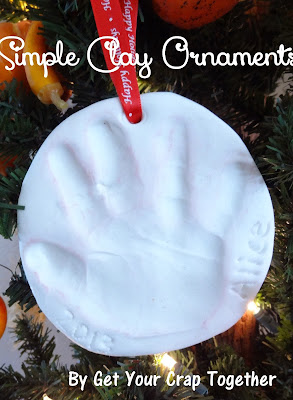
Next, add your design! I used my baby girl's hand print.

My son got in on the fun. I gave him a pencil and her made his own designs. Mostly snowflakes. But he enjoyed it.

You can use a pen or pencil to write a name, date, location. Whatever you want.

Make sure to punch a hole for the ribbon for hanging. And make sure that it punches all the way through your ornament.

Bake for 30 minutes on 425 degrees. Don't leave it longer. We don't want it to burn.
(PS Please ignore the nasty baking sheet. This one is for "crafting".)

Last, thread your ribbon onto a needle. This helps since your ribbon tends to not go through the hole you punched earlier on its own.

Now hang that cute ornament for everyone to see!


No comments
I'd love to hear from you!