Summertime is just around the corner and Spring is in full bloom. And my 5 year olds wardrobe is a bit lacking in the warm weather clothes.
Which would be fine but she spends so much time outside and needs clothes that won't end up striped off in the middle of the yard. (Yes, this does happen.)

When she was tiny I made her this adorable shirred dress along with some leggings. (Check out the free leggings pattern here.)
I loved this dress but had forgotten it after several years. But it's back! I'm super excited to share it with you all again. Not only that, but it looks super comfy and it is a lot less expensive than purchasing the pre-shirred fabric at your local fabric store.

This post contains affiliate links to products I recommend. I do make a portion off any you may purchase. See full disclosure here.
If you want to learn to make my own shirred fabric, it is actually a lot easier than you'd think. My favorite part about shirring your own fabric is you get to choose whatever pattern, color or print you want. You aren't limited to what is already in the store.
Which would be fine but she spends so much time outside and needs clothes that won't end up striped off in the middle of the yard. (Yes, this does happen.)

When she was tiny I made her this adorable shirred dress along with some leggings. (Check out the free leggings pattern here.)
I loved this dress but had forgotten it after several years. But it's back! I'm super excited to share it with you all again. Not only that, but it looks super comfy and it is a lot less expensive than purchasing the pre-shirred fabric at your local fabric store.

This post contains affiliate links to products I recommend. I do make a portion off any you may purchase. See full disclosure here.
If you want to learn to make my own shirred fabric, it is actually a lot easier than you'd think. My favorite part about shirring your own fabric is you get to choose whatever pattern, color or print you want. You aren't limited to what is already in the store.
Related: How to Make the Perfect Gathers
Related: Simple Girls Skirt Pattern

So what does that mean to shirr something?
Shirring is gathering fabric using an elastic thread. Your top thread is regular thread but the thread inside your bobbin is elastic thread. You stitch several rows this way and than take the iron and steam your seams. The elastic shrinks and you have gorgeous shirred seams.
Like I said, much easier than it looks! Let's get you shirring.
How to Shirr Fabric
Materials Needed
Cotton woven fabric
Regular thread

Step 1
Measure your "model". You'll want to know their chest and waist measurement. You'll also want to measure for length. How long are you going to want the tunic or dress?
Cut your fabric into a rectangle. You'll want the top to be about double the width of your models chest.
So my daughter has a 19" chest, so my fabric needs to be 38" wide. Length is dependent on how long you'd like it.
So my daughter has a 19" chest, so my fabric needs to be 38" wide. Length is dependent on how long you'd like it.
Step 2
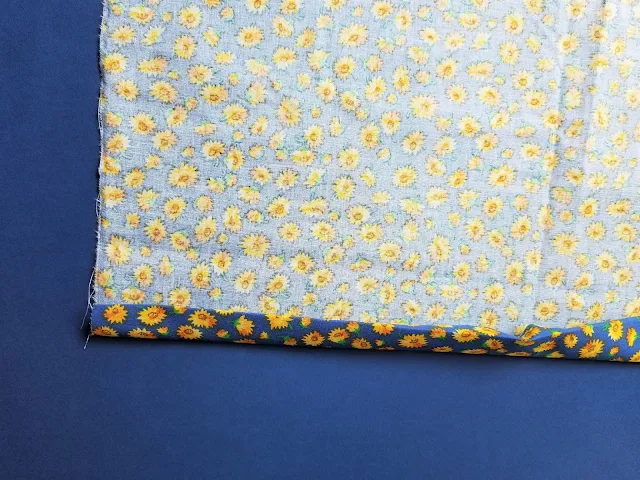
Hem the top edge by folding over a 1/4 inch and another 1/4". Hem the bottom edge by folding over 1/4" and than 3/4".
Step 3
Wind your elastic thread. To do this you'll want to wind it by hand. Running it through the machine will make it to tight and it won't work. It takes a little bit of time, but that is the best method I've found for getting it on the bobbin. Then place the bobbin in your machine. Place it in your machine.
If you are worried about it working, test it out on a scrap piece of fabric first.


Step 4
Sew like you normally would with regular thread on top and elastic thread in the bobbin. Once you finish one row, start the next and continue until you have the amount of shirred rows you want. I usually do between 10-15 rows. But this will vary depending on the size of the dress. Babies won't need as many rows as say a 12 year old.
Step 5
Steam the heck out of your new shirred fabric. This is what will cause it to bunch up and make it tighter. This was the fun part! I know that is weird, but it shows you that your hard work sewing paid off.
Notice how it all bunched up. Look at the few pictures before and then this one! It went from 38 inches wide to like 28 inches. Nice!!!
Step 6
With right sides together, stitch your side seams together. Now is the time to check the fit on your model. Make sure the dress is snug enough it won't fall off, but also has room to move.
Step 7
Cut out some straps (which is optional, but a good idea when you have small people).
Measure 2 straps 2 1/2 inches by 12 inches. Add interfacing so they have some strength.


Step 8
Fold it in half, sew it together and then flip it right side out. Repeat with opposite strap.
Step 9
Pin on your straps and sew them down.


Tada! All done. Isn't it adorable?! Think of all the fun things you can now make. You could make a dress, a shirt, a skirt, a cover-up for a bathing suit! Anything you want. You just need to know how much shirring to go around and then length you want. No pattern needed.


